Appearance
Projects & Repositories
In BrowserStack Code Quality, a Project is a logical container used to group related Repositories. One project can house multiple repositories to give you an aggregated view of your product's health.
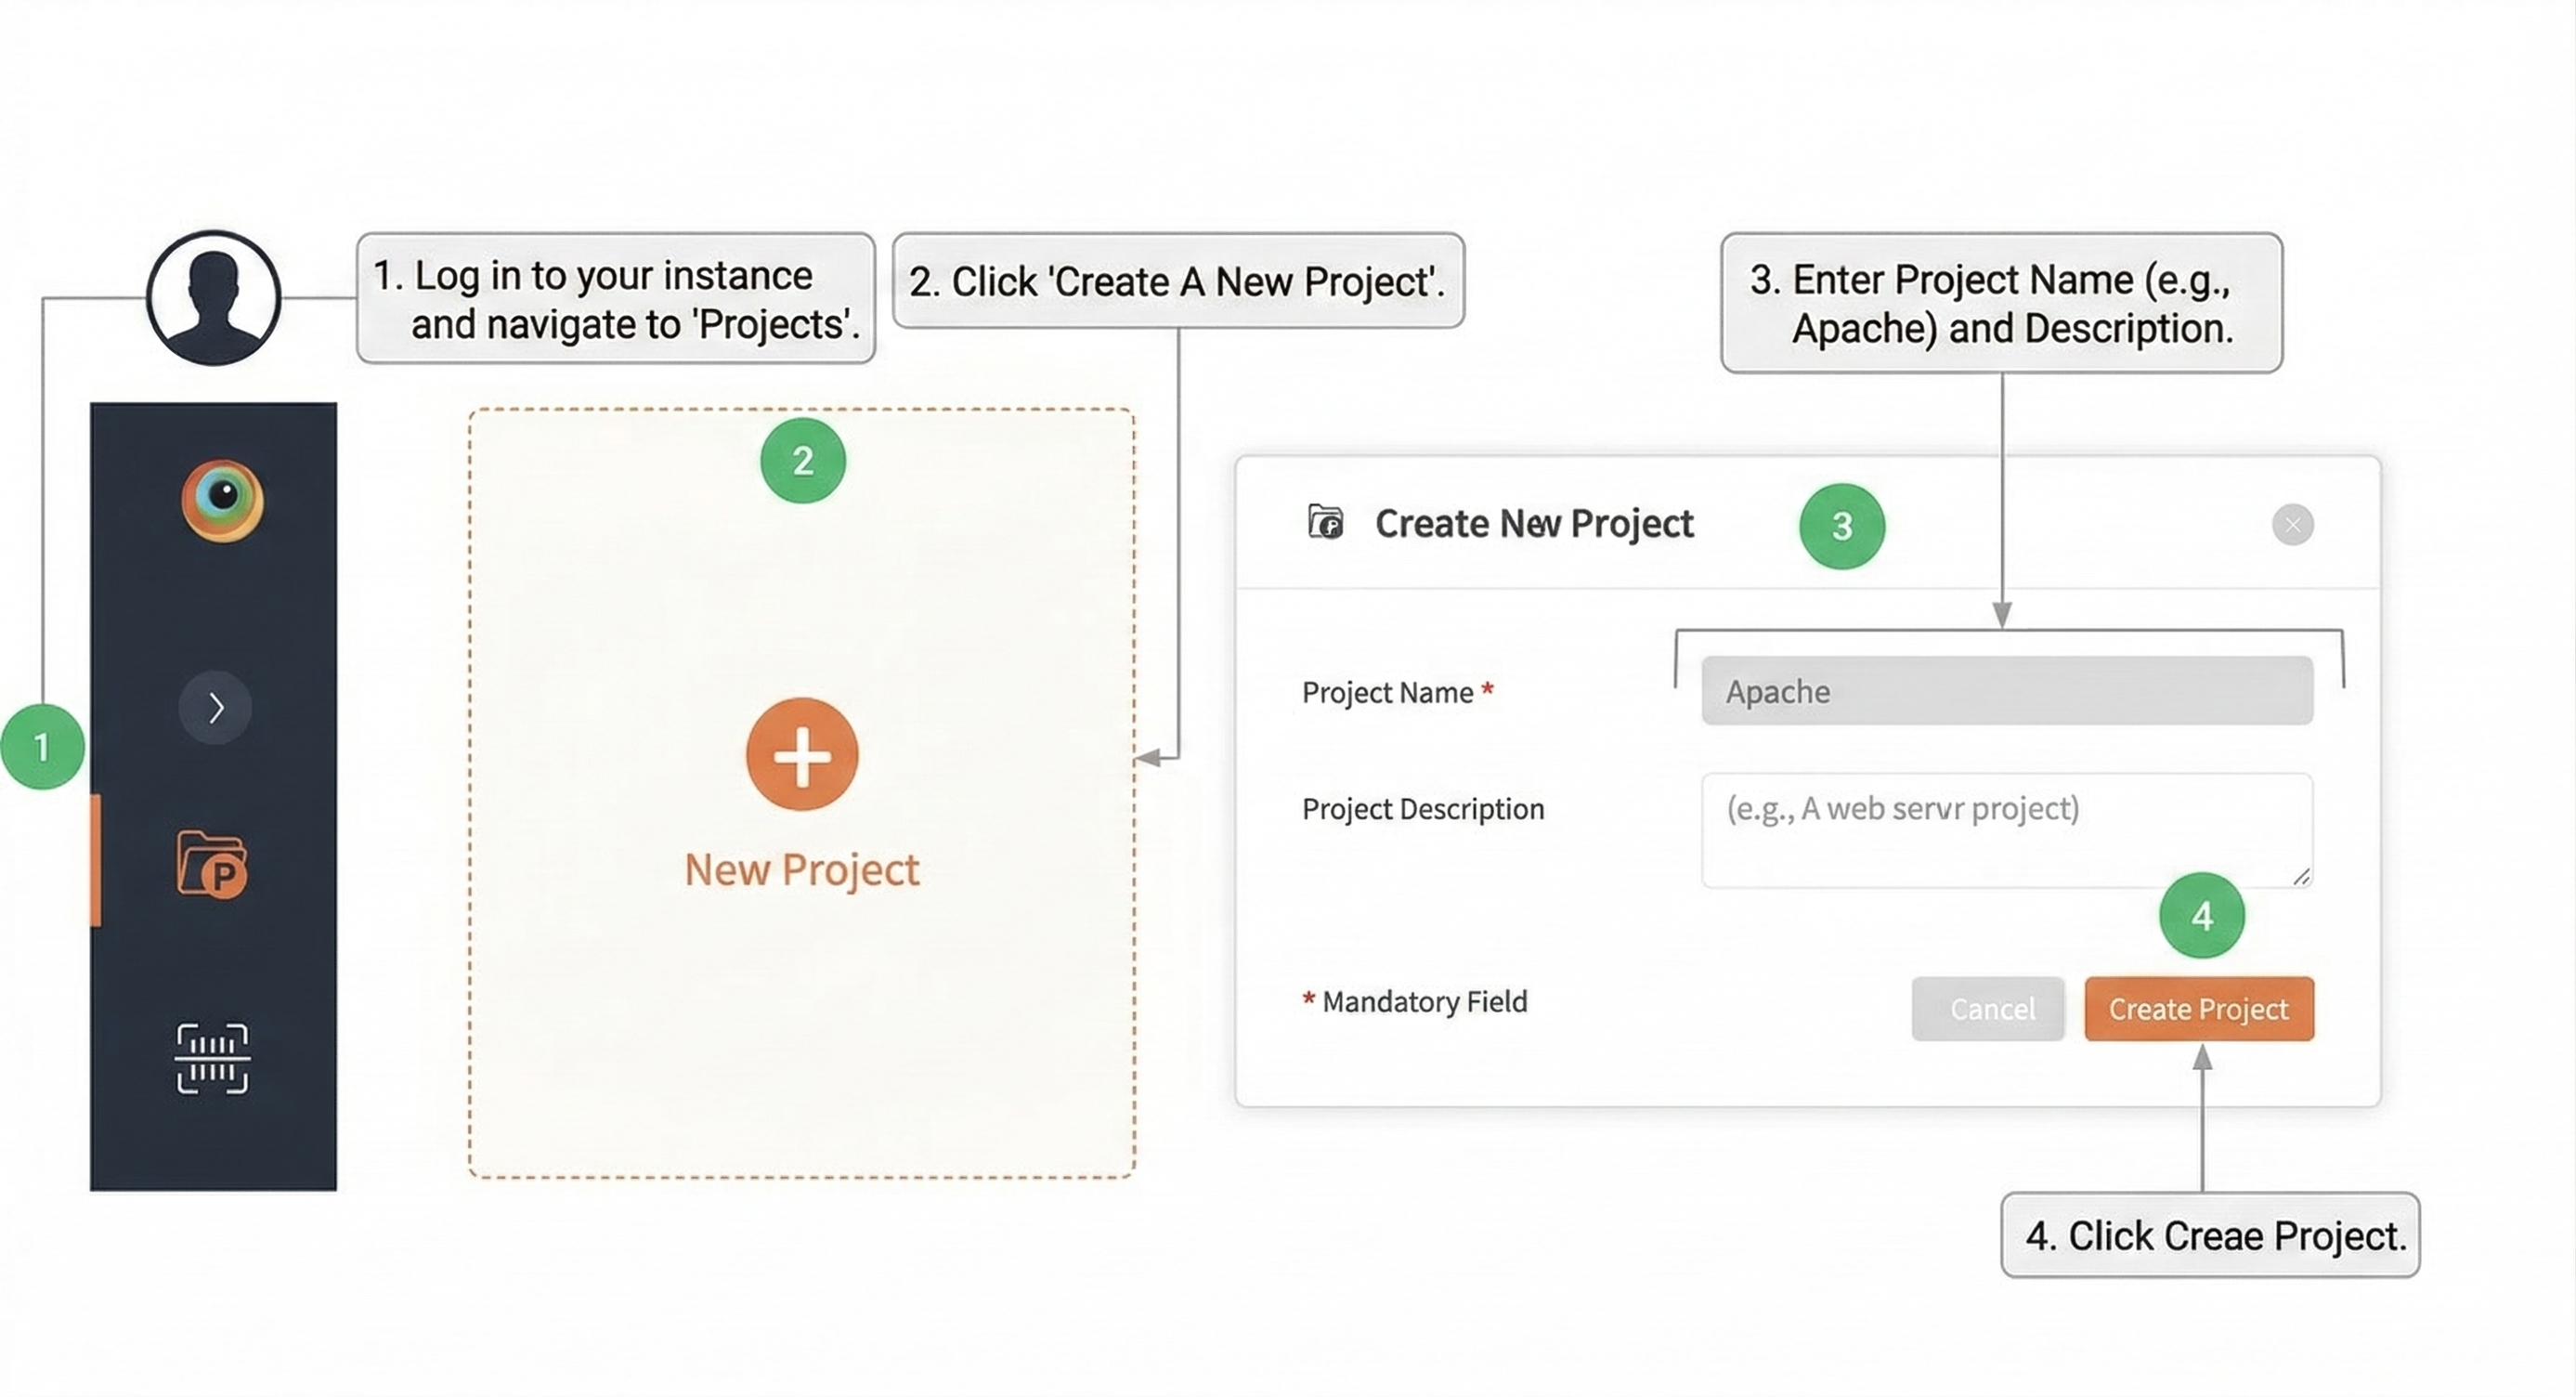
1. Creating a Project
- Log in to your instance.
- Go to Projects and click Create A New Project.
- Enter the Project Name (e.g.,
Apache) and Project Description. - Click Create Project.
2. Linking Repositories
Once your project is created, choose one of the three methods below to link your source code.
Option A: Version Control Account (VCA) — Recommended
Use this method if you have already connected your SCM account (GitHub, GitLab, etc.).
- Prerequisite: How to add a VCA account →
- Steps:
- Click on Add Repository.
- Select your VCA (GitHub, GitLab, etc.).
- Select the Language and provide the Repository Name.
- Click on Create.
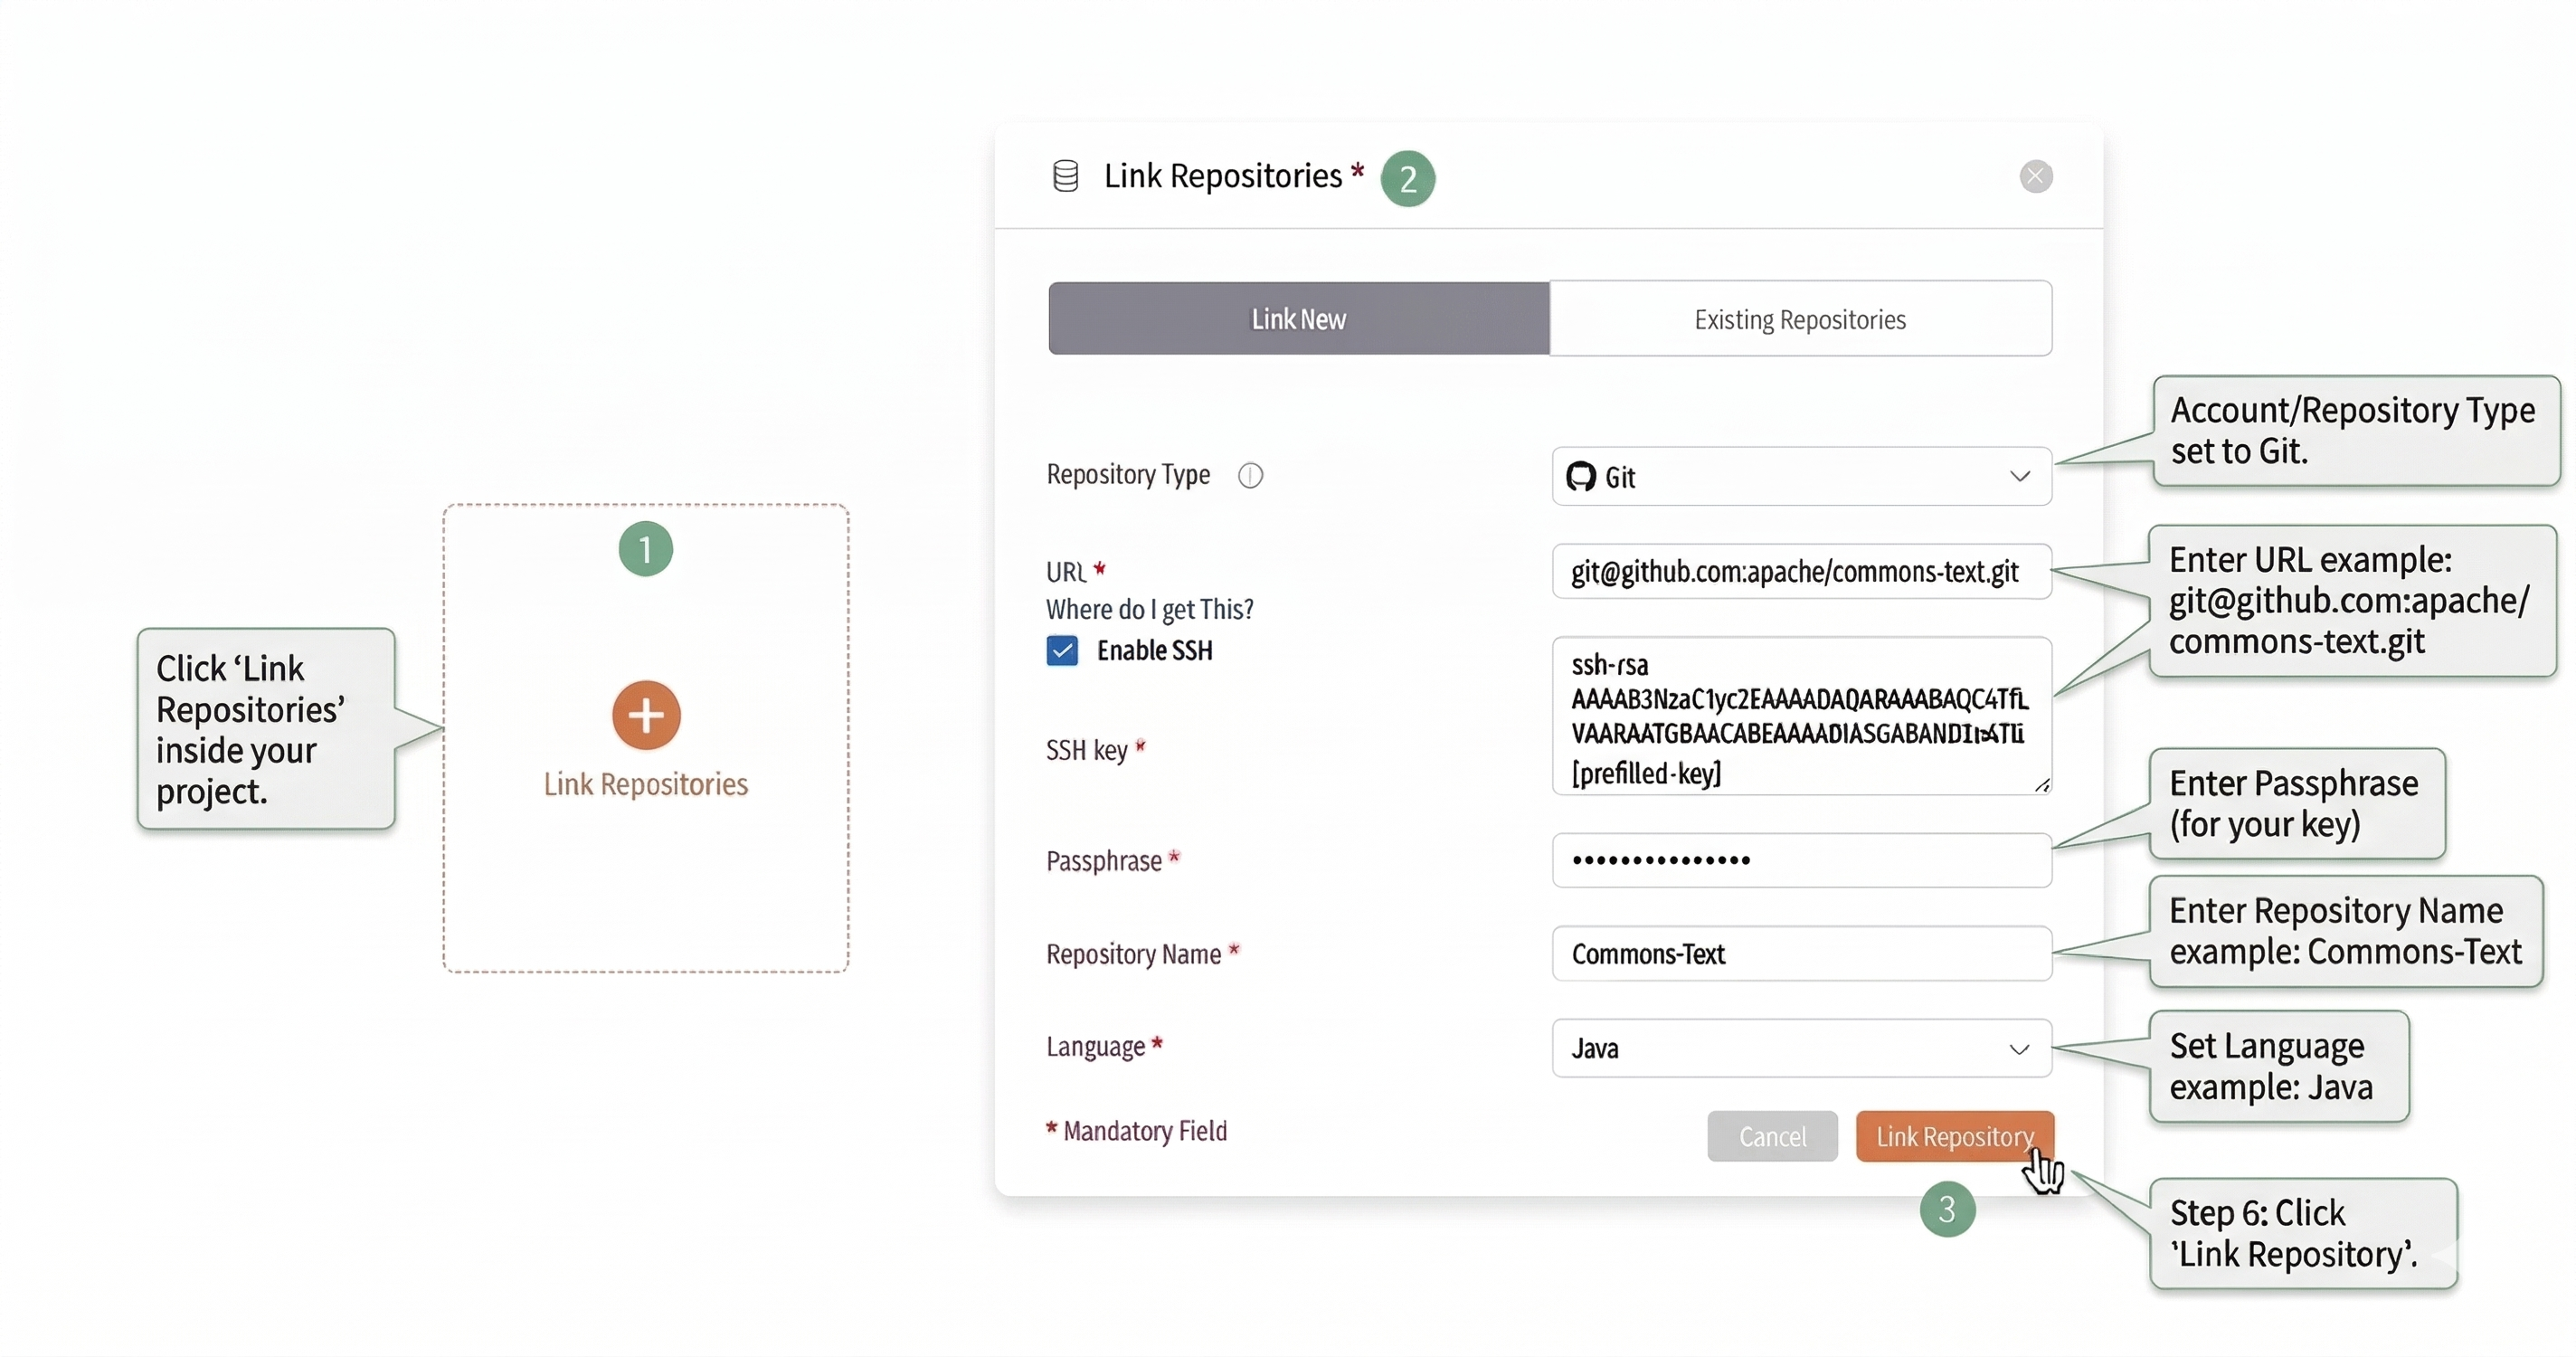
Option B: Git SSH
Use this for private repositories requiring RSA key authentication.
Steps:
- Initialize: Open the Link Repositories popup and select Git.
- Authenticate: Enter the Git URL, enable SSH, and paste the complete RSA Private Key (with passphrase, if applicable).
- Identify: Provide a Repository Name, select the Language, and click Link Repository.
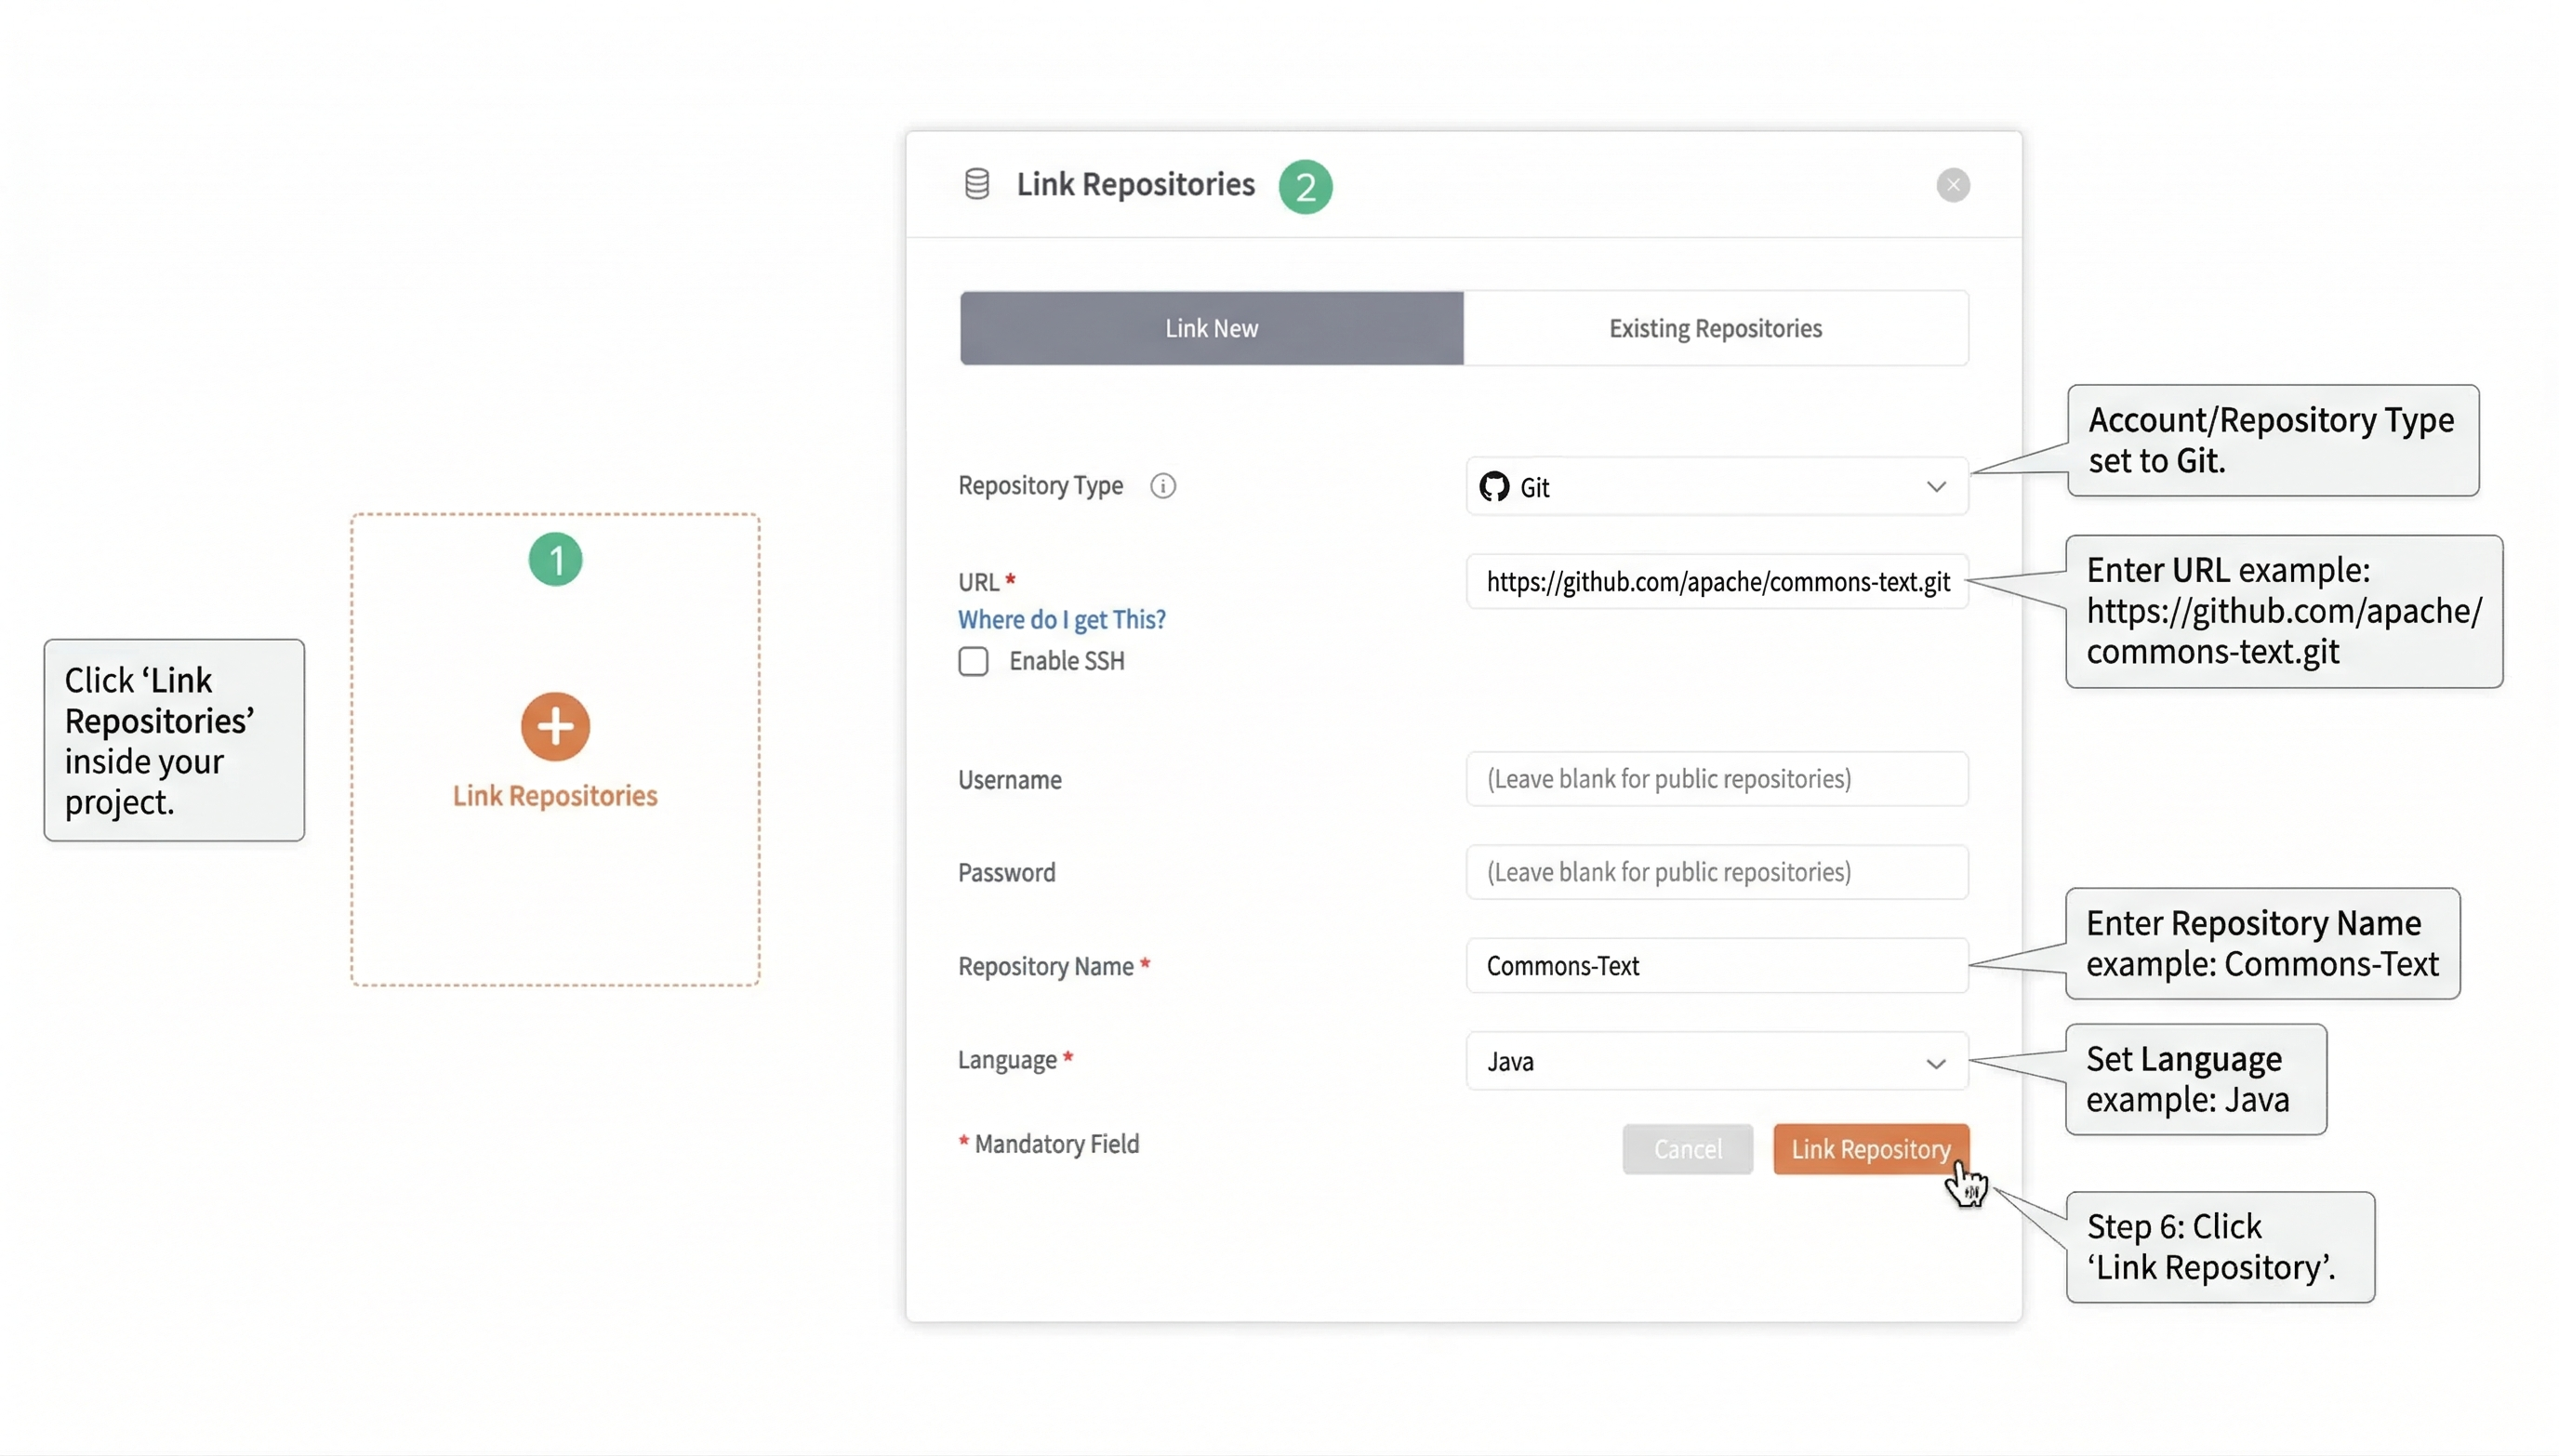
Option C: Git HTTPS
Use this for public repositories or private ones using HTTPS credentials.
Steps:
- Click Link Repositories inside your project.
- Set the Account/Repository Type to Git.
- Enter the URL (e.g.,
https://github.com/apache/commons-text.git). - For public repositories, leave the Username and Password blank.
- Enter the Repository Name (e.g., Commons-Text).
- Set the Language (e.g., Java) and click Link Repository.
3. Identifying the Repository UID (RepoUID)
The RepoUID is the unique identifier required for CLI scans and API calls.
- Inside your project, click on a repository and then the three dots (...) on the top right corner.
- Click on the More Information button.
- From the Repository Information pop-up, copy the Repository UID and paste it appropriately while filling repository details on the server.
4. Managing Repositories (Unlink vs. Delete)
To Unlink (Remove from project)
Overview: Removes the repository from the current project view while keeping the scan data safe in the database.
- Steps:
- Inside your project, click on a repository and the three dots (...) on the top right corner.
- Click on the Unlink repository from project button.
- A warning message will appear for confirmation; confirm to proceed.
- The repository will no longer be linked to the project.
To Delete (Remove permanently)
Overview: Permanently removes the repository and all history. This action cannot be undone.
- Steps:
- Inside your project, click on a repository and the three dots (...) on the top right corner.
- Click on the Delete repository permanently button.
- A warning message will appear for confirmation; confirm to proceed.
- The repository will be permanently deleted from all linked projects. All ongoing scans will be aborted.