Appearance
Rule Tags & Filtering
Rule Tags and Categories allow you to create a custom taxonomy for your code issues. Instead of relying only on default "Bugs" or "Vulnerabilities," you can organize issues by Team, Compliance Standards (e.g., OWASP), or Internal Priorities.
1. Defining Your Taxonomy
Before you can filter issues, you must define the "Buckets" (Categories) and the "Labels" (Tags).
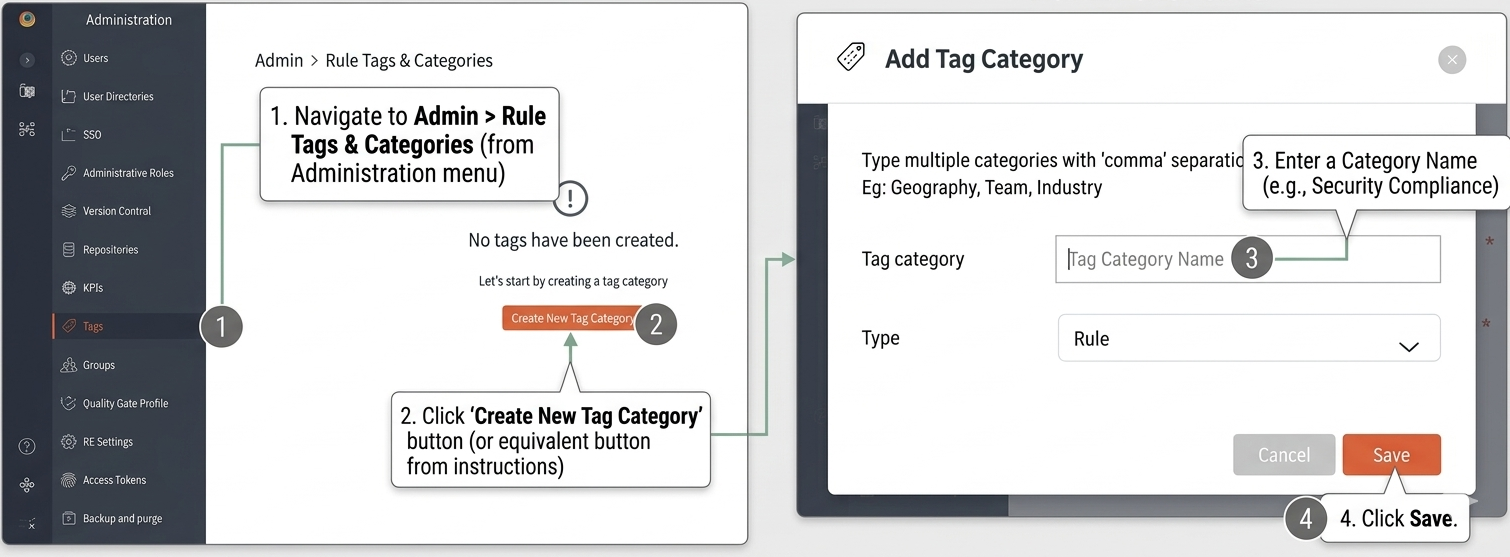
Step 1: Create a Category
Categories act as the parent group for your tags.
- Navigate to Admin > Rule Tags & Categories.
- In the Categories tab, click Add Category.
- Enter a Category Name (e.g.,
Security Compliance) and click Save.
Step 2: Link a tag to category
Tags are the specific labels nested within a category.
- In the Tags tab, click + Tag.
- Select a Tag Name (e.g.,
OWASP) and assign it to a Category. - Click Add Tag.

2. Filtering Issues by Tags
This is where the taxonomy provides value. You can now drill down into specific subsets of data in the Issue Explorer.
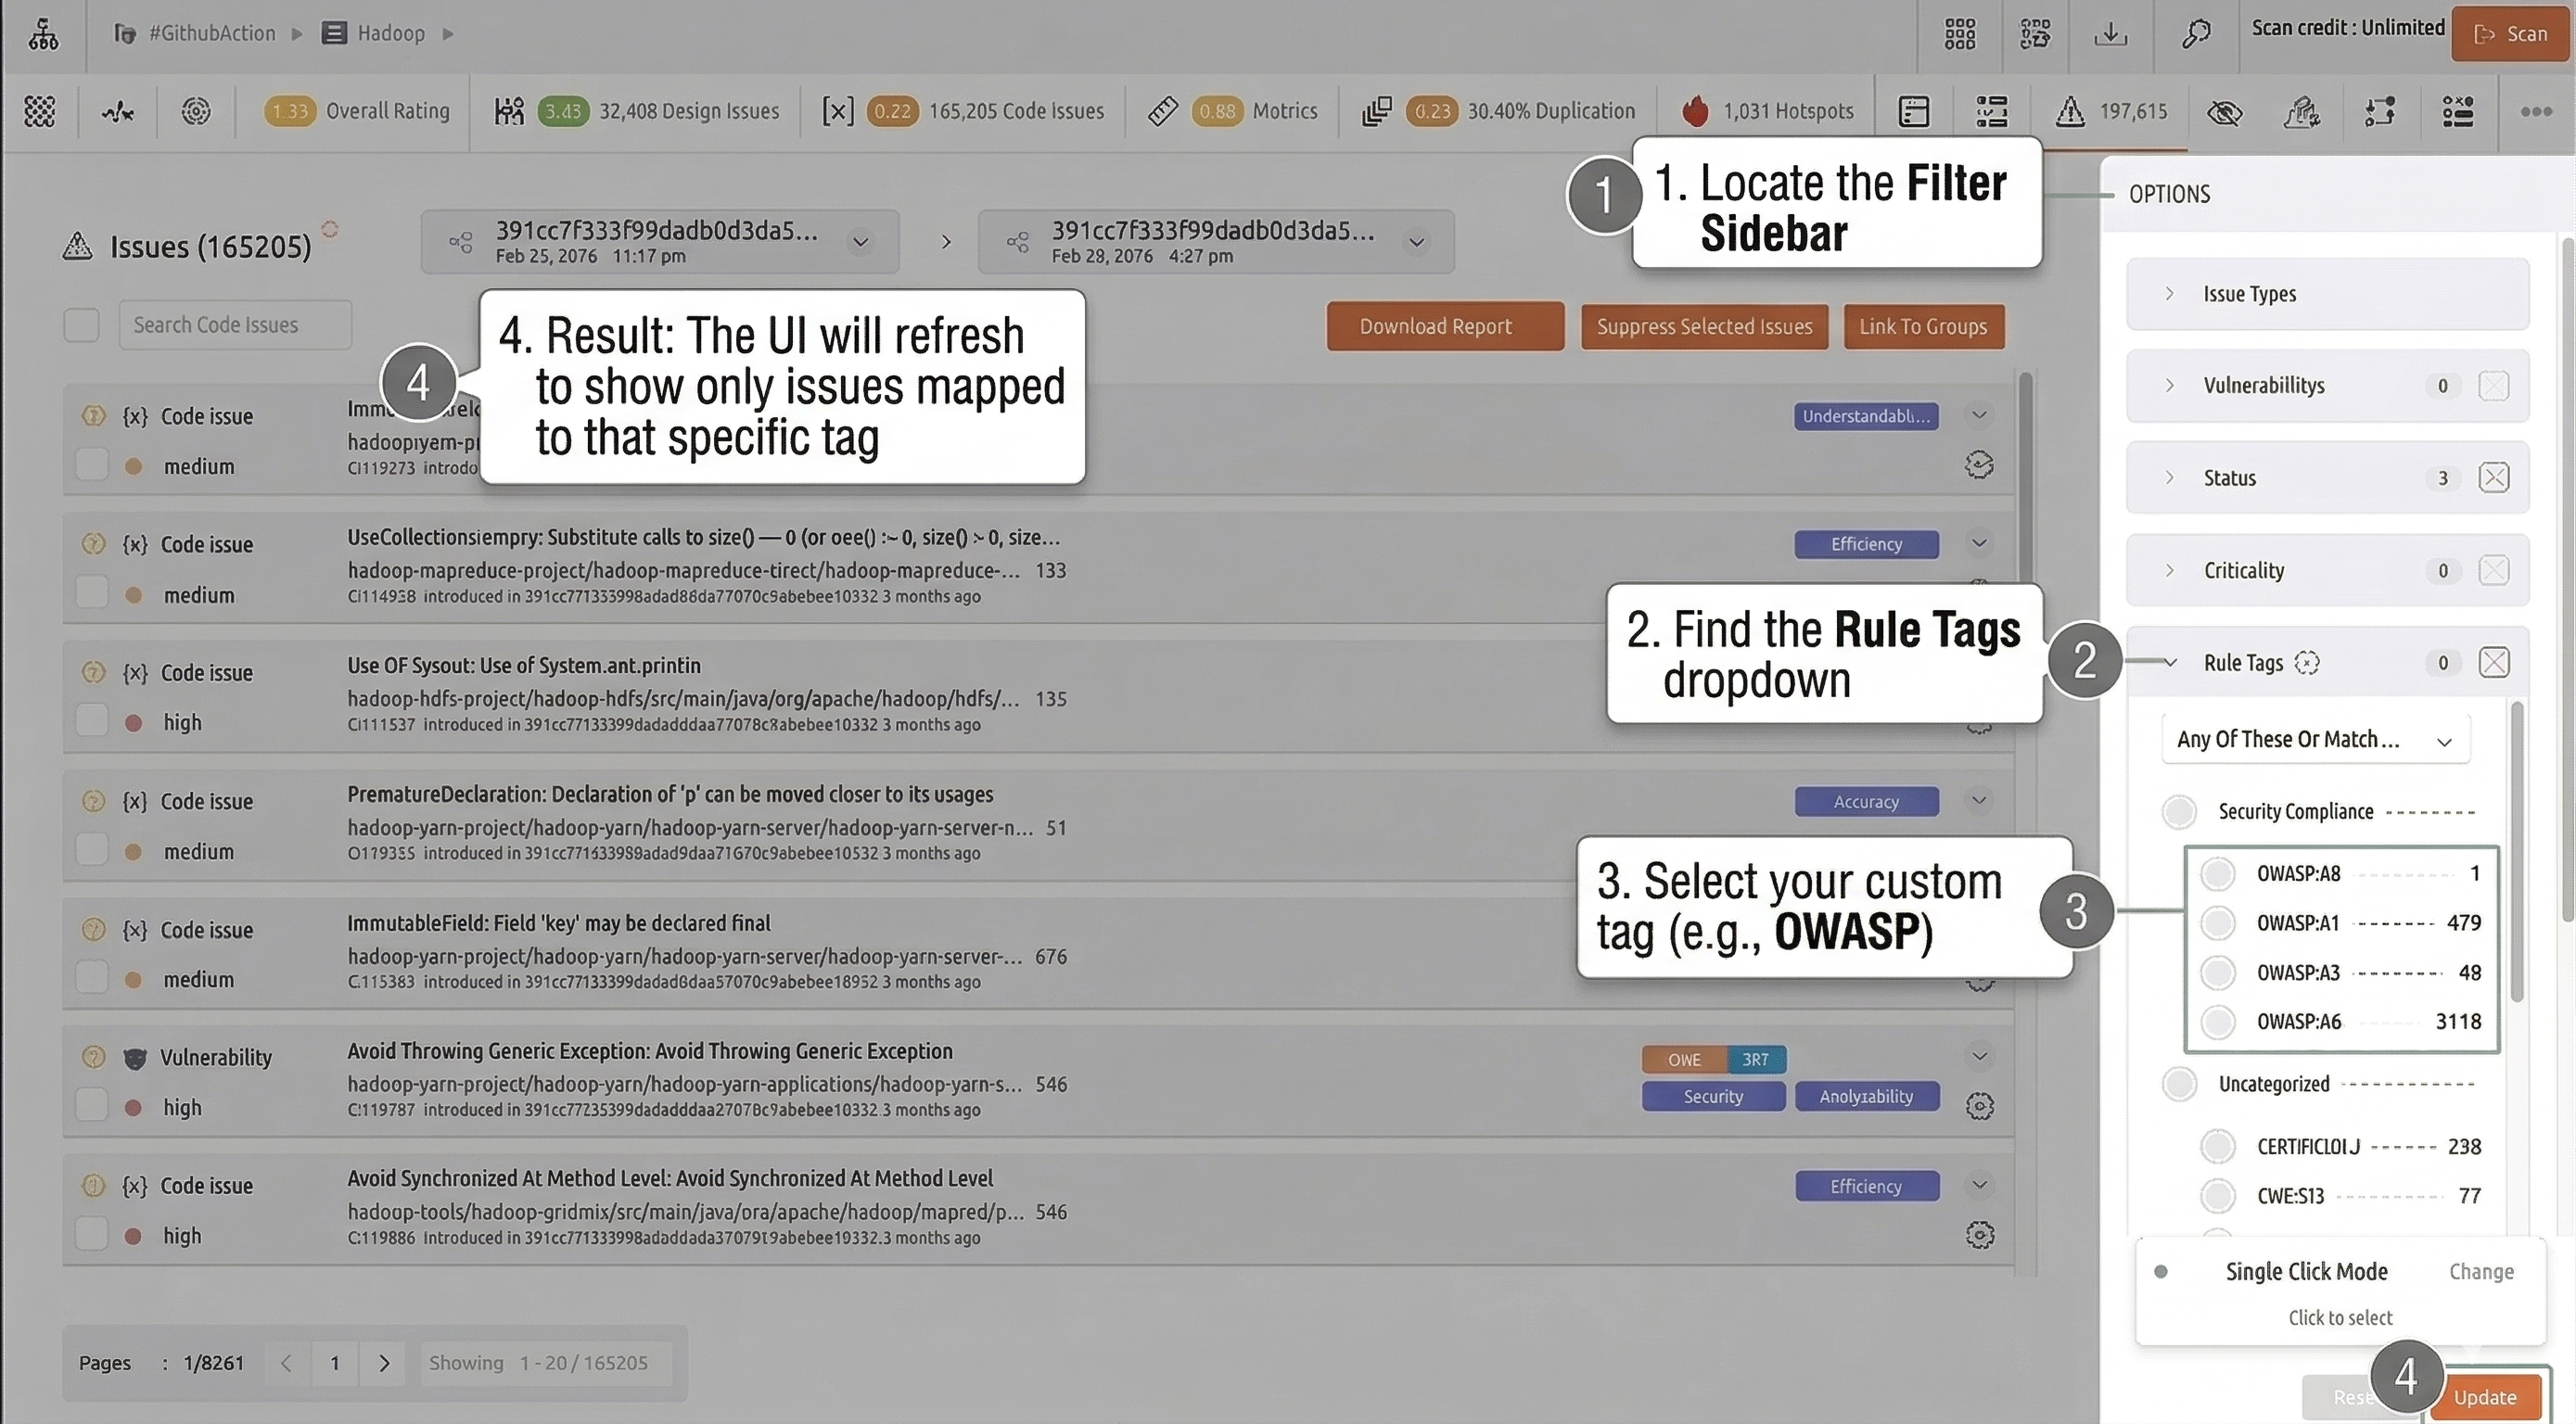
Steps to Filter:
- Navigate to your Repository Dashboard and open the Issue Explorer.
- Locate the Filter Sidebar on the left.
- Find the Tags dropdown.
- Select your custom tag (e.g.,
OWASP). - Result: The UI will refresh to show only the issues mapped to that specific compliance tag.
Additional Filtering Options
- Filter by Tag Category: Filter by an entire Tag Category (e.g., CVE, GHSA) to see all related issues without selecting individual tags.
- Filter by Individual Tag: Filter by a specific tag for granular results.
- Global Scope: Tag Category configuration is global. Issues across all repositories with matching tags are mapped automatically.
Practical Examples
| Use Case | Category Name | Tag Examples |
|---|---|---|
| Team Ownership | Squads | Frontend, Backend, DevOps |
| Compliance | Regulatory | HIPAA, PCI-DSS, SOC2 |
| Legacy Code | Technical Debt | Deprecation, Performance-Risk |