EMBOLD JIRA CONNECT INSTALLATION & SETUP GUIDE
ML Server Setup
- 1. Go to https://codequality.browserstack.com/self-managed/v1/portal/.
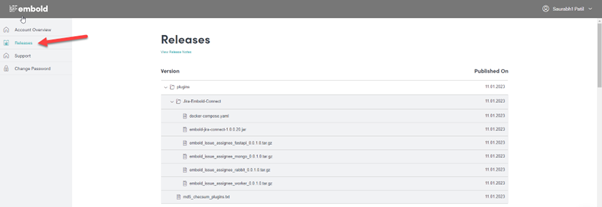
- 2. Login with your Embold credentials and go to release section.

- 3. Download the following 4 docker images, docker-compose.yaml and Jira plugin from release section. JIRA-Embold-connect as shown below:

- 4. Download the files listed below:
- embold_issue_assignee_fastapi_0.0.1.0.tar.gz
- embold_issue_assignee_mongo_0.0.1.0.tar.gz
- embold_issue_assignee_rabbit_0.0.1.0.tar.gz
- embold_issue_assignee_worker_0.0.1.0.tar.gz
- embold-jira-connect-1.0.0.20.jar
- docker-compose.yaml.
- 5. Verify the MD5 checksum of docker images with md5_checksum_plugins file.
- 6. Run command: docker load –input
- 7. Download attached docker-compose file.
- 8. Run command: docker-compose up -d.
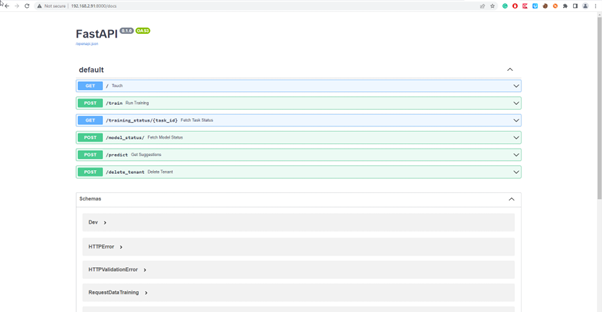
- 9. Once installation is finished go to 8000 port on machine where docker-compose command was executed.
- 10. For e.g.: http://<Your_IP>:8000/ docs, you will see below snapshot.

- 11. MongoDB URL: http://<Your_IP>:27017
- 12. ML URL: http://<Your_IP>:8000/
Jira Plugin Setup
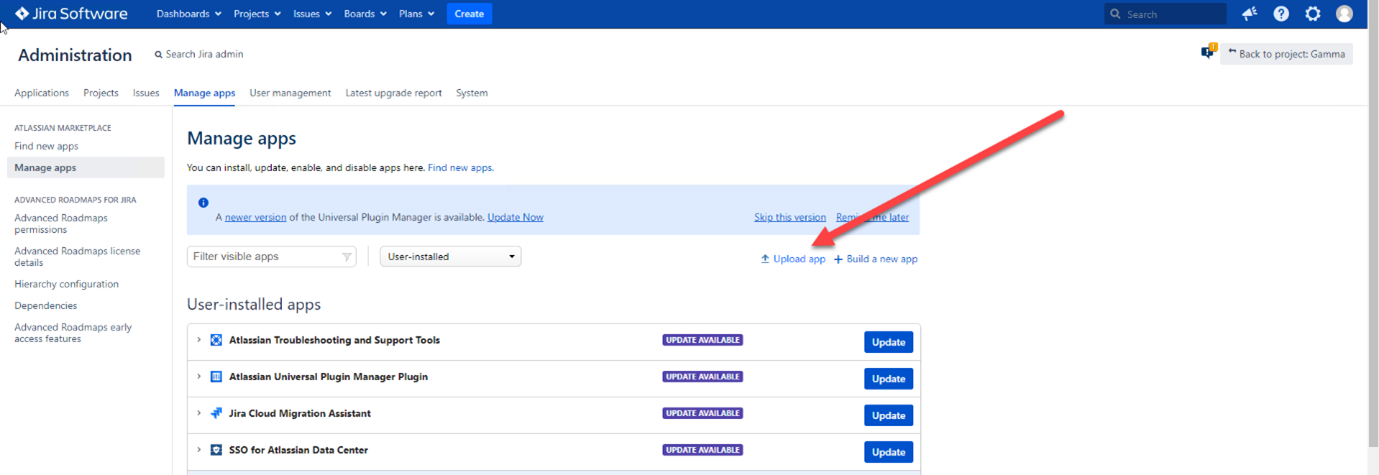
- 1. To install the plugin manually, upload it from the Jira server’s Admin section, as shown below.

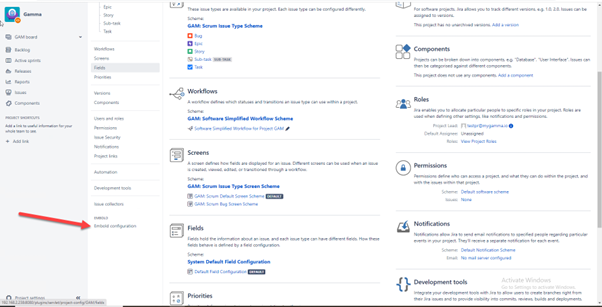
- 2. Once Plugin is Installed go to project settings in JIRA, you will see Embold configuration option. (See below image for reference).

- 3. Click on Embold configuration, you will see configuration. (See below image for reference).

- 4. Add Embold server URL, Embold Access Token (To generate token refer: https://docs.embold.io/embold-access-token-eat/#embold-access-token-eat) , ML server and MongoDB server URL in it.
- 5. Click on authenticate.
- 6. For more details click here.
