Below are the steps to install Embold on Ubuntu.
Note: The version number (1.8.3.0) in installer file is mentioned as an example. You can use your applicable/newer version number.
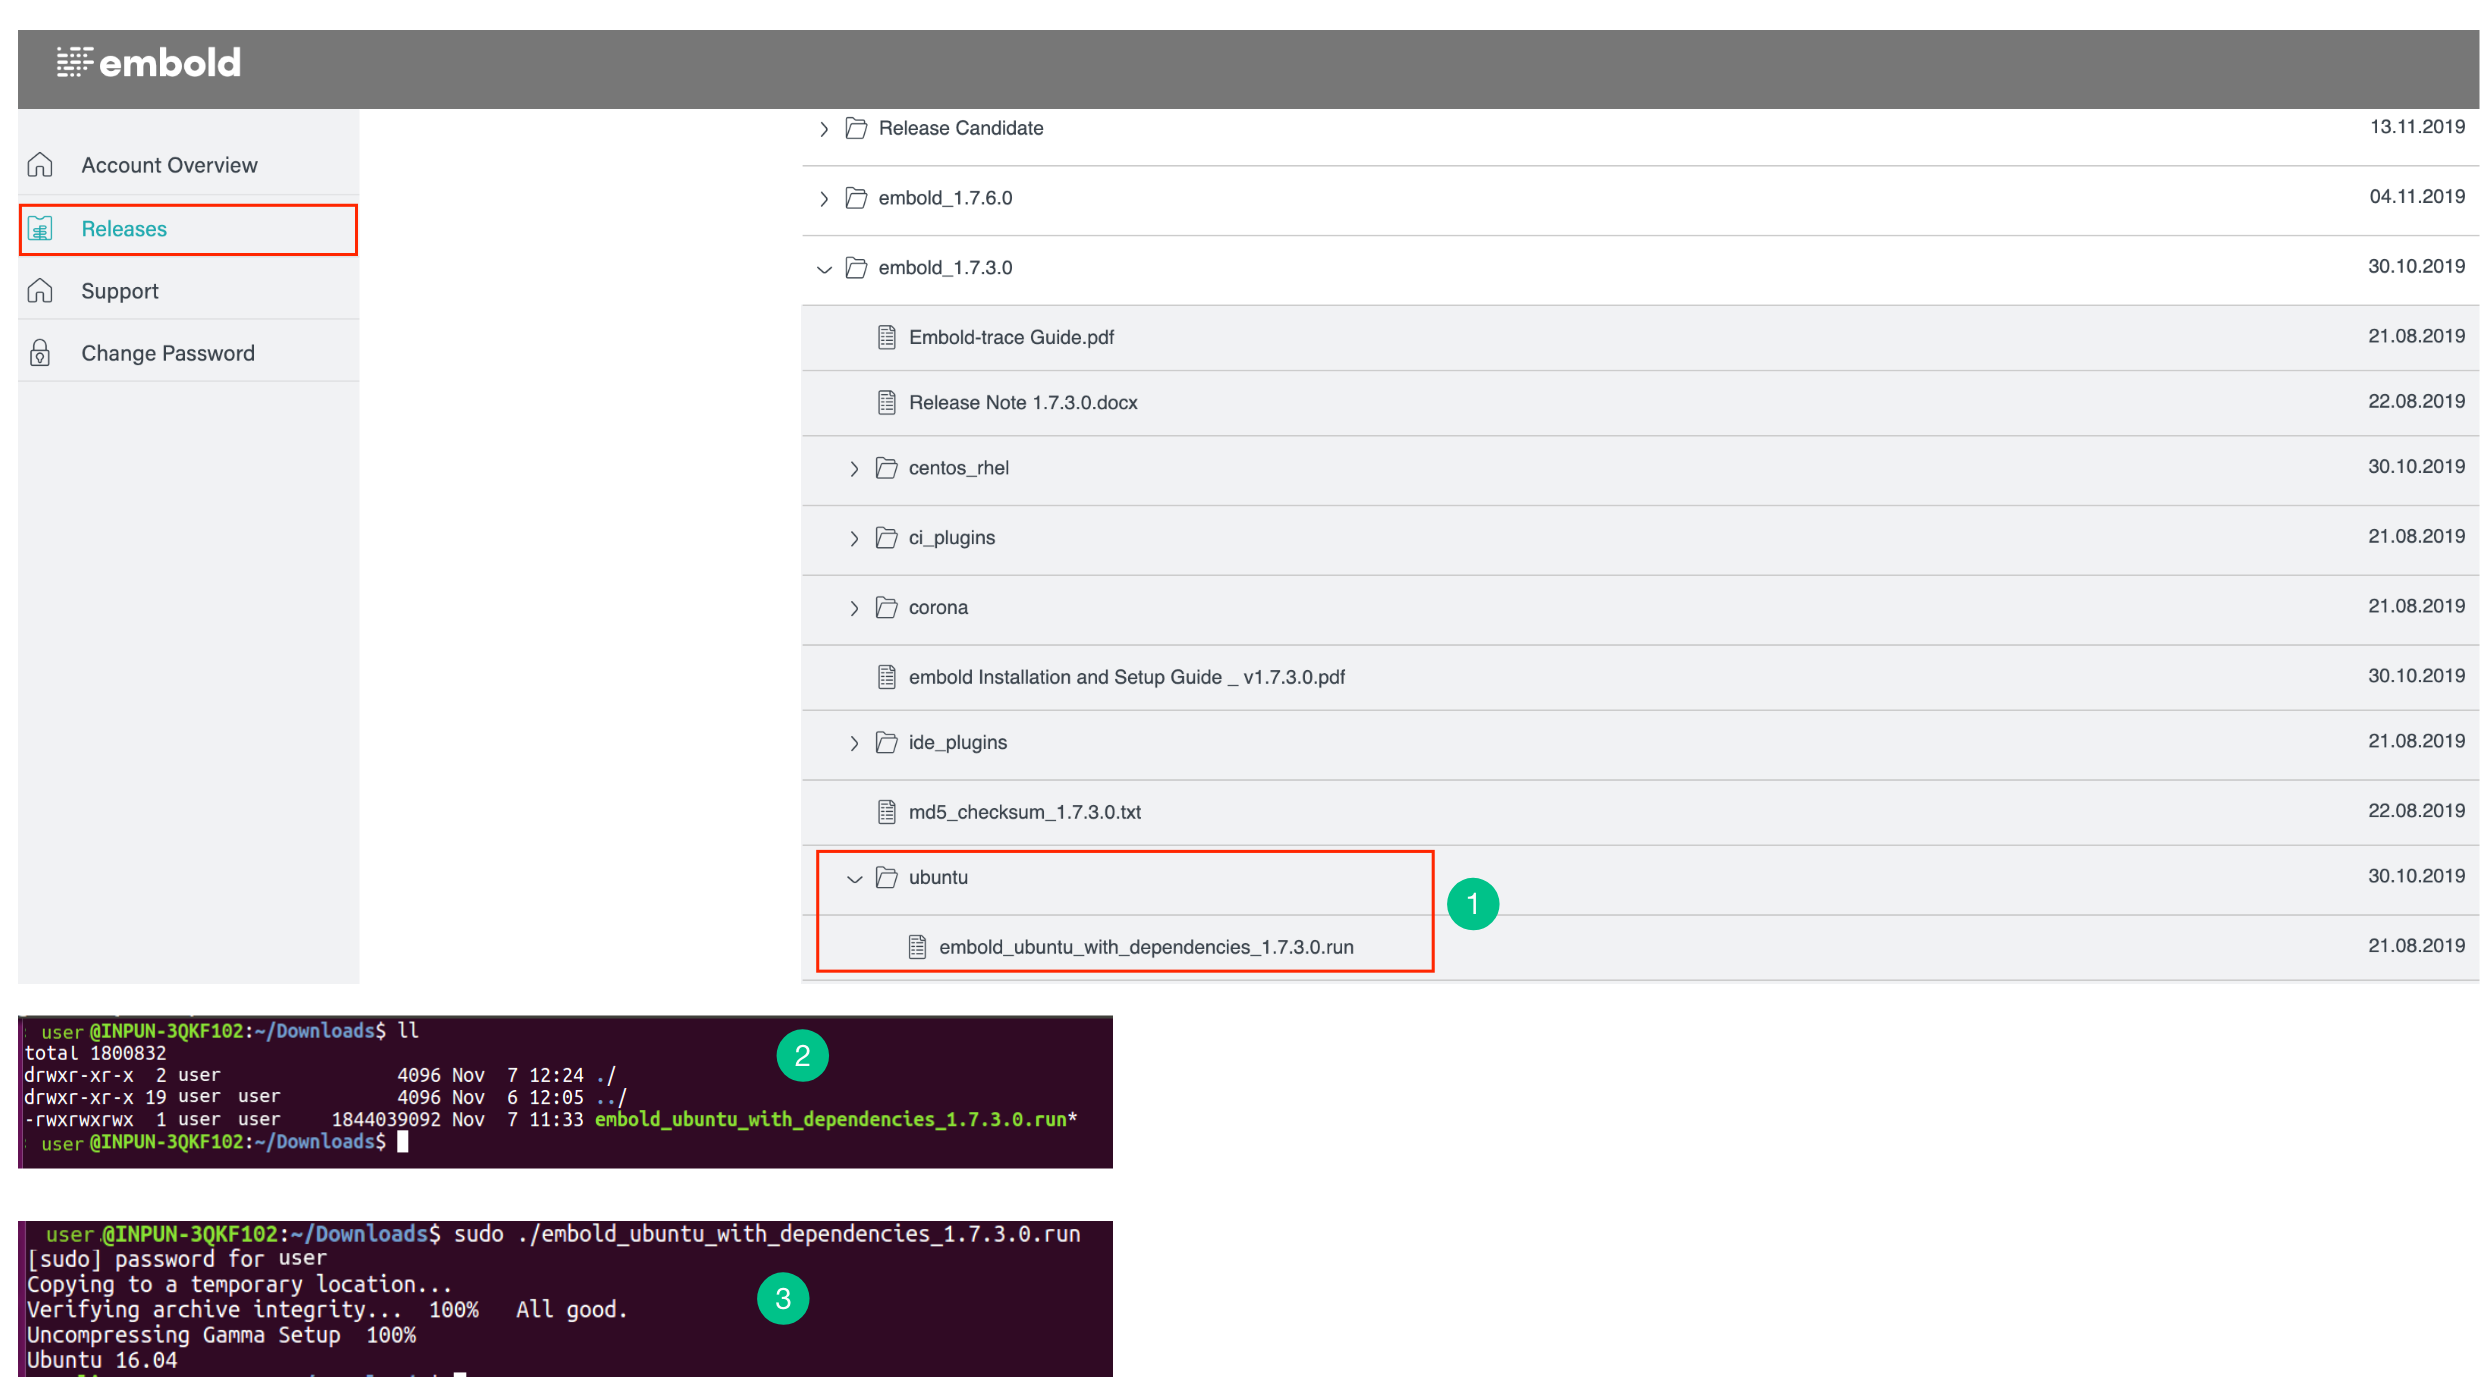
- Download installer file from your Embold Account’s section > Releases tab > Installers. There will be one file with names similar to the following: ‘embold_ubuntu_1.8.3.0.run’.
- Make sure that installer file ‘embold_ubuntu_1.8.3.0.run’ has execution permission. To check the permissions of installer file, run the following command in terminal.
||
If the file does not have the execution permission, use the following command to grant the permission.sudo chmod 755 embold_ubuntu_1.8.3.0.run - Run installer using the command:
sudo ./embold_ubuntu_1.8.3.0.run
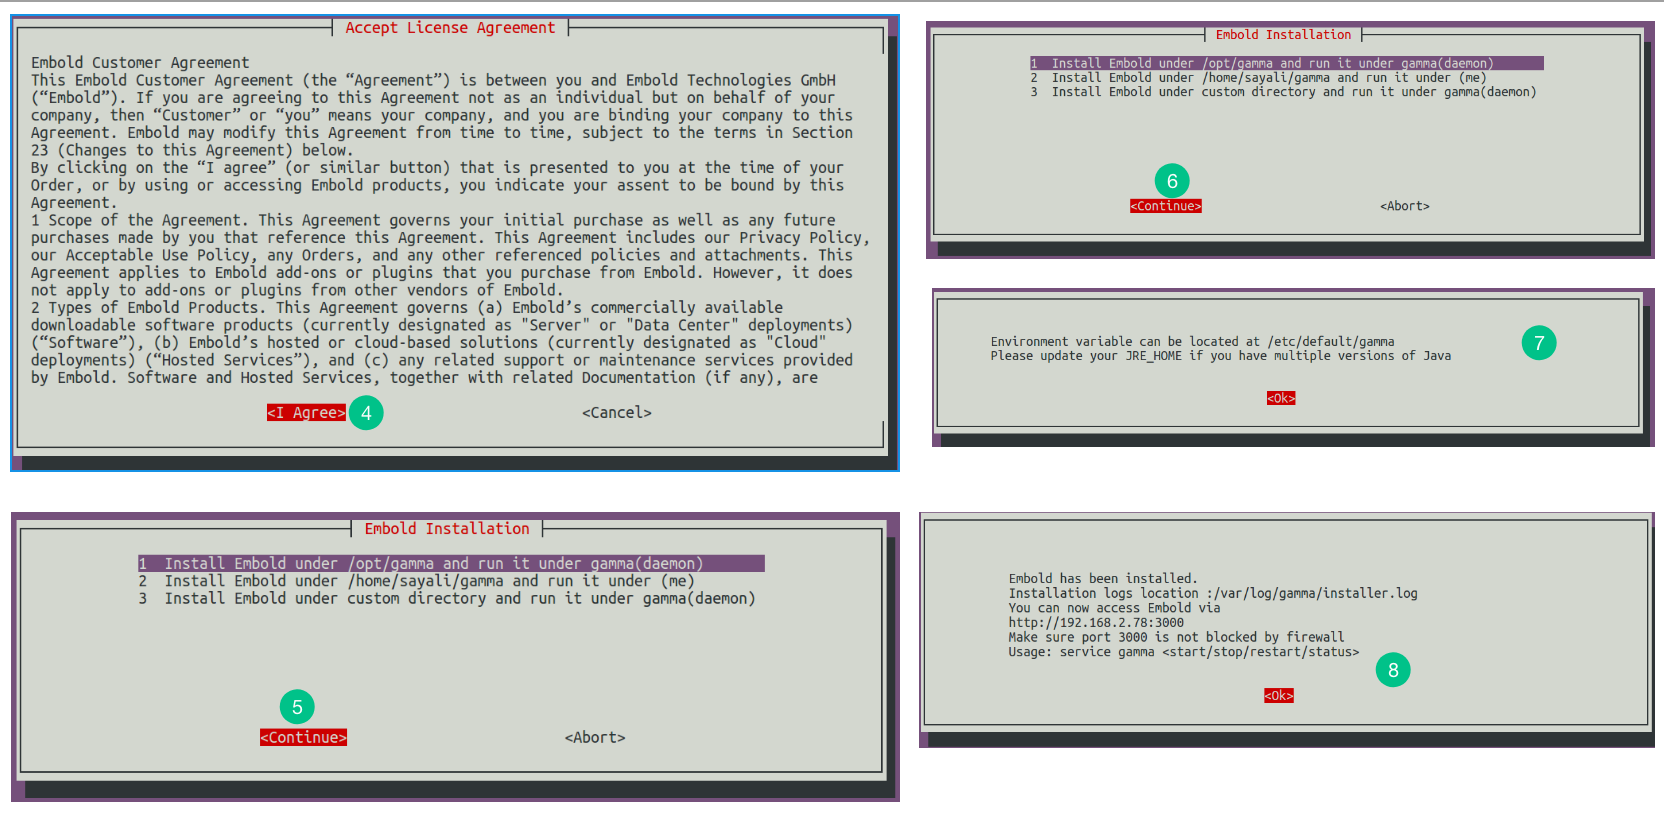
This will start the installation process. - Accept the License Agreement to proceed. You can use tab and return/enter keys for navigation in any such prompt.
- For a fresh Embold installation, choose the option: “Install Embold and prerequisites“.
- Choose the Embold installation location.
- If you have multiple versions of Java installed on your computer/server, you can set JRE_HOME at the specified path.
- On the successful installation, a pop-up screen will be displayed. Embold will be accessible from the IP address mentioned in a pop-up.
- Activate Embold.


