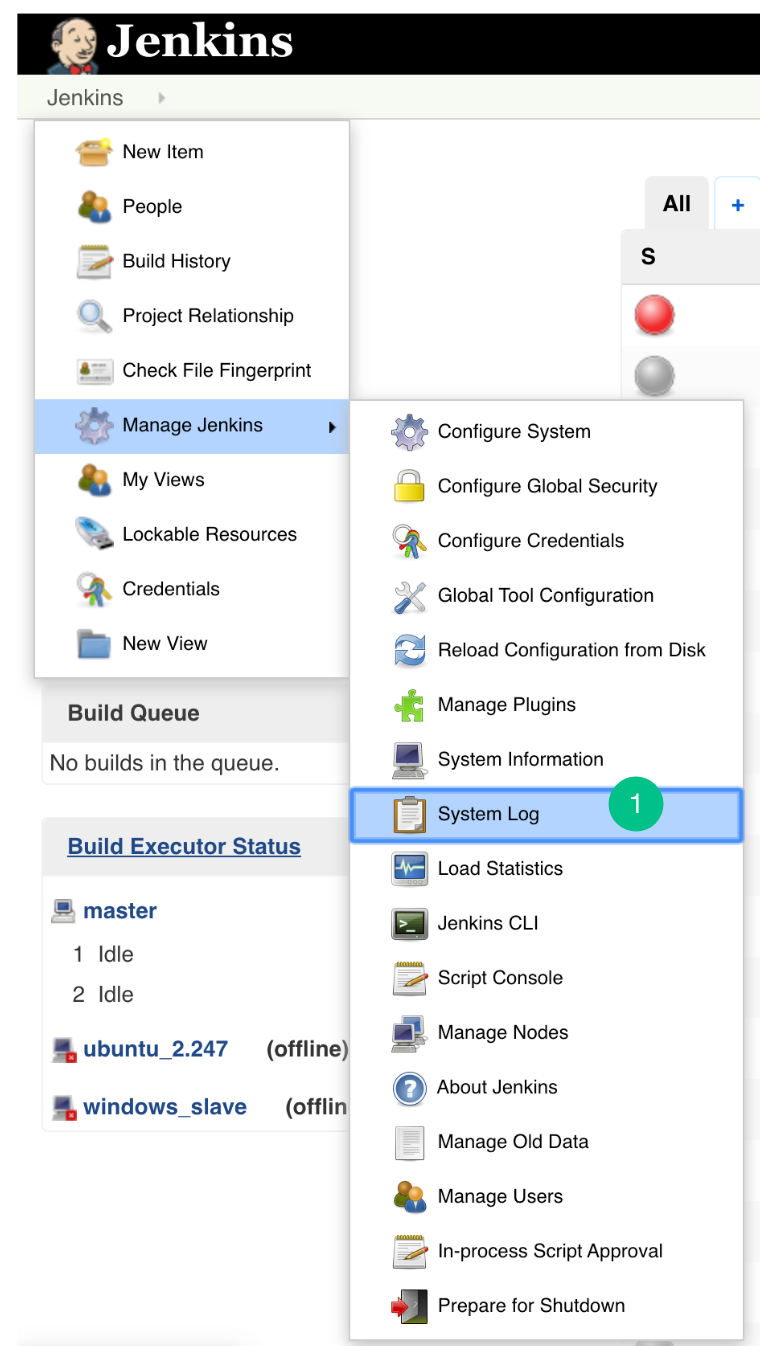
- Go to the Jenkins> Manage Jenkins> System log. (Steps to add logging support)
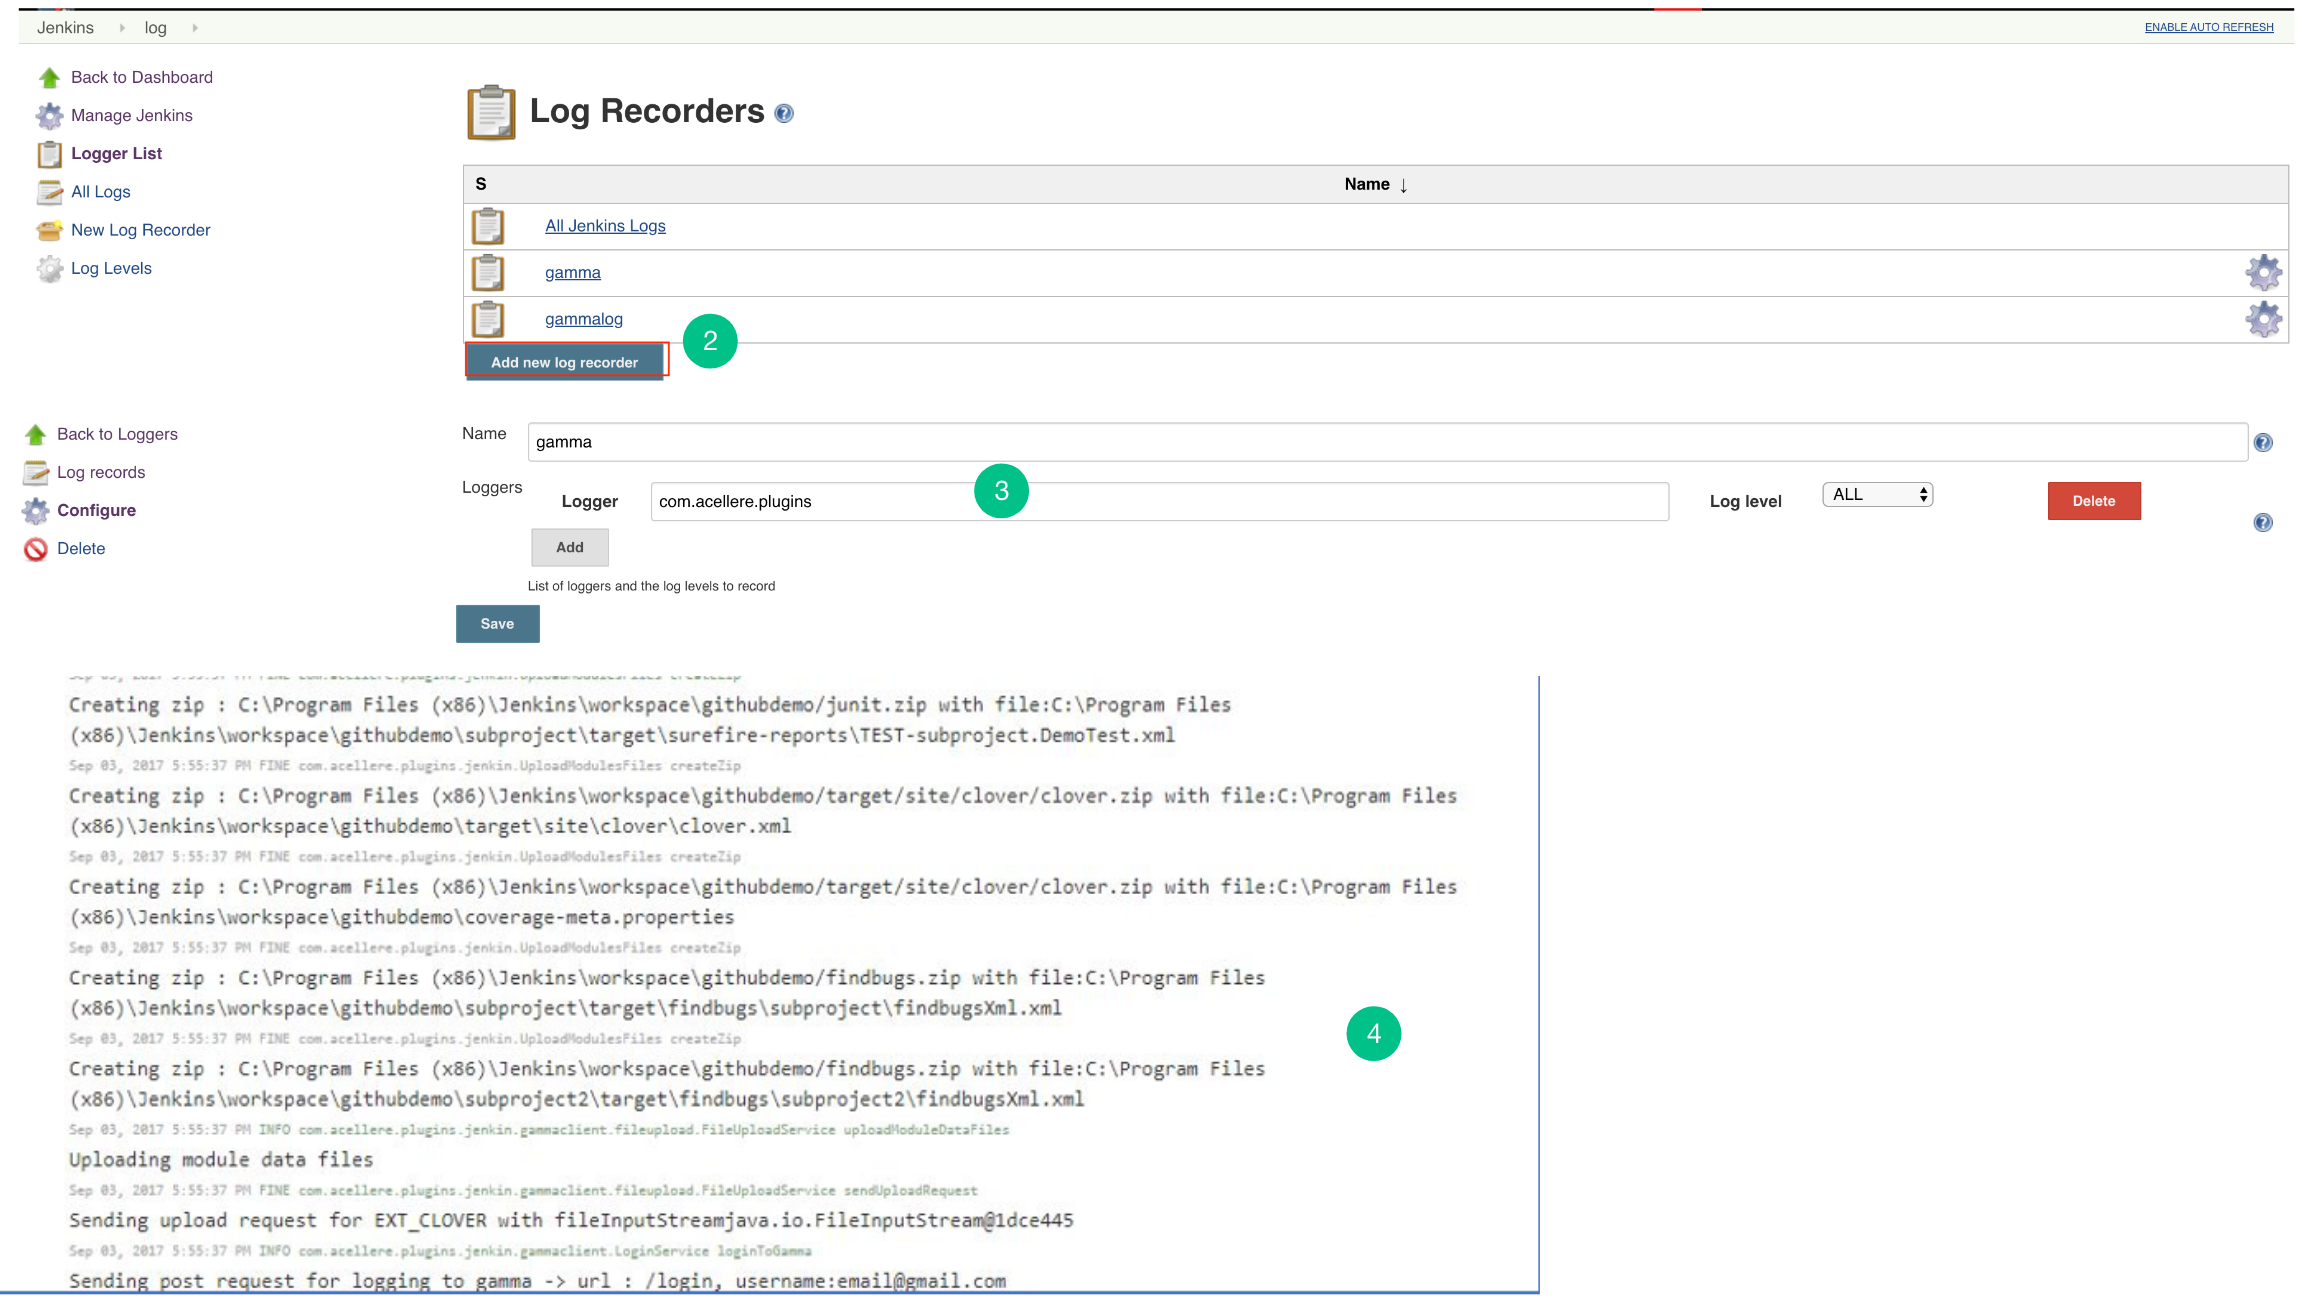
- “Add new log recorder” for Jenkins Plugin.
- The Logger should be com.acellere.plugins and the log level should be mentioned as “All”.
- You should only view Embold Jenkins Plugin related logs.
Post steps configuration of Jenkins Plugin
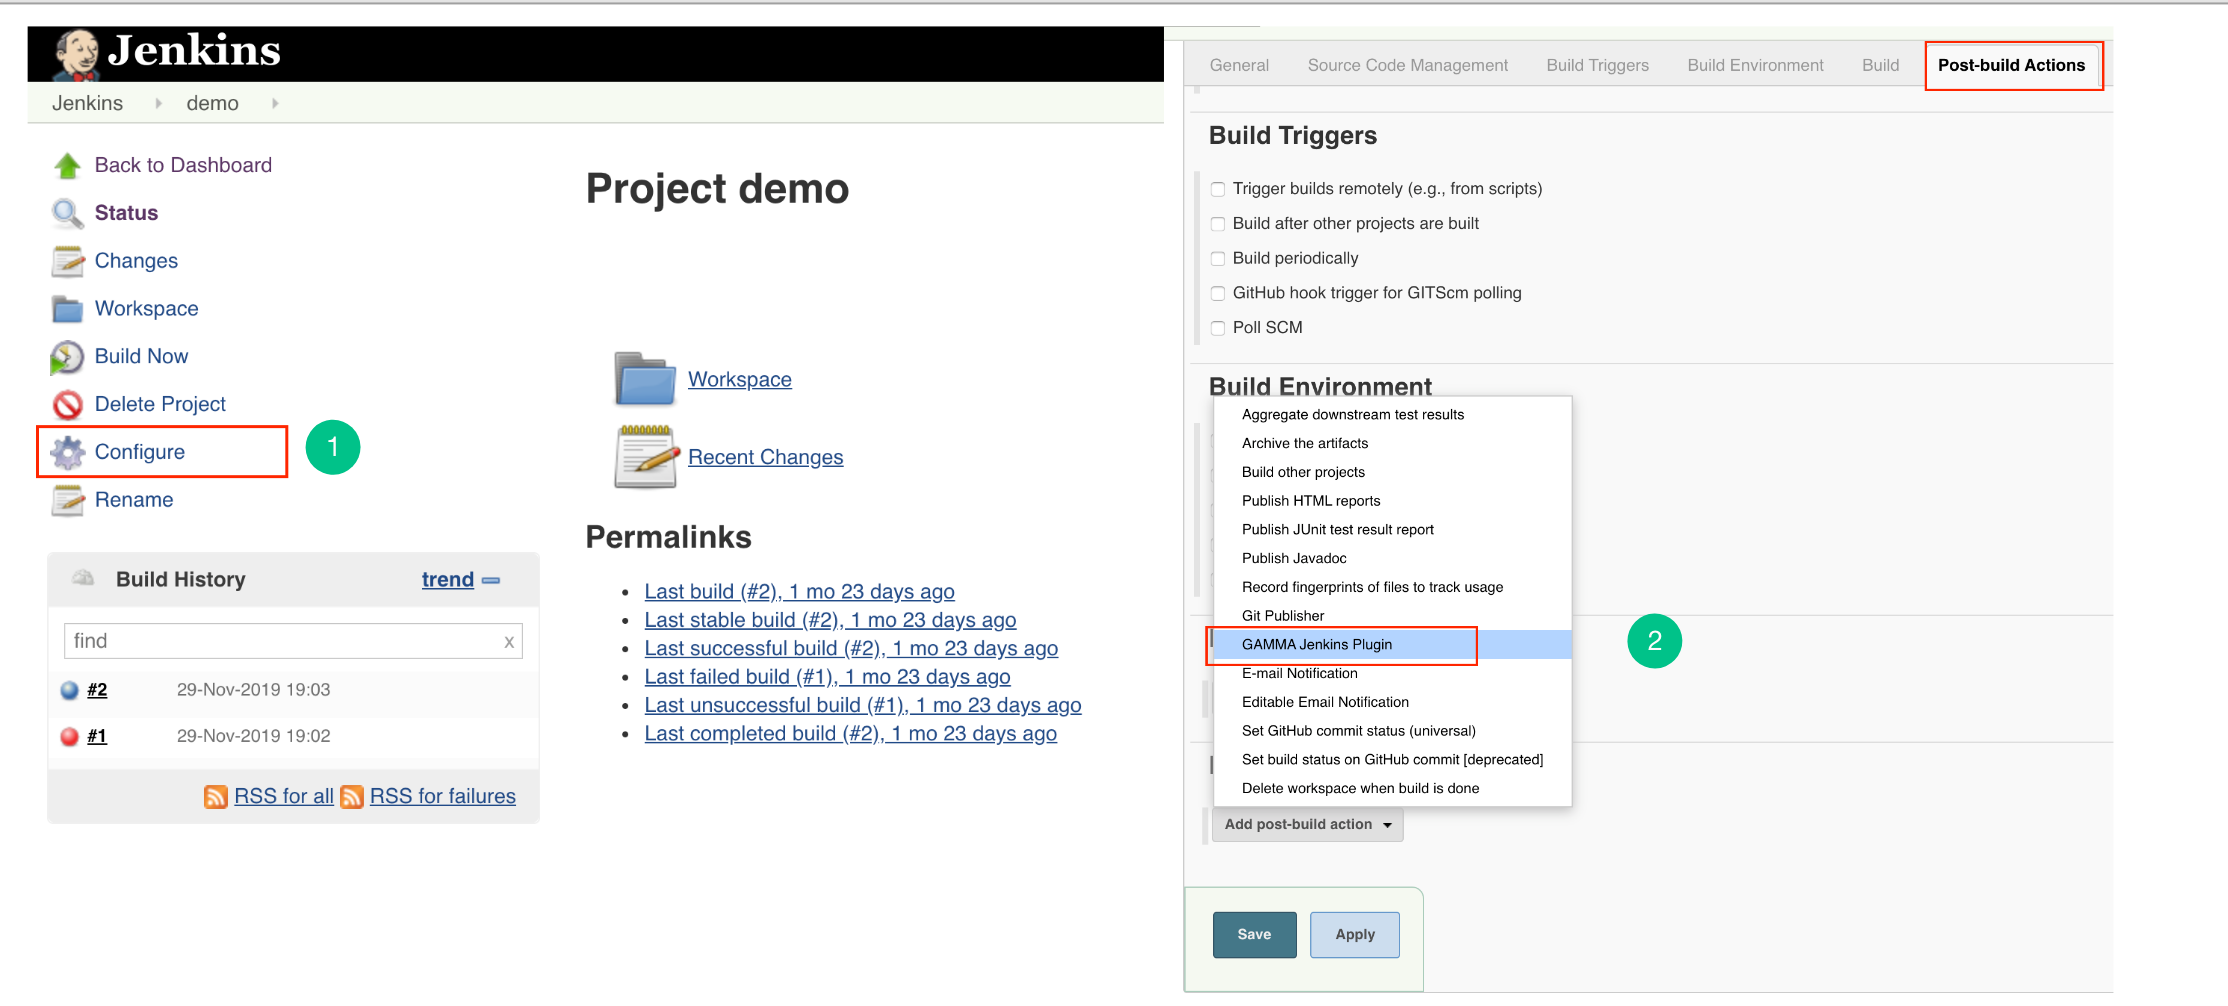
- Go to the “Configure” page.
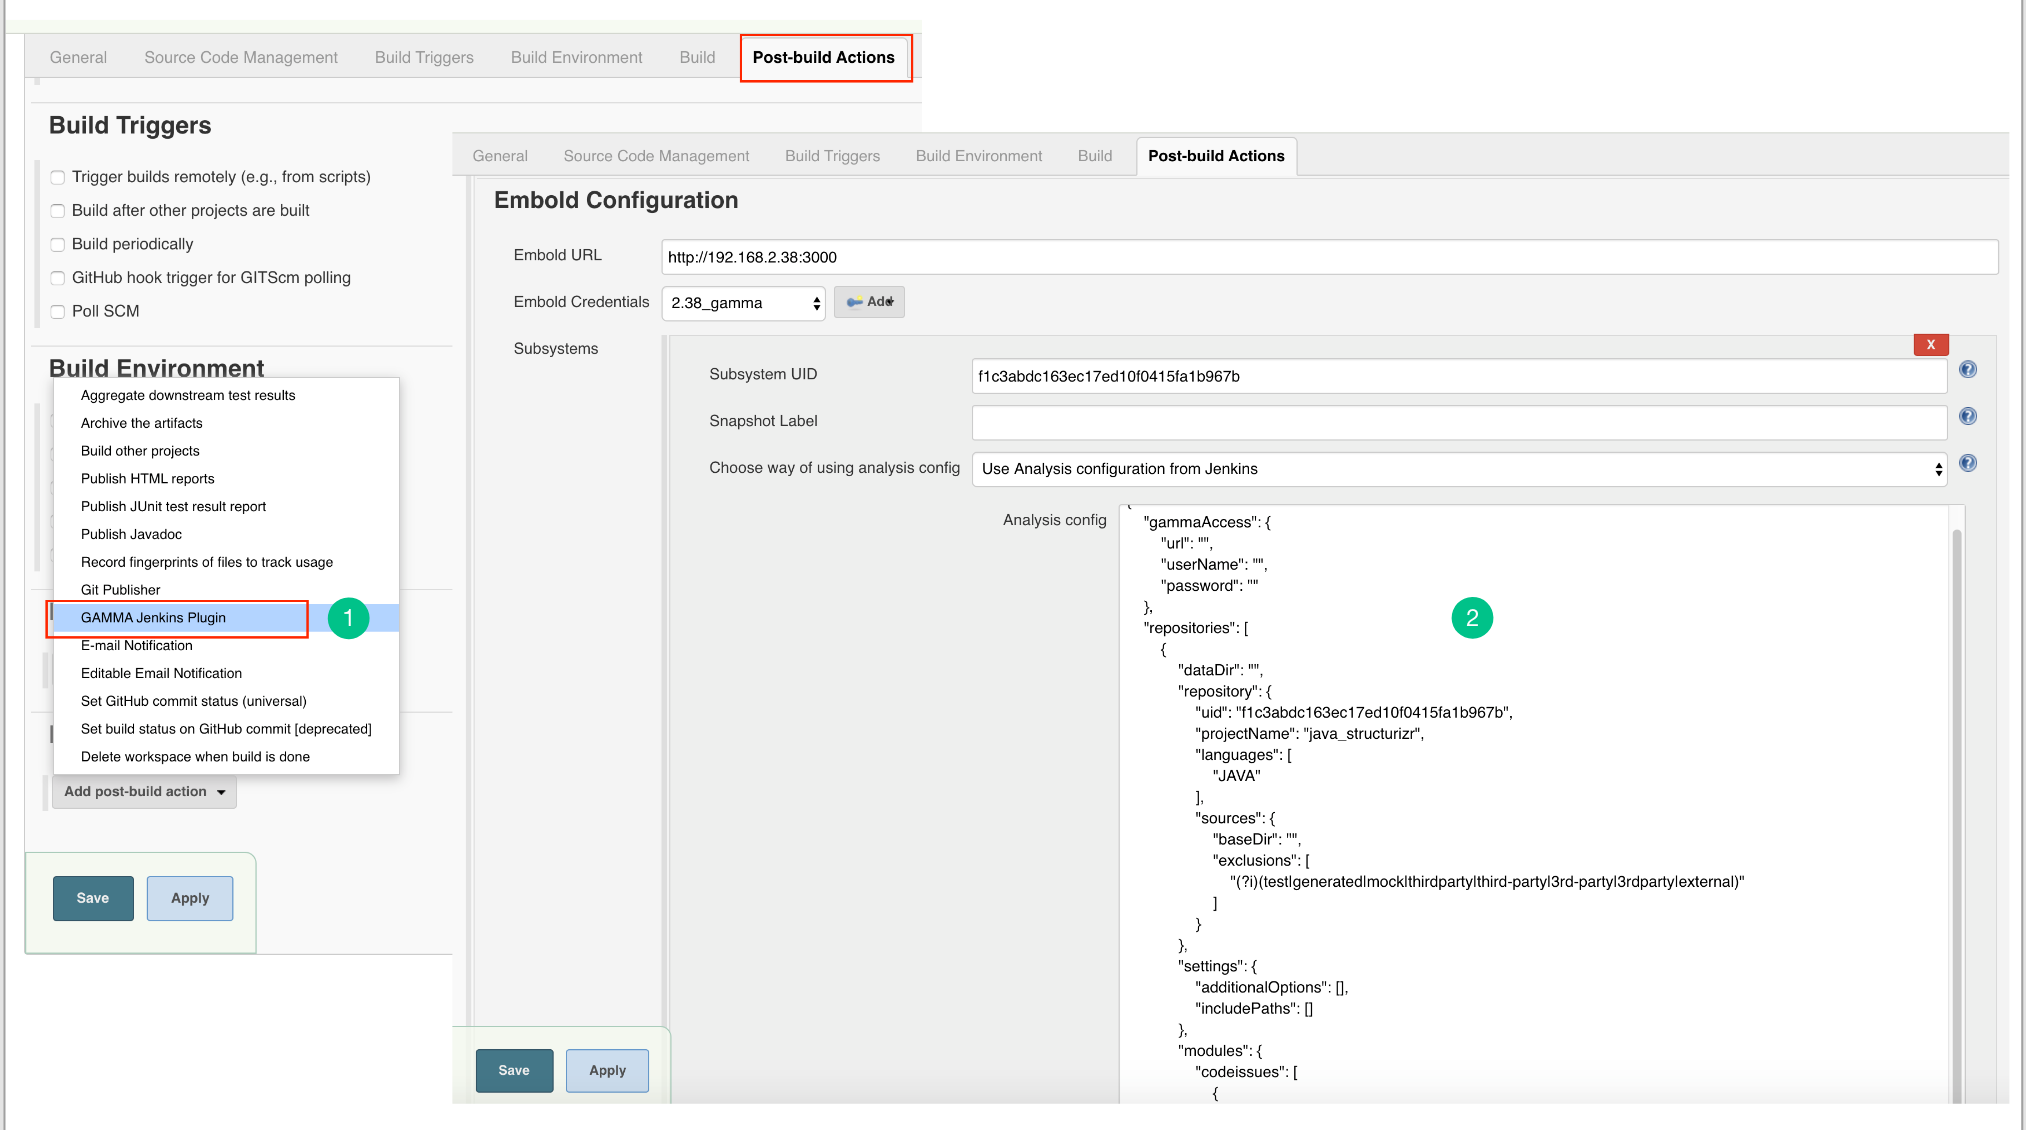
- Go to Post Steps and from Add post-build step dropdown list, select “
Embold Jenkins Plugin” option. - Embold Configuration Page is displayed to the user. Specify valid Embold URL (http://IP address of Embold Server:3000).
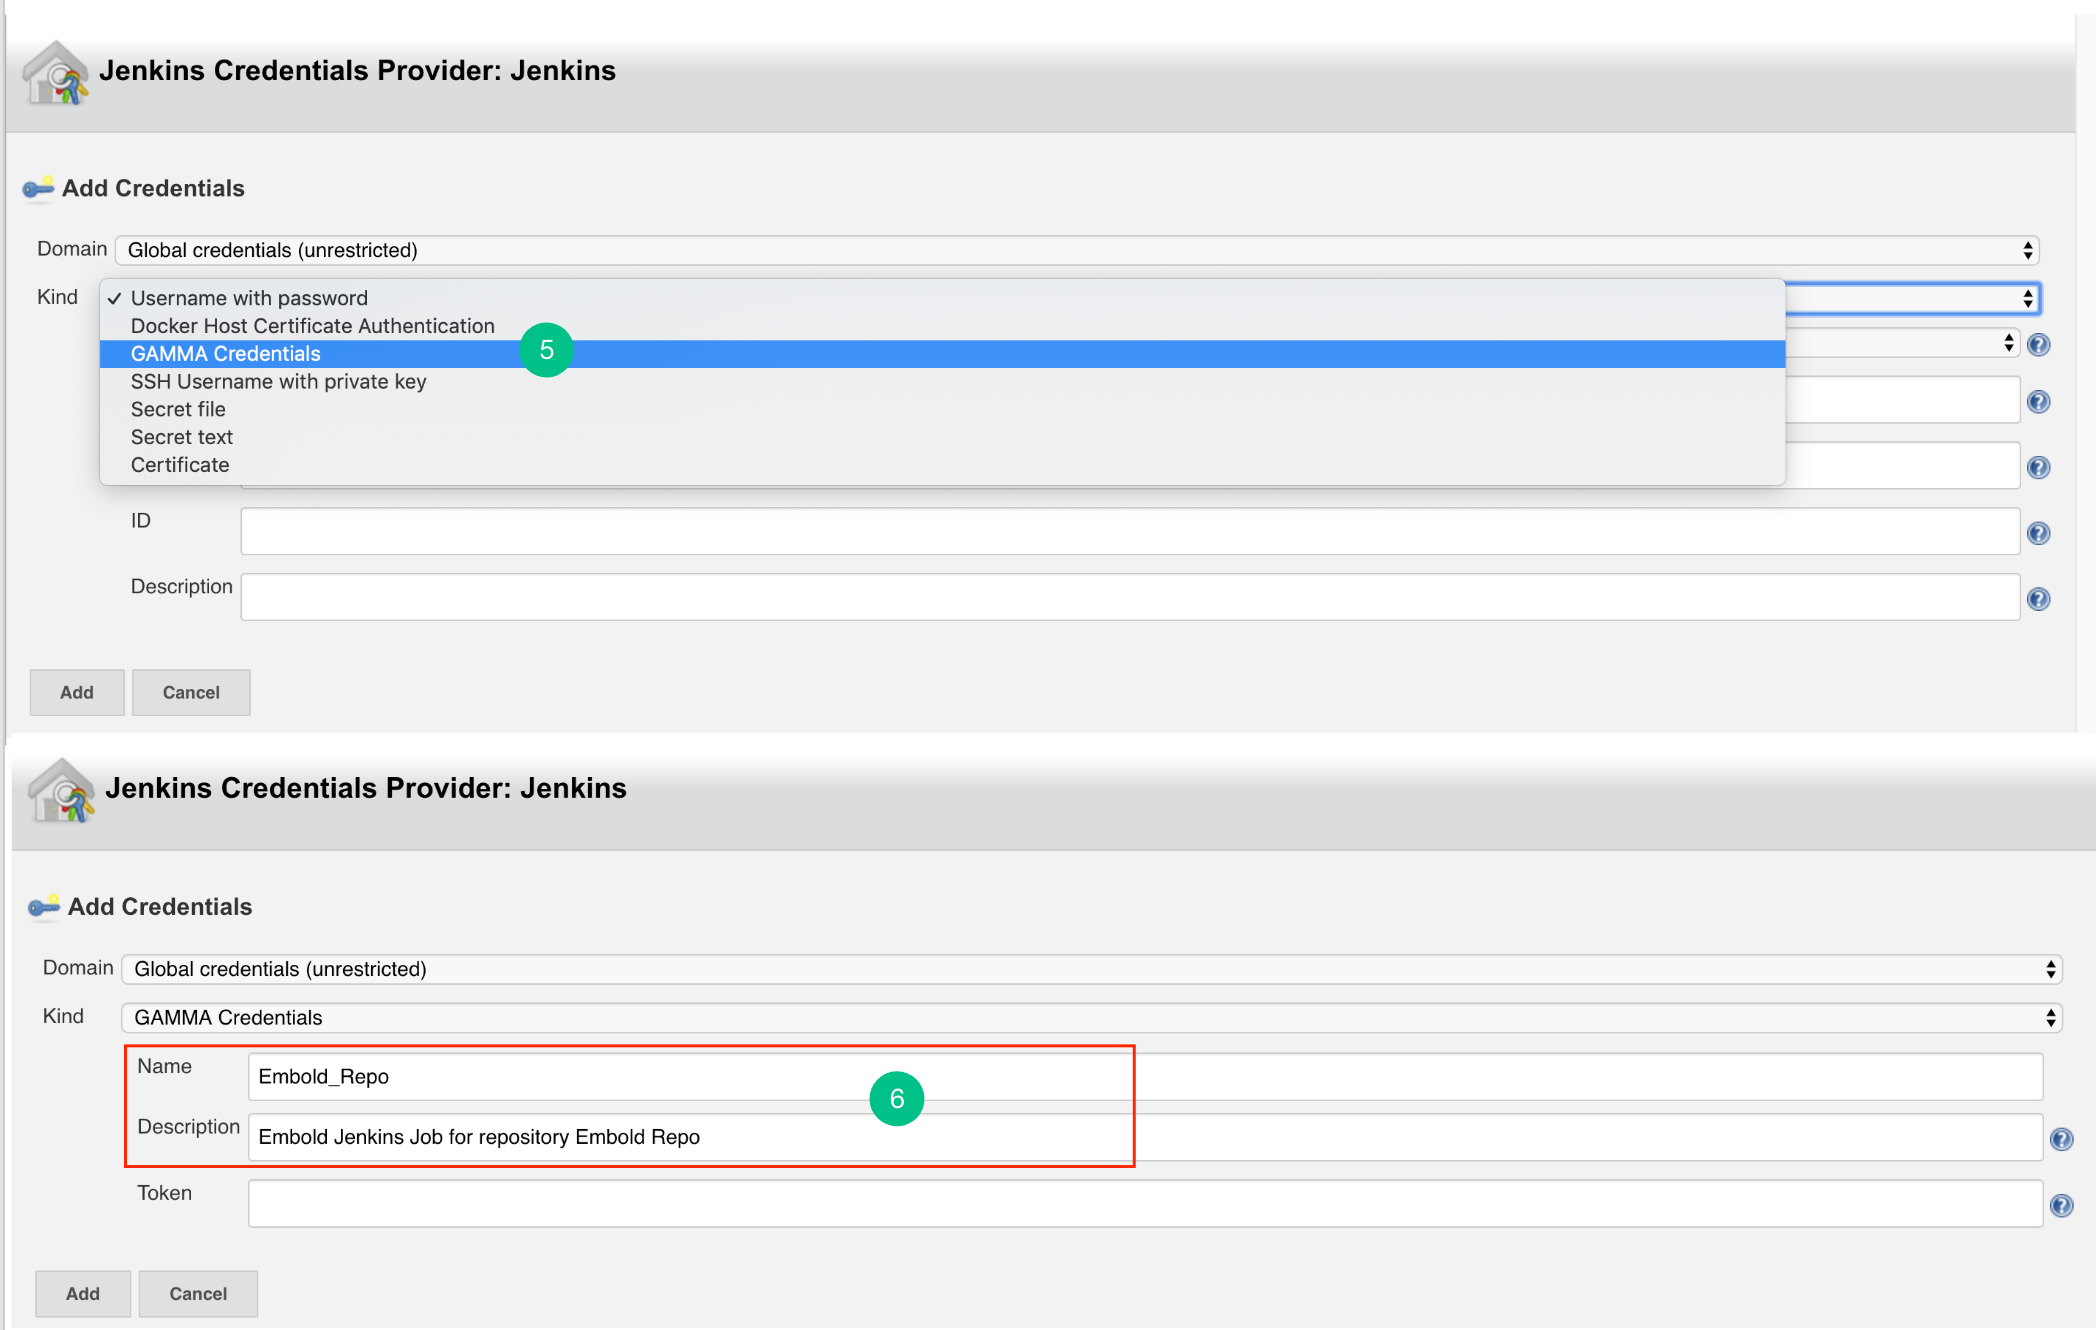
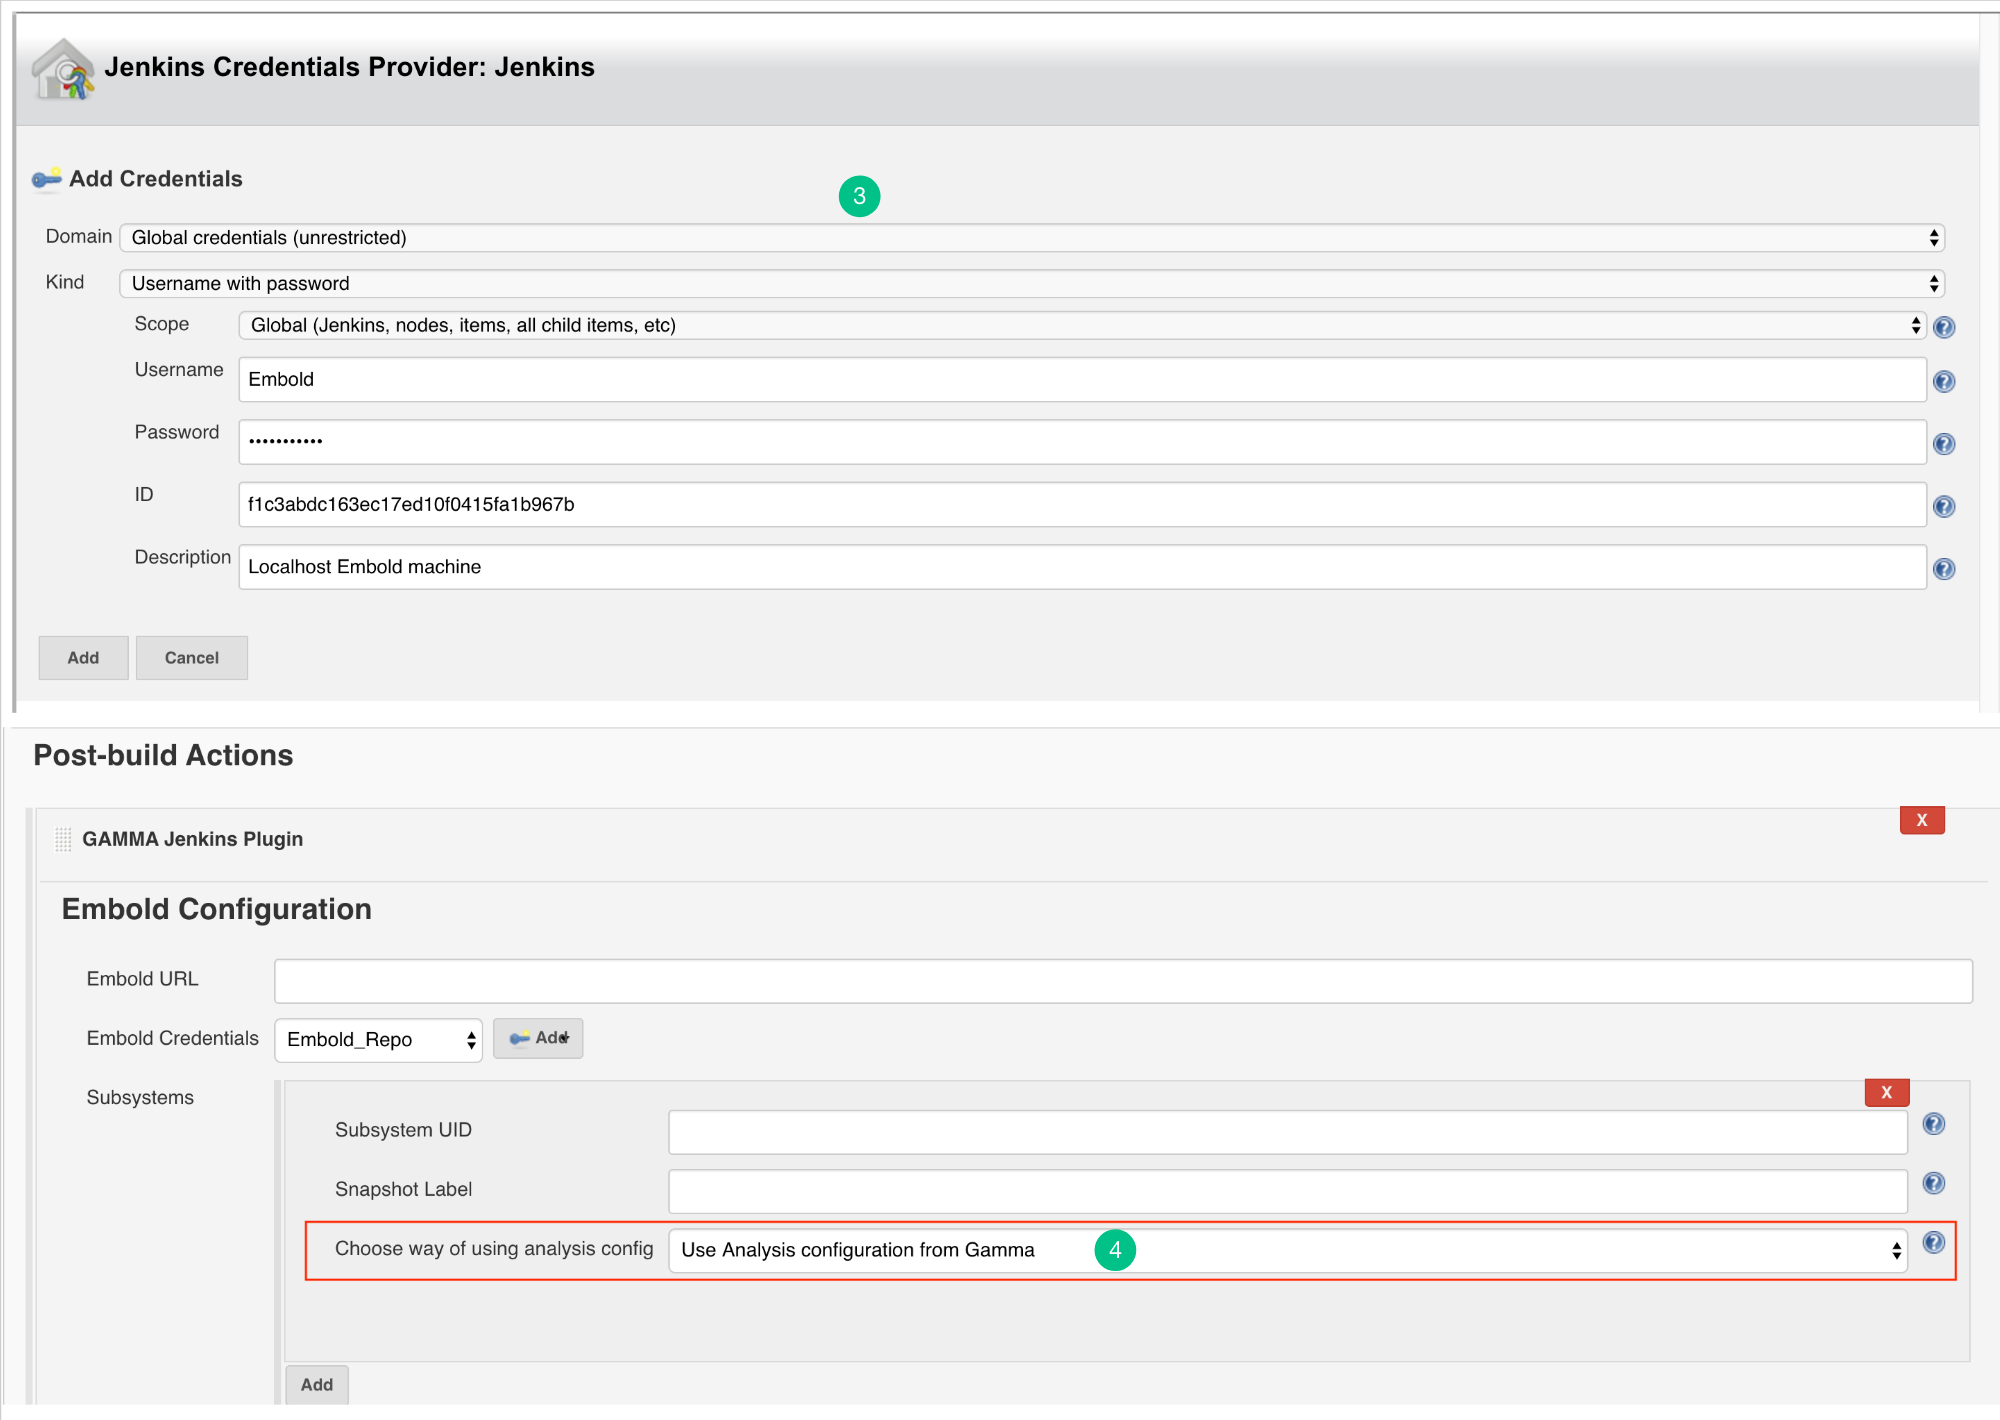
- Click on the Add button for adding Embold Credentials.
- In the Jenkins Credentials Provider pop-up, from Kind dropdown, choose “GAMMA Credentials”.
- Specify Name and Description which could be any value (it can be your Repo name or job name).
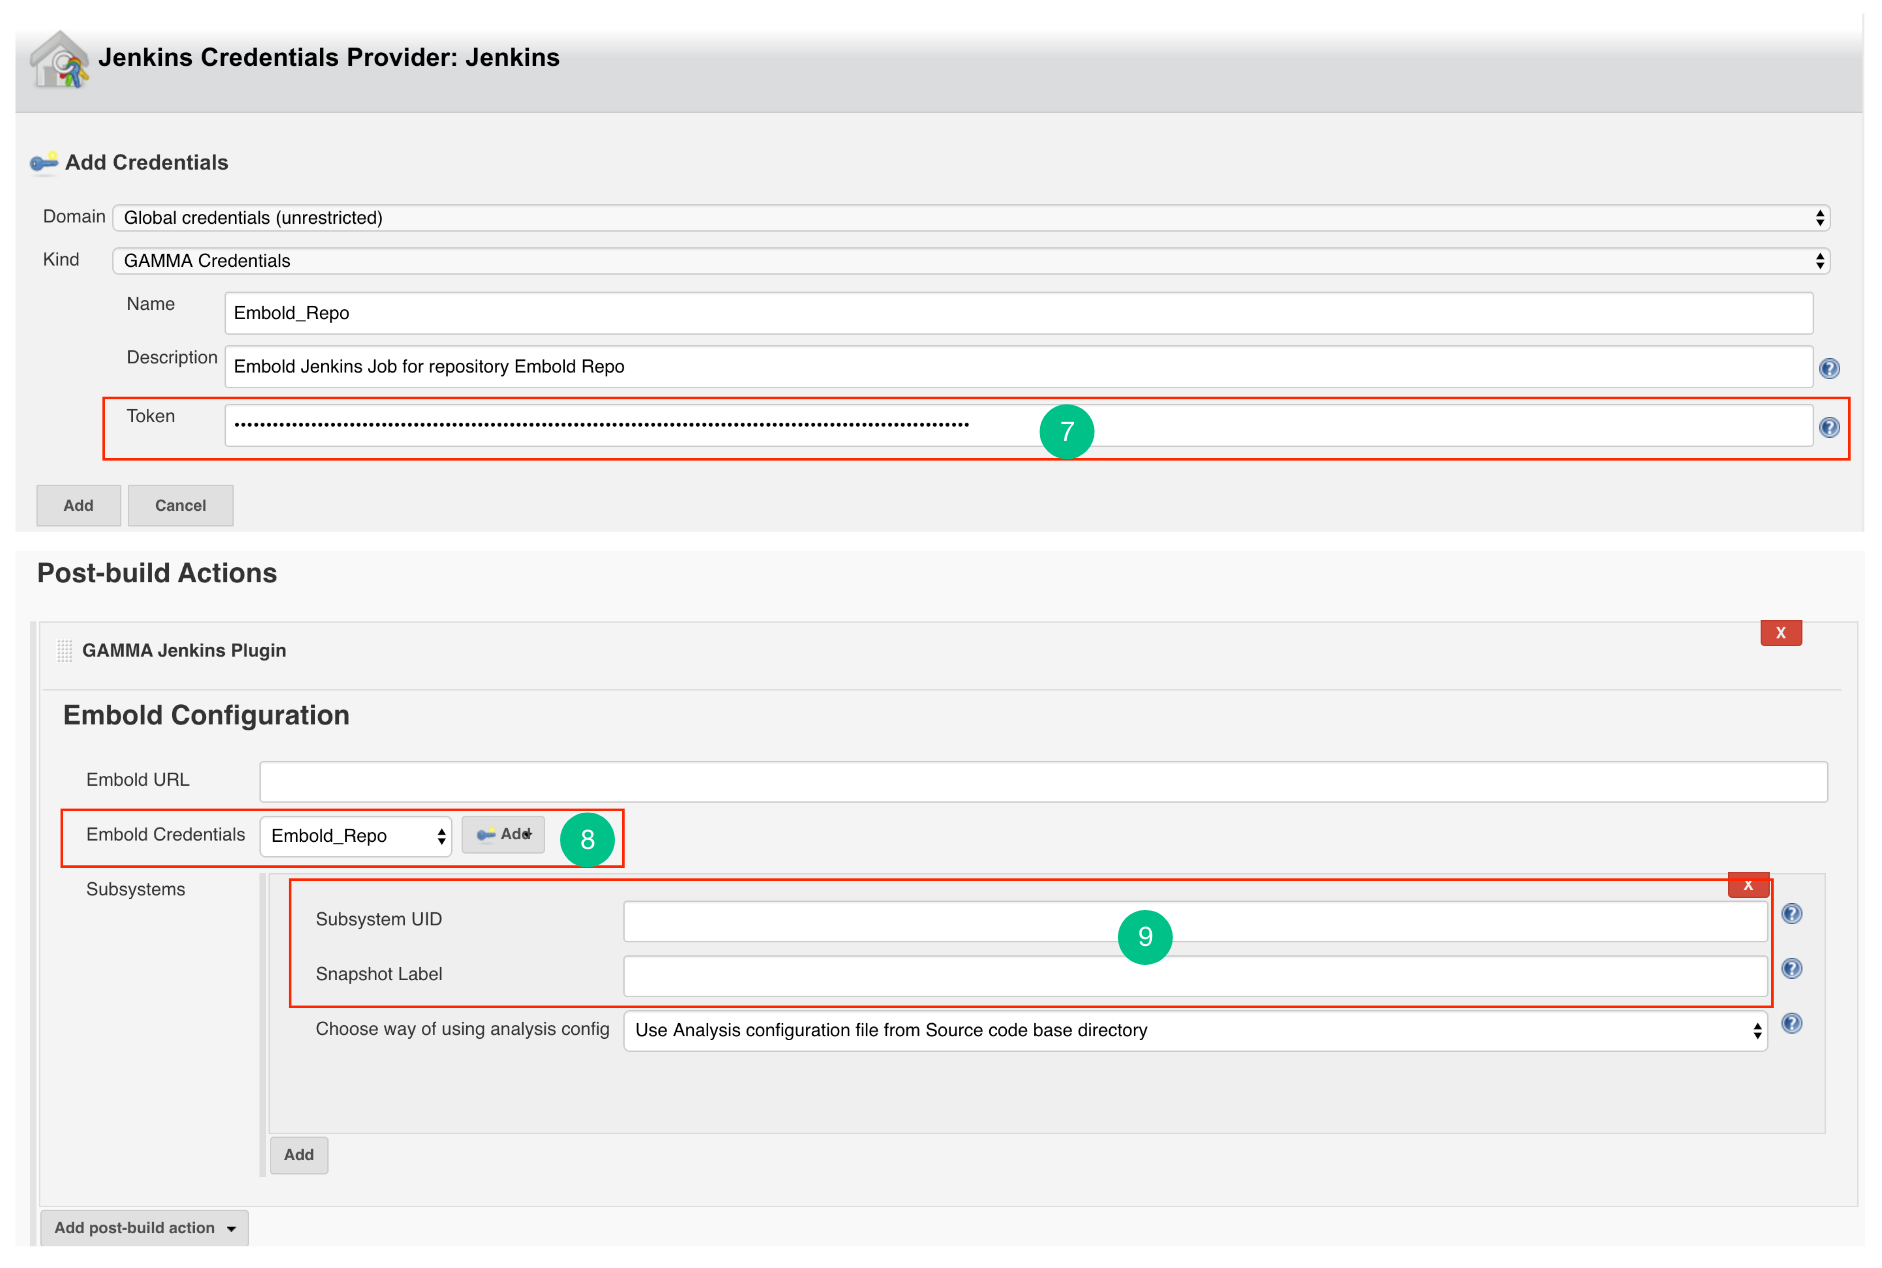
- Generate an Embold Access Token from the deployed Embold application website and add the Access Token under the Token section. Refer this article for generating Embold Access Token.
- After adding the Jenkins Credentials, select the added credential from the dropdown of Embold Credentials.
- Fill up the details in Subsystems section:
- Subsystem UID: Repository UID. Can be obtained from Repository information in corresponding project on Embold. Incorrect UID will throw an error.
- Snapshot Label (Optional): Provide the snapshot level value for Embold analysis. You can also provide environment variable. For example: BUILD_NUMBER
Configure Jenkins Plugin as Post-build Action
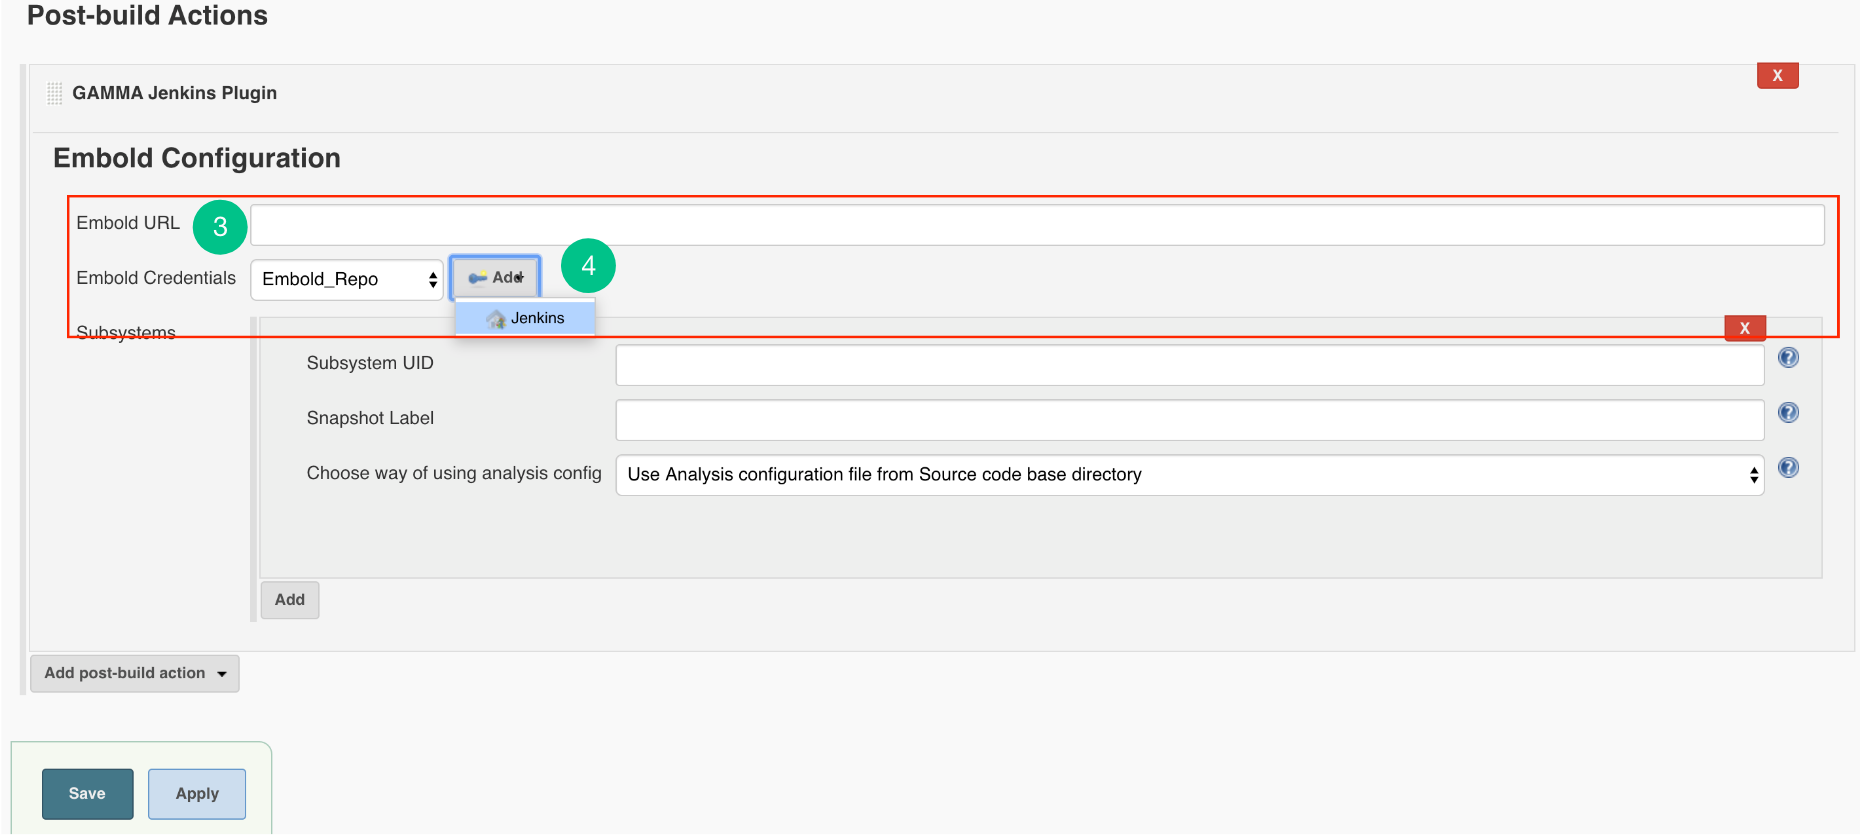
- Go to Post build Actions tab and add Embold Jenkins Plugin.
- You should see the Embold Jenkins configuration page.
- Embold Configuration Page is displayed to the user. Specify valid Embold URL (http://IP address of Embold Server:3000).
- Click on the Add button for adding Embold Credentials.
- In the Jenkins Credentials Provider pop-up, from Kind dropdown, choose “GAMMA Credentials”.
- Specify Name and Description which could be any value (it can be your Repo name or job name).
- Generate an Embold Access Token from the deployed Embold application website and add the Access Token under the Token section. Refer this article for generating Embold Access Token.
- After adding the Jenkins Credentials, select the added credential from the dropdown of Embold Credentials.
- Fill up the details in Subsystems section:
- Subsystem UID: Repository UID. Can be obtained from Repository information in corresponding project on Embold. Incorrect UID will throw an error.
- Snapshot Label (Optional): Provide the snapshot level value for Embold analysis. You can also provide environment variable. For example: BUILD_NUMBER
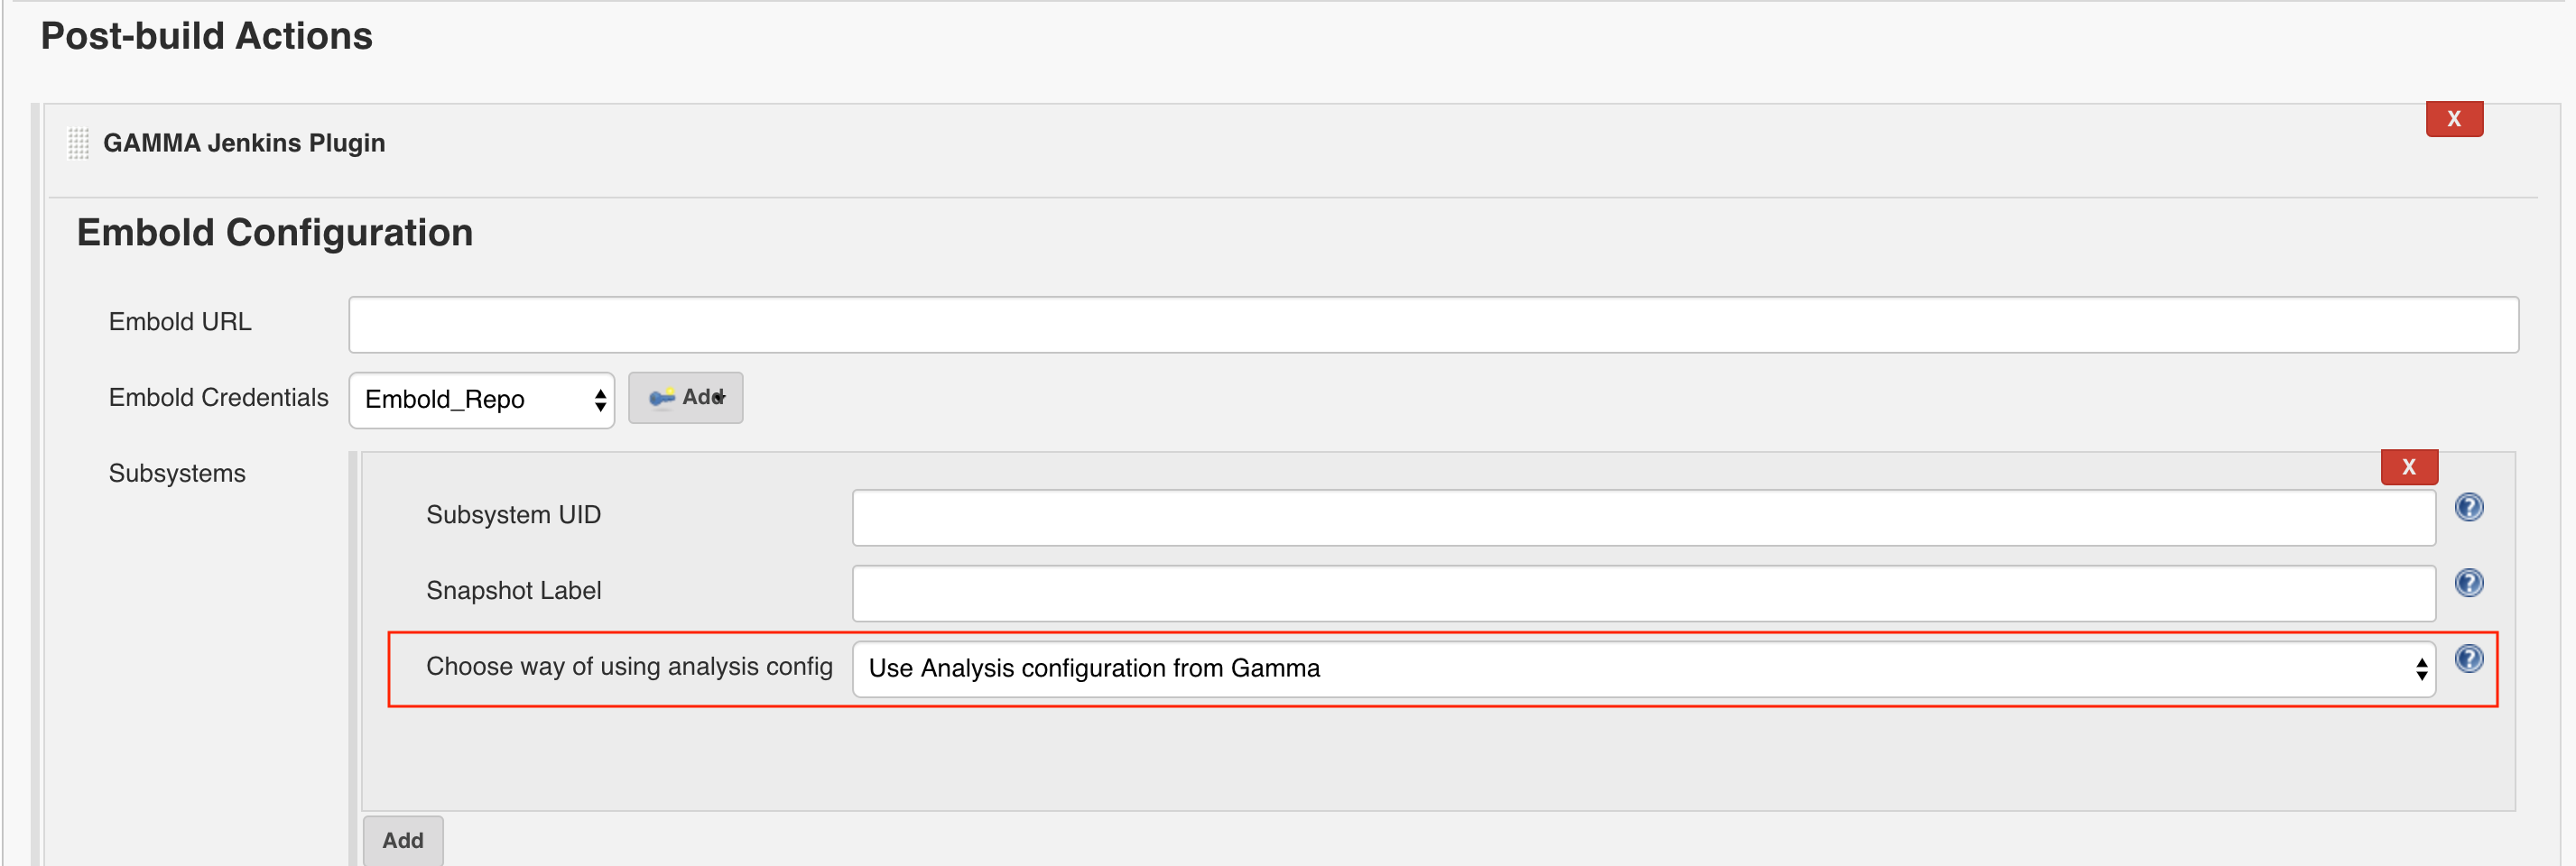
Configure Analysis Configuration file for Embold Jenkins Pugin for both modes
- Use Analysis configuration from Embold:
- Embold analysis configuration file with name ‘.gammascan.json’ containing subsystem configuration will be picked at runtime from. Embold server associated with the Subsystem ID specified.
- With this option, the configuration file will take the default path for Junit and Clover.
- Use Analysis configuration file from Source code base directory:
- Embold configuration file with name ‘.gammascan.json’ containing subsystem configuration should be present in the base(root) directory.
- Windows: C:/Program Files (x86)/Jenkins/workspace/{Project_Name}
/.gammascan.json - Linux: /var/lib/Jenkins/workspaces/{Project_Name}
/.gammascan.json
- Windows: C:/Program Files (x86)/Jenkins/workspace/{Project_Name}
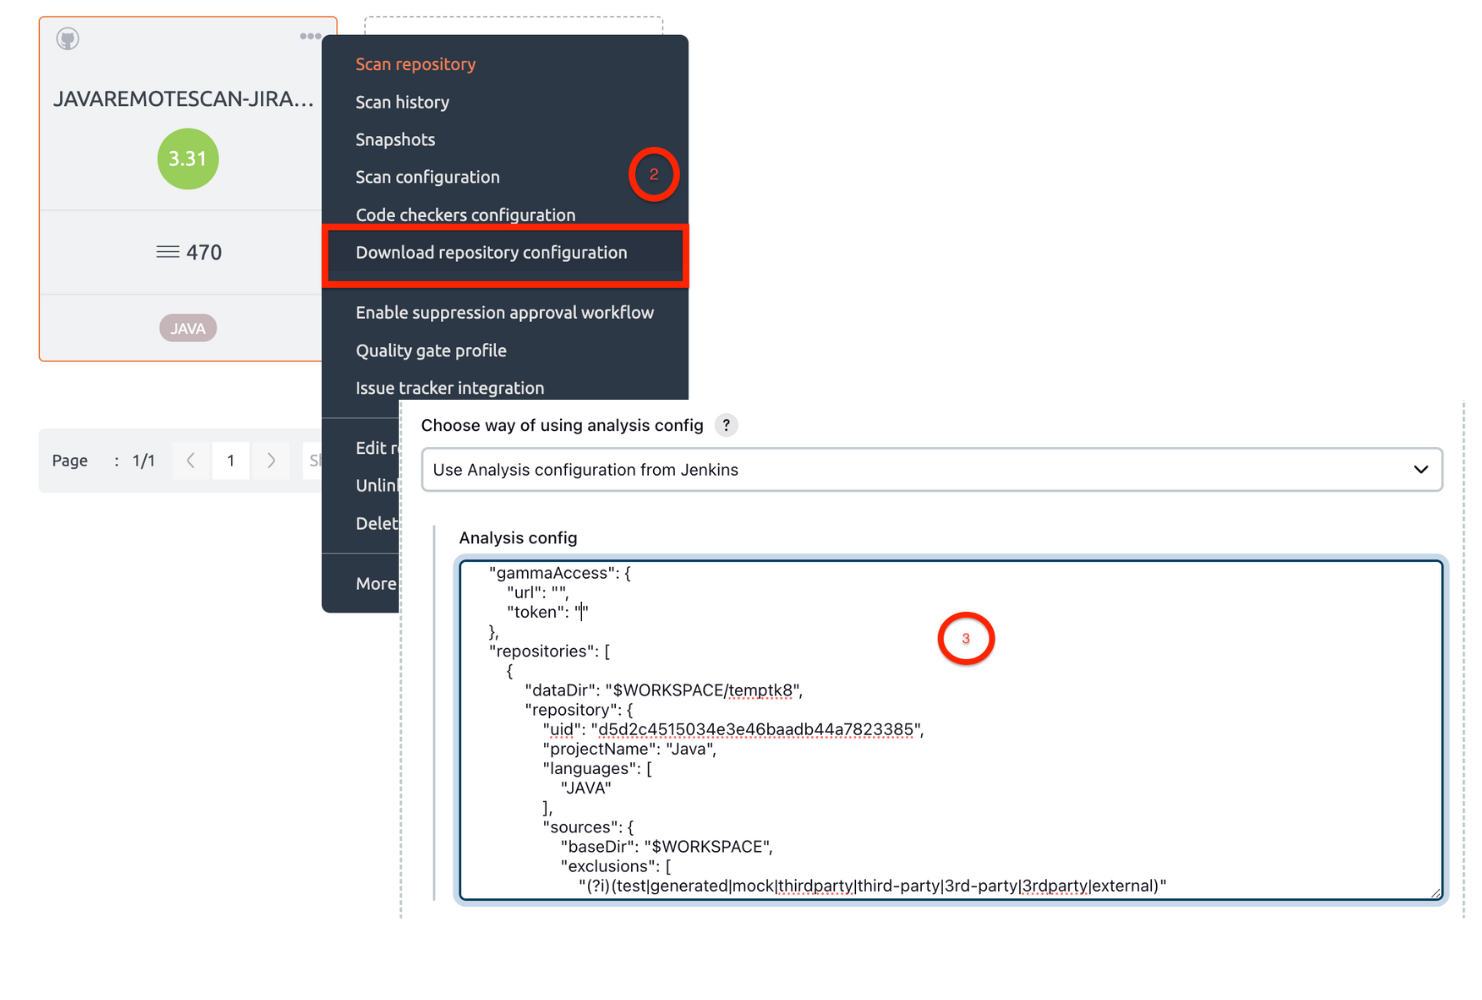
- Use Analysis configuration from Jenkins:
- Login to Embold. Create a project. Link the repository you want to scan.
- On your remote Embold instance, navigate to the repository you want to scan. Click on “…”. Download configuration json from Embold UI.
- Update the following fields in json.
- Replace baseDir value with $WORKSPACE OR %WORKSPACE%
Note: WORKSPACE = Jenkins workspace - Give custom directory path for Data directory
Note: Make sure Jenkins user has Write permission for dataDir.
- Replace baseDir value with $WORKSPACE OR %WORKSPACE%
- Give the analysis configuration JSON in Jenkins UI. Click on the “Apply” button. Check if any errors are displayed in any configuration field. Click on the “Save” button.
For more information to understand repository-configuration.json, refer to this article.
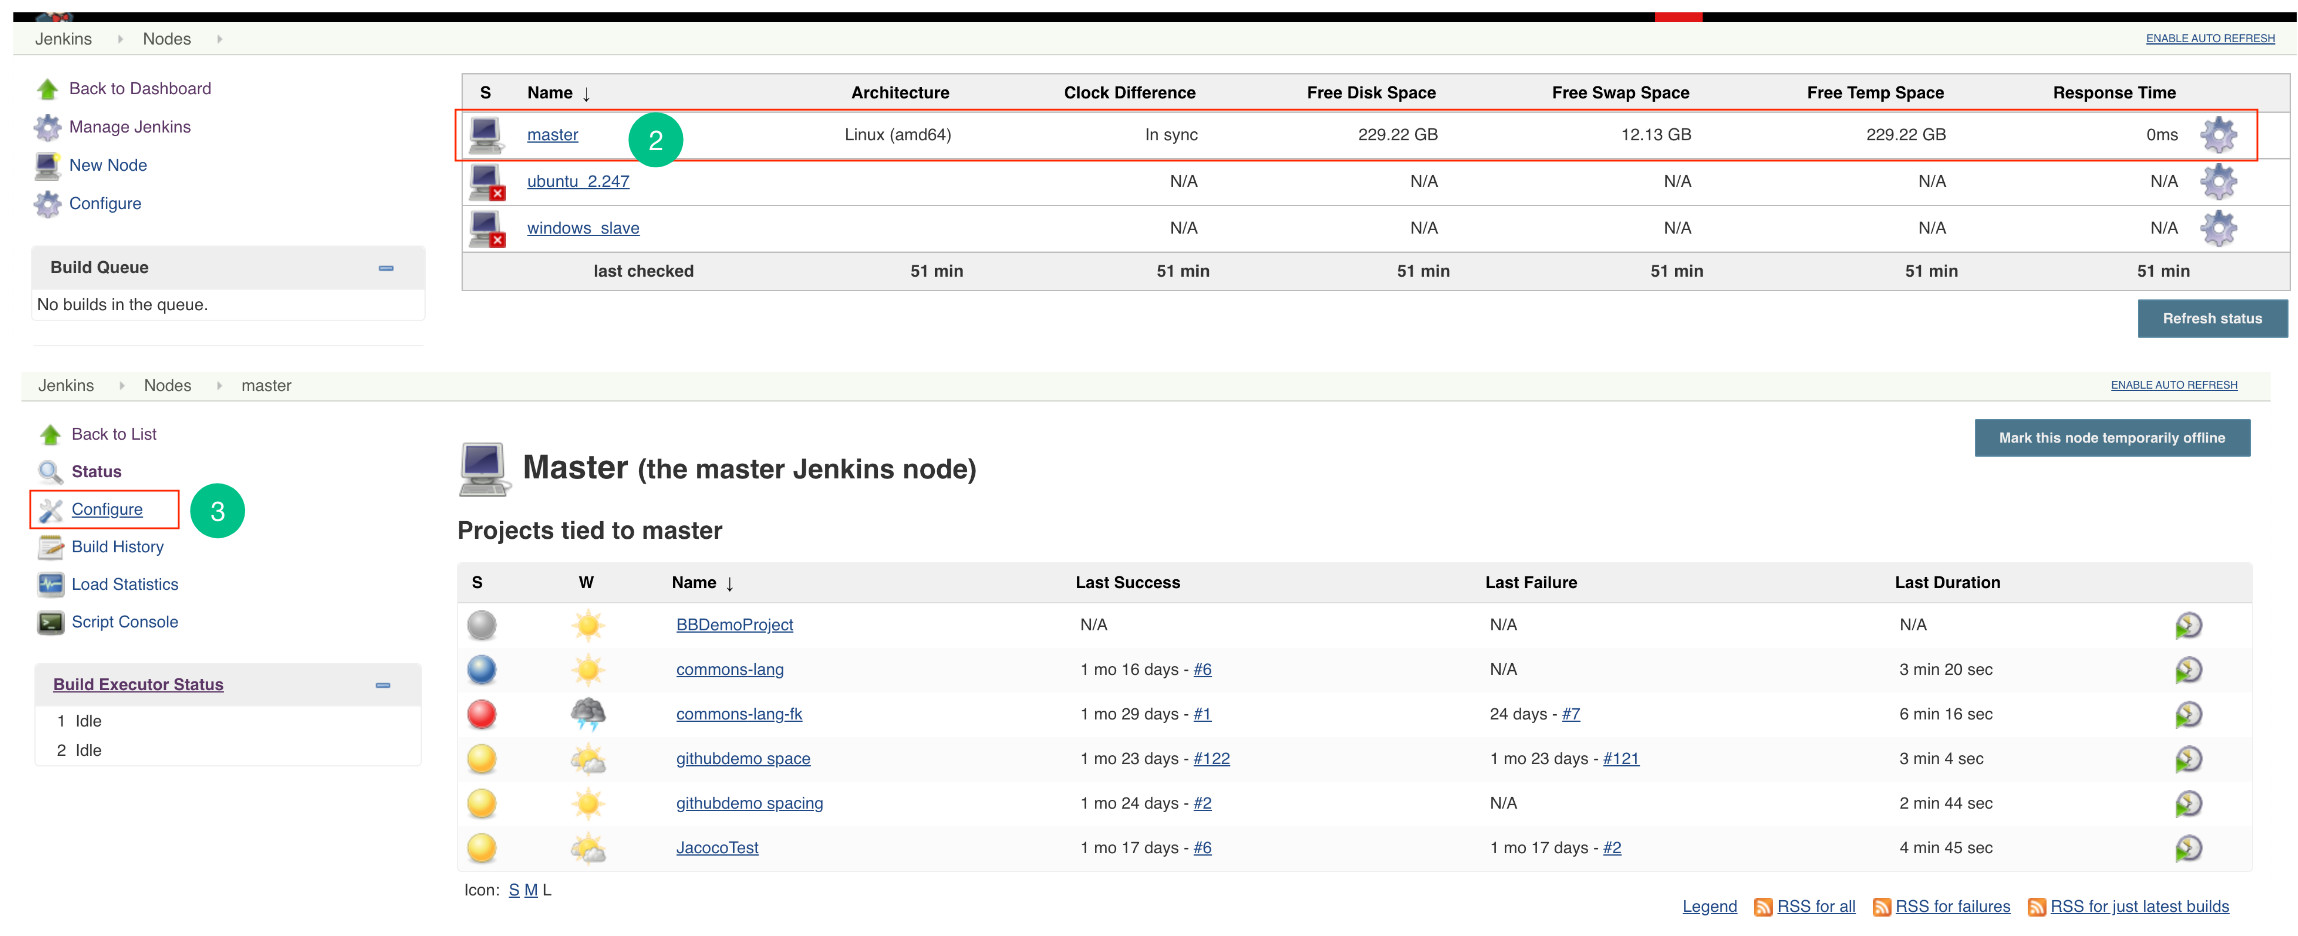
Steps for Master Slave:
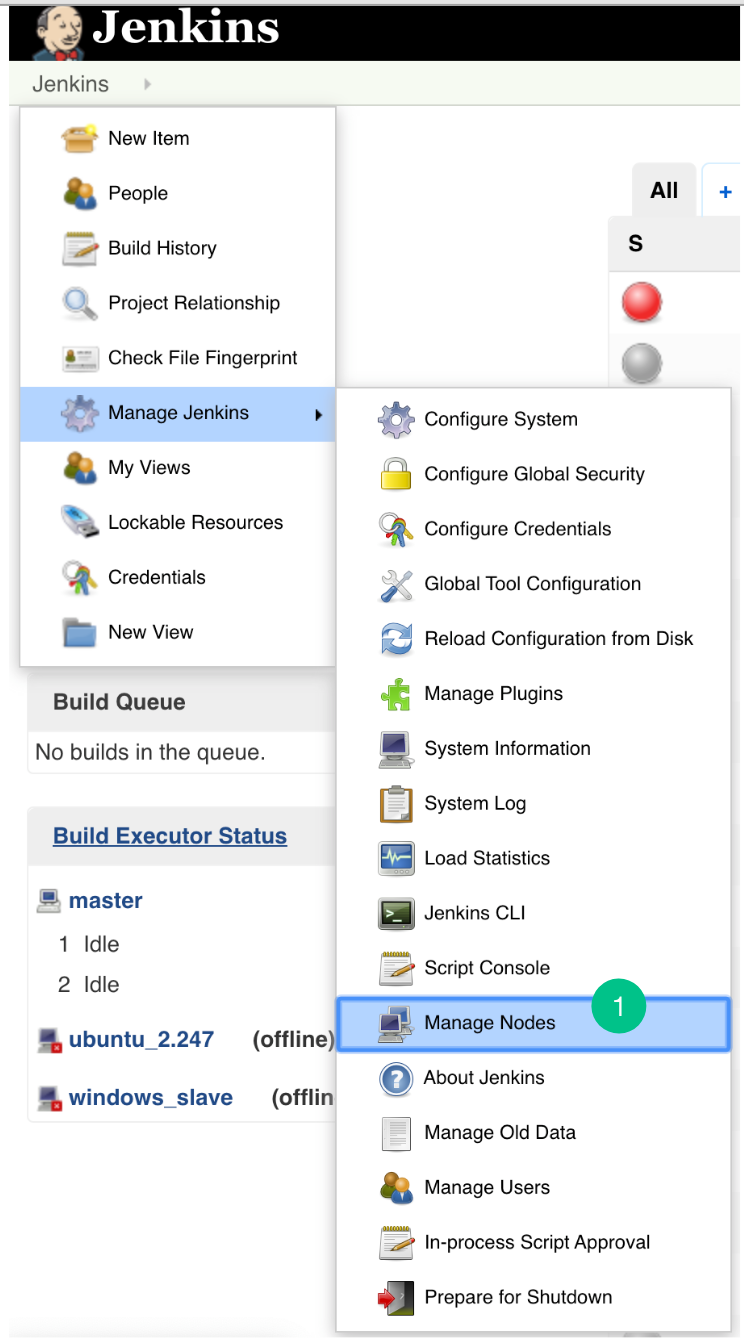
- Go to Jenkins -> Manage Jenkins -> Manage Nodes (only required for master – slave configuration)
- Open the particular Slave Node (only required for master – slave configuration).
- Go to Configuration.
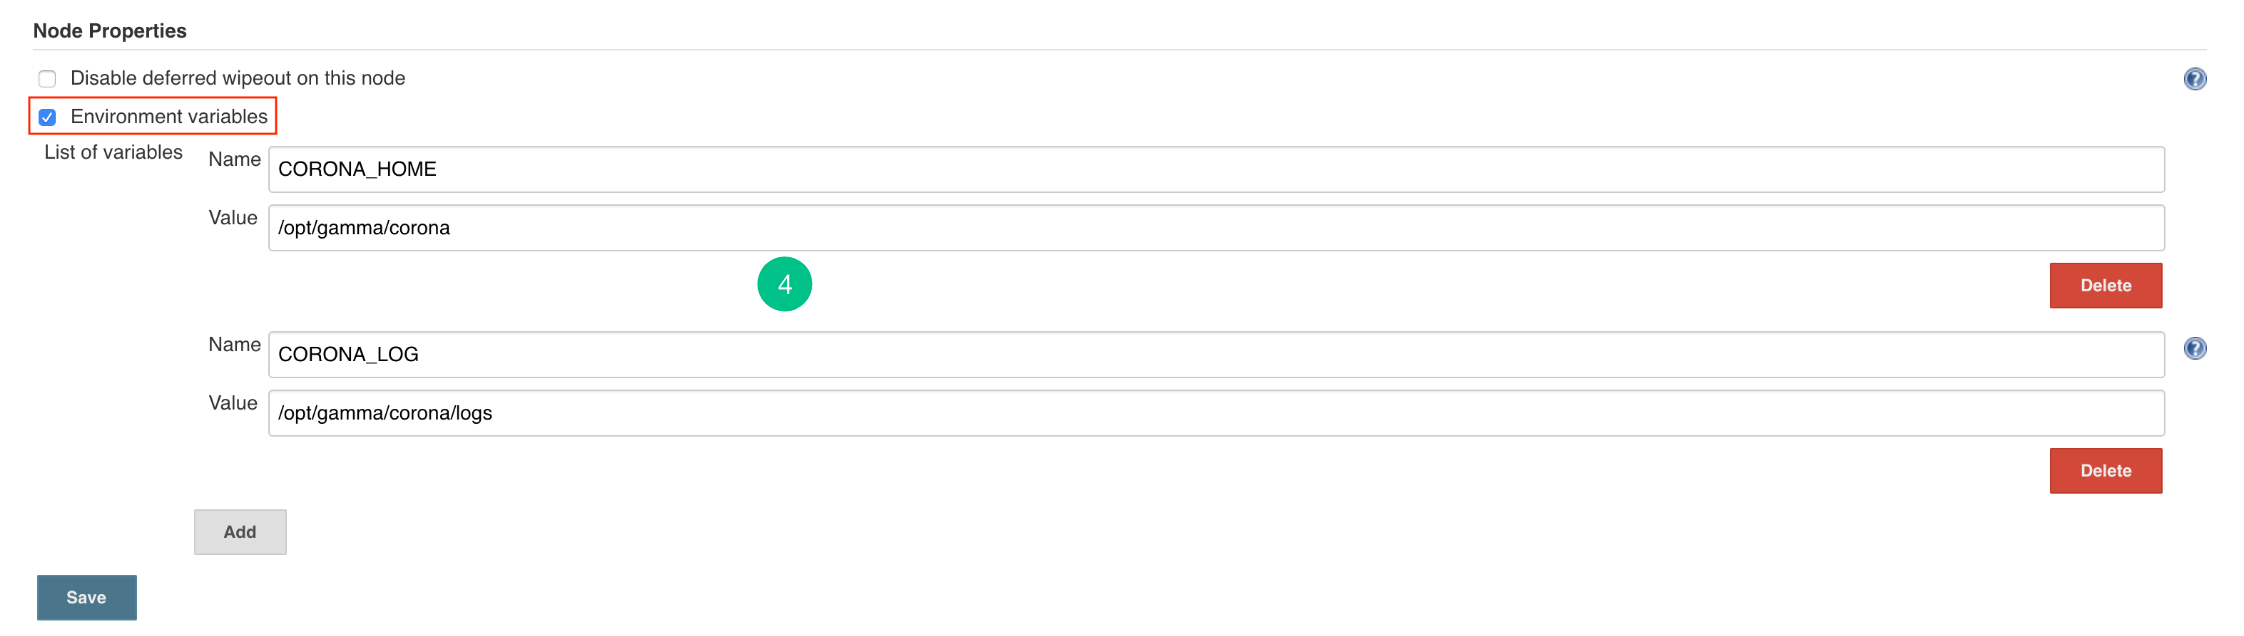
- Add the new environment variables
CORONA_HOME,CORONA_LOGandEMBOLD_SCANNER_HOME.
Steps for master only
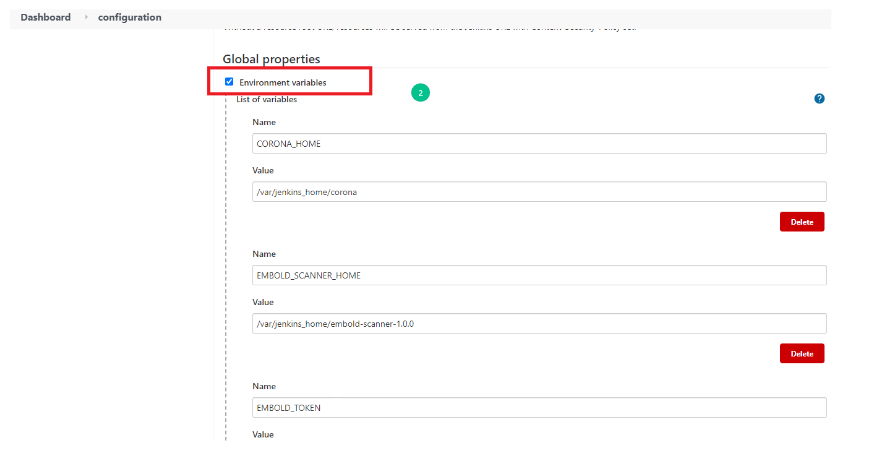
- Go to Jenkins -> Manage Jenkins -> Configure System page and add the following 3 environment variables in “Global properties” section (In a case of master slave add these variables into slave configuration)
- Add the environment variables
CORONA_HOME,CORONA_LOGandEMBOLD_SCANNER_HOME.CORONA_HOME: Specify the location where Embold Analyzer will be downloaded (e.g /opt/gamma/corona).CORONA_LOG: Specify the location where logs for Embold Analysis will be generated. Note: The directory should have write permissions.EMBOLD_SCANNER_HOME: Specify the path till embold-scanner.