Integrating issue tracking systems
You can integrate issue tracking system such as Jira and Redmine with BrowserStack Code Quality. This will enable users to create tickets / tasks on your issue tracking system directly from BrowserStack Code Quality.
BrowserStack Code Quality uses issue tracking information for recommendations and risk calculation as well.
Steps to integrate Jira or Redmine with BrowserStack Code Quality:
- Select the Issue tracking integration option from the repository context menu of the desired repository.
- Fill the form in Issue Tracking Integration pop-up. Select applicable issue tracking platform (such as Jira). Click Save button.
- You may use the same Issue Tracking Integration pop-up to update or remove issue tracking integration.
Jira Integration
Below are the steps to integrate Jira with basic authentication and OAuth authentication:
A. Steps to integrate Jira with Basic authentication
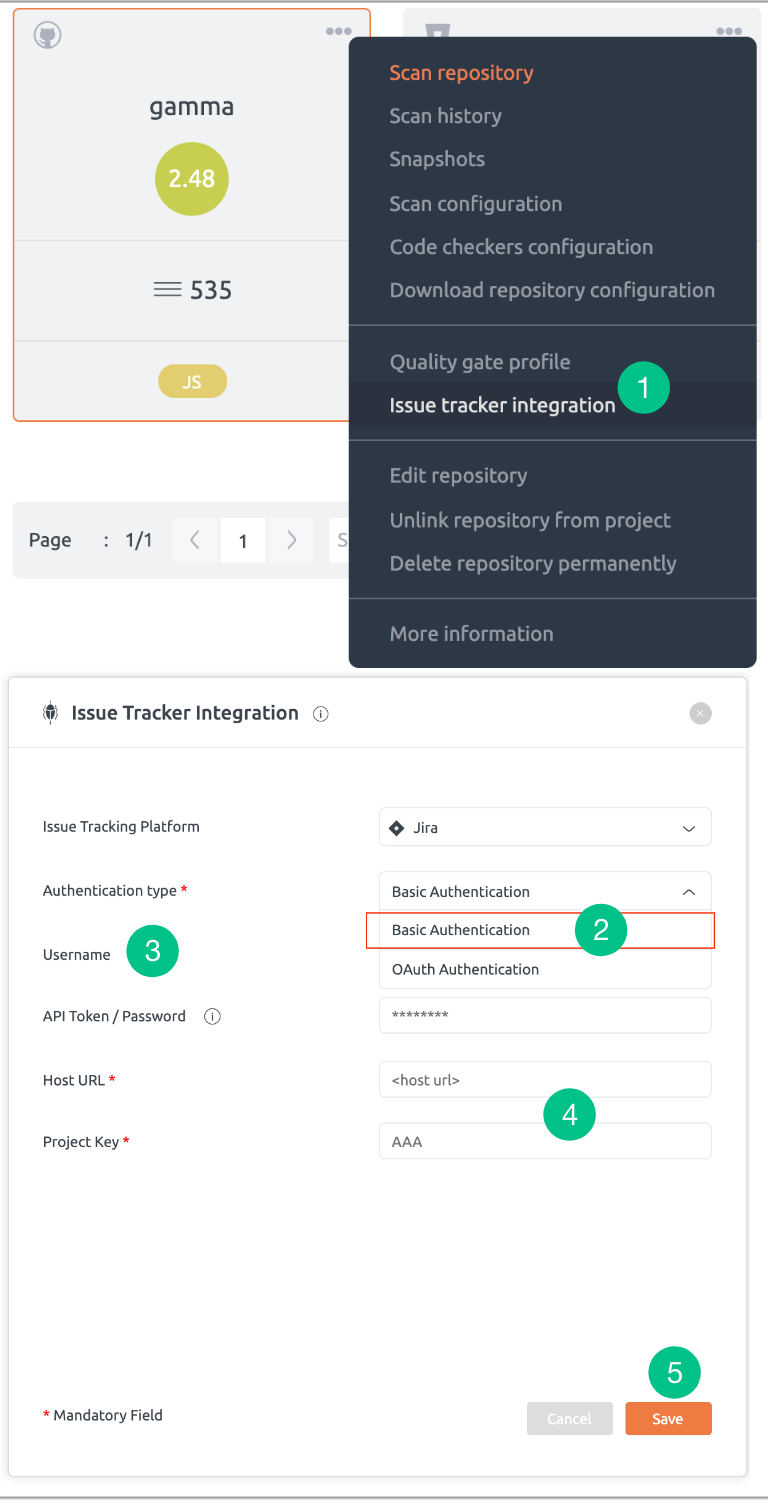
- Select the Issue tracker Integration option from the repository context menu of the desired repository.
- In Issue Tracker Integration pop-up, by default Basic Authentication is displayed from the Authentication type dropdown list.
- Enter your username and generate the Atlassian API token. For more information, refer to this article.
- Mention your Host URL and Project Key.
- Click the Save button to add the JIRA account successfully.
API tokens are used for basic authentication as Jira has deprecated the use of passwords. Password-based authentication will work for older versions of Jira only.
Jira has introduced PAT for Jira on-premise version 8.14 and later. BrowserStack Code Quality is in process of adding support for login using PAT.
BrowserStack Code Quality works with Jira cloud (all versions) and Jira on-premise version 8.13 and below.
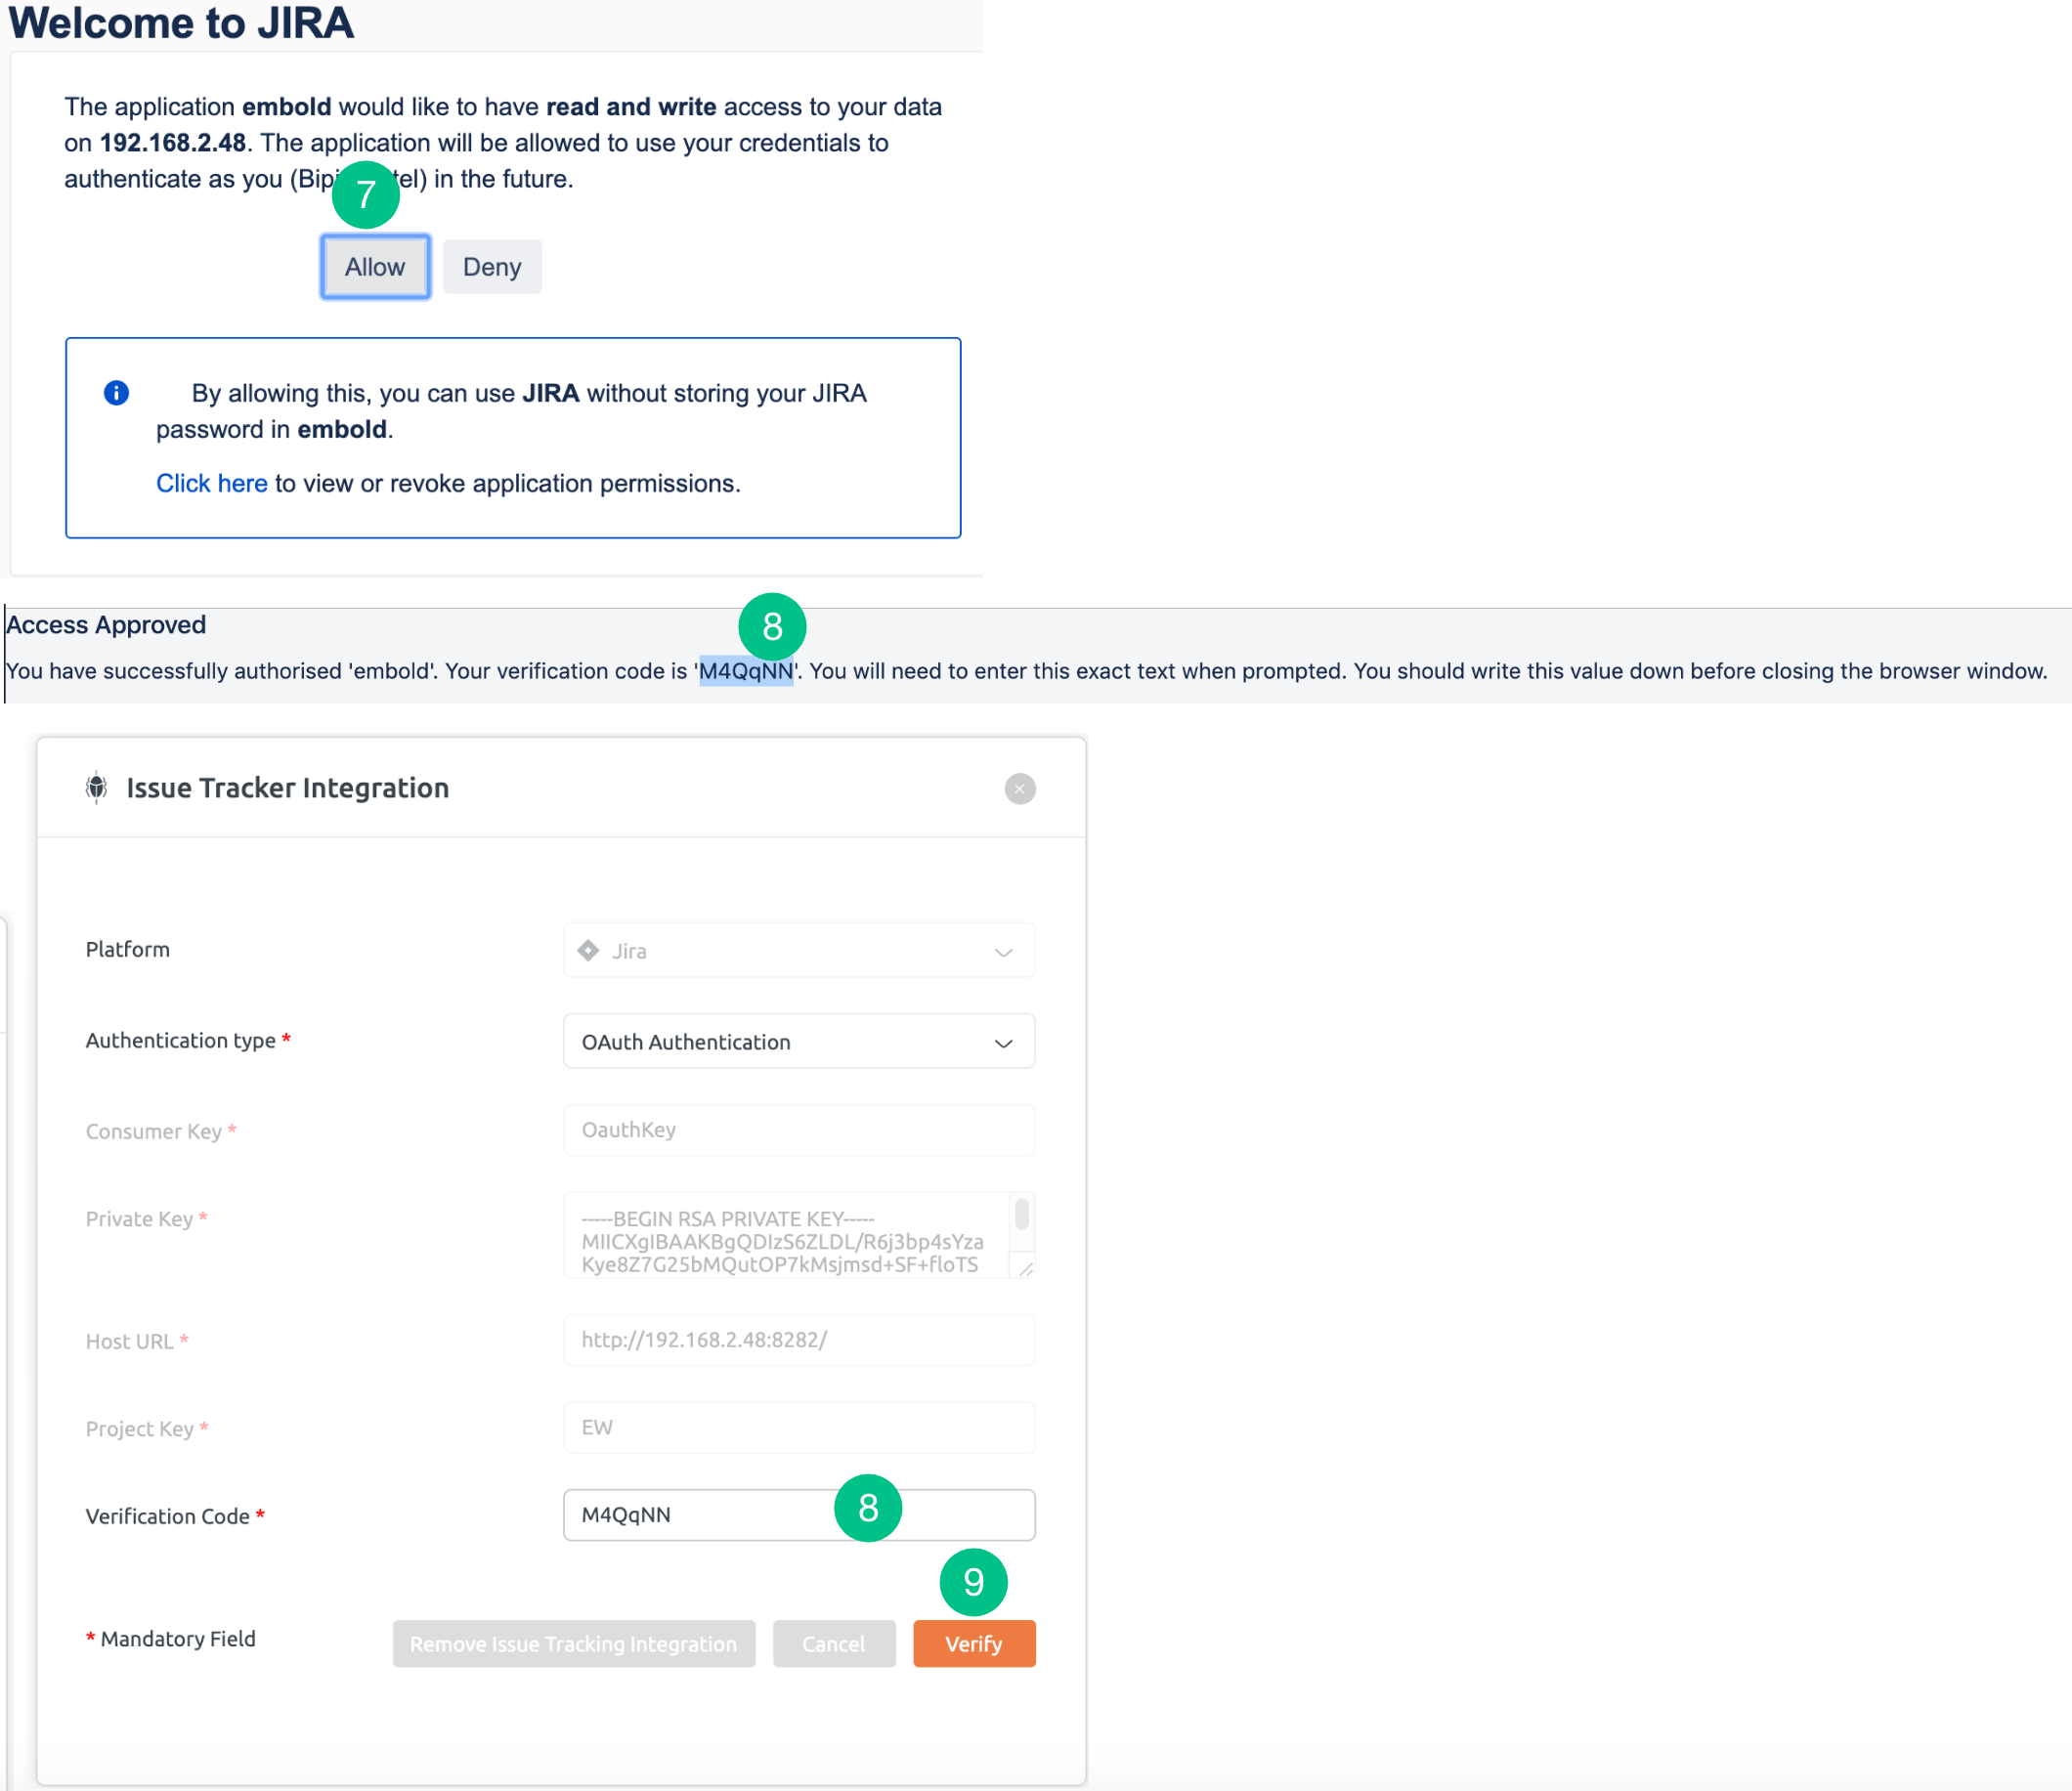
B. Steps to integrate Jira with OAuth
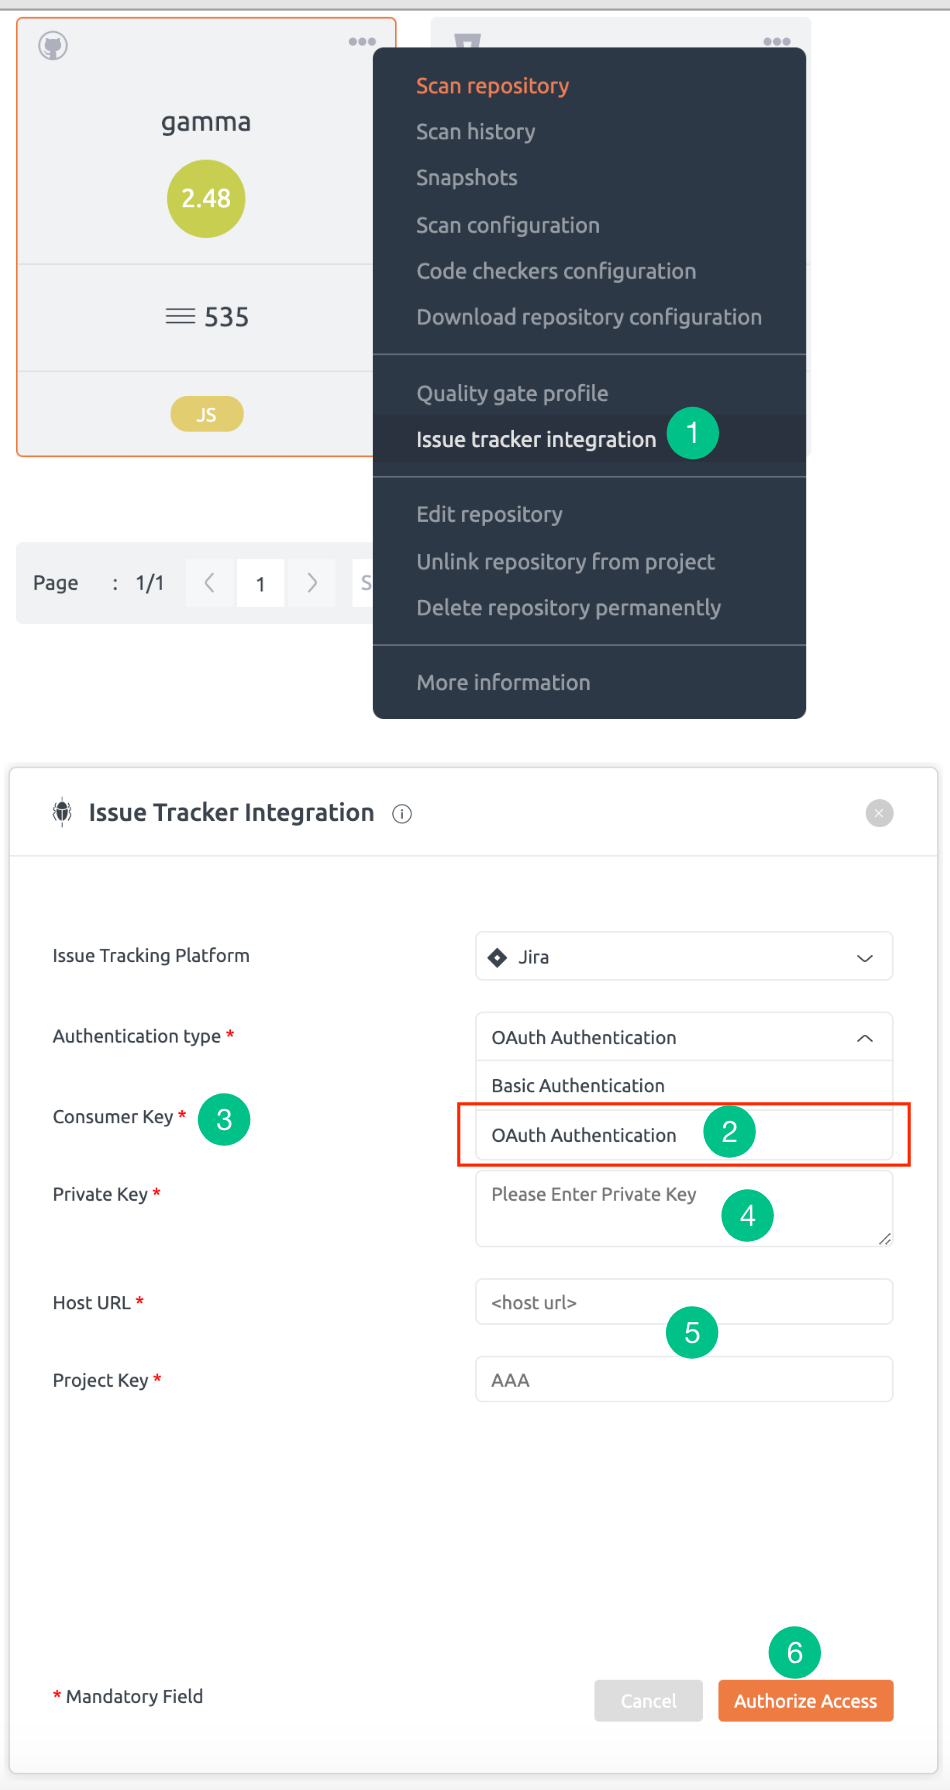
- Select the Issue tracking Integration option from the repository context menu of the desired repository.
- In Issue Tracking Integration pop-up, select OAuth Authentication from the Authentication type dropdown list.
- Generate Atlassian Consumer Key. For more information, refer to this article.
- Generate Atlassian Private Key. For more information, refer to this article.
- Mention your Host URL and Project Key.
- Click the Verify button.
- A new tab will be opened. Click on the Allow button to get access to the verification code.
- Copy the verification code and paste in the “Verification Code” text box manually.

Tasks
You can create tasks from issues detected by BrowserStack Code Quality to track them and fix them. You may create tasks on BrowserStack Code Quality using built-in tasks feature or on an integrated issue tracking system such as Jira.
Step to create a task:
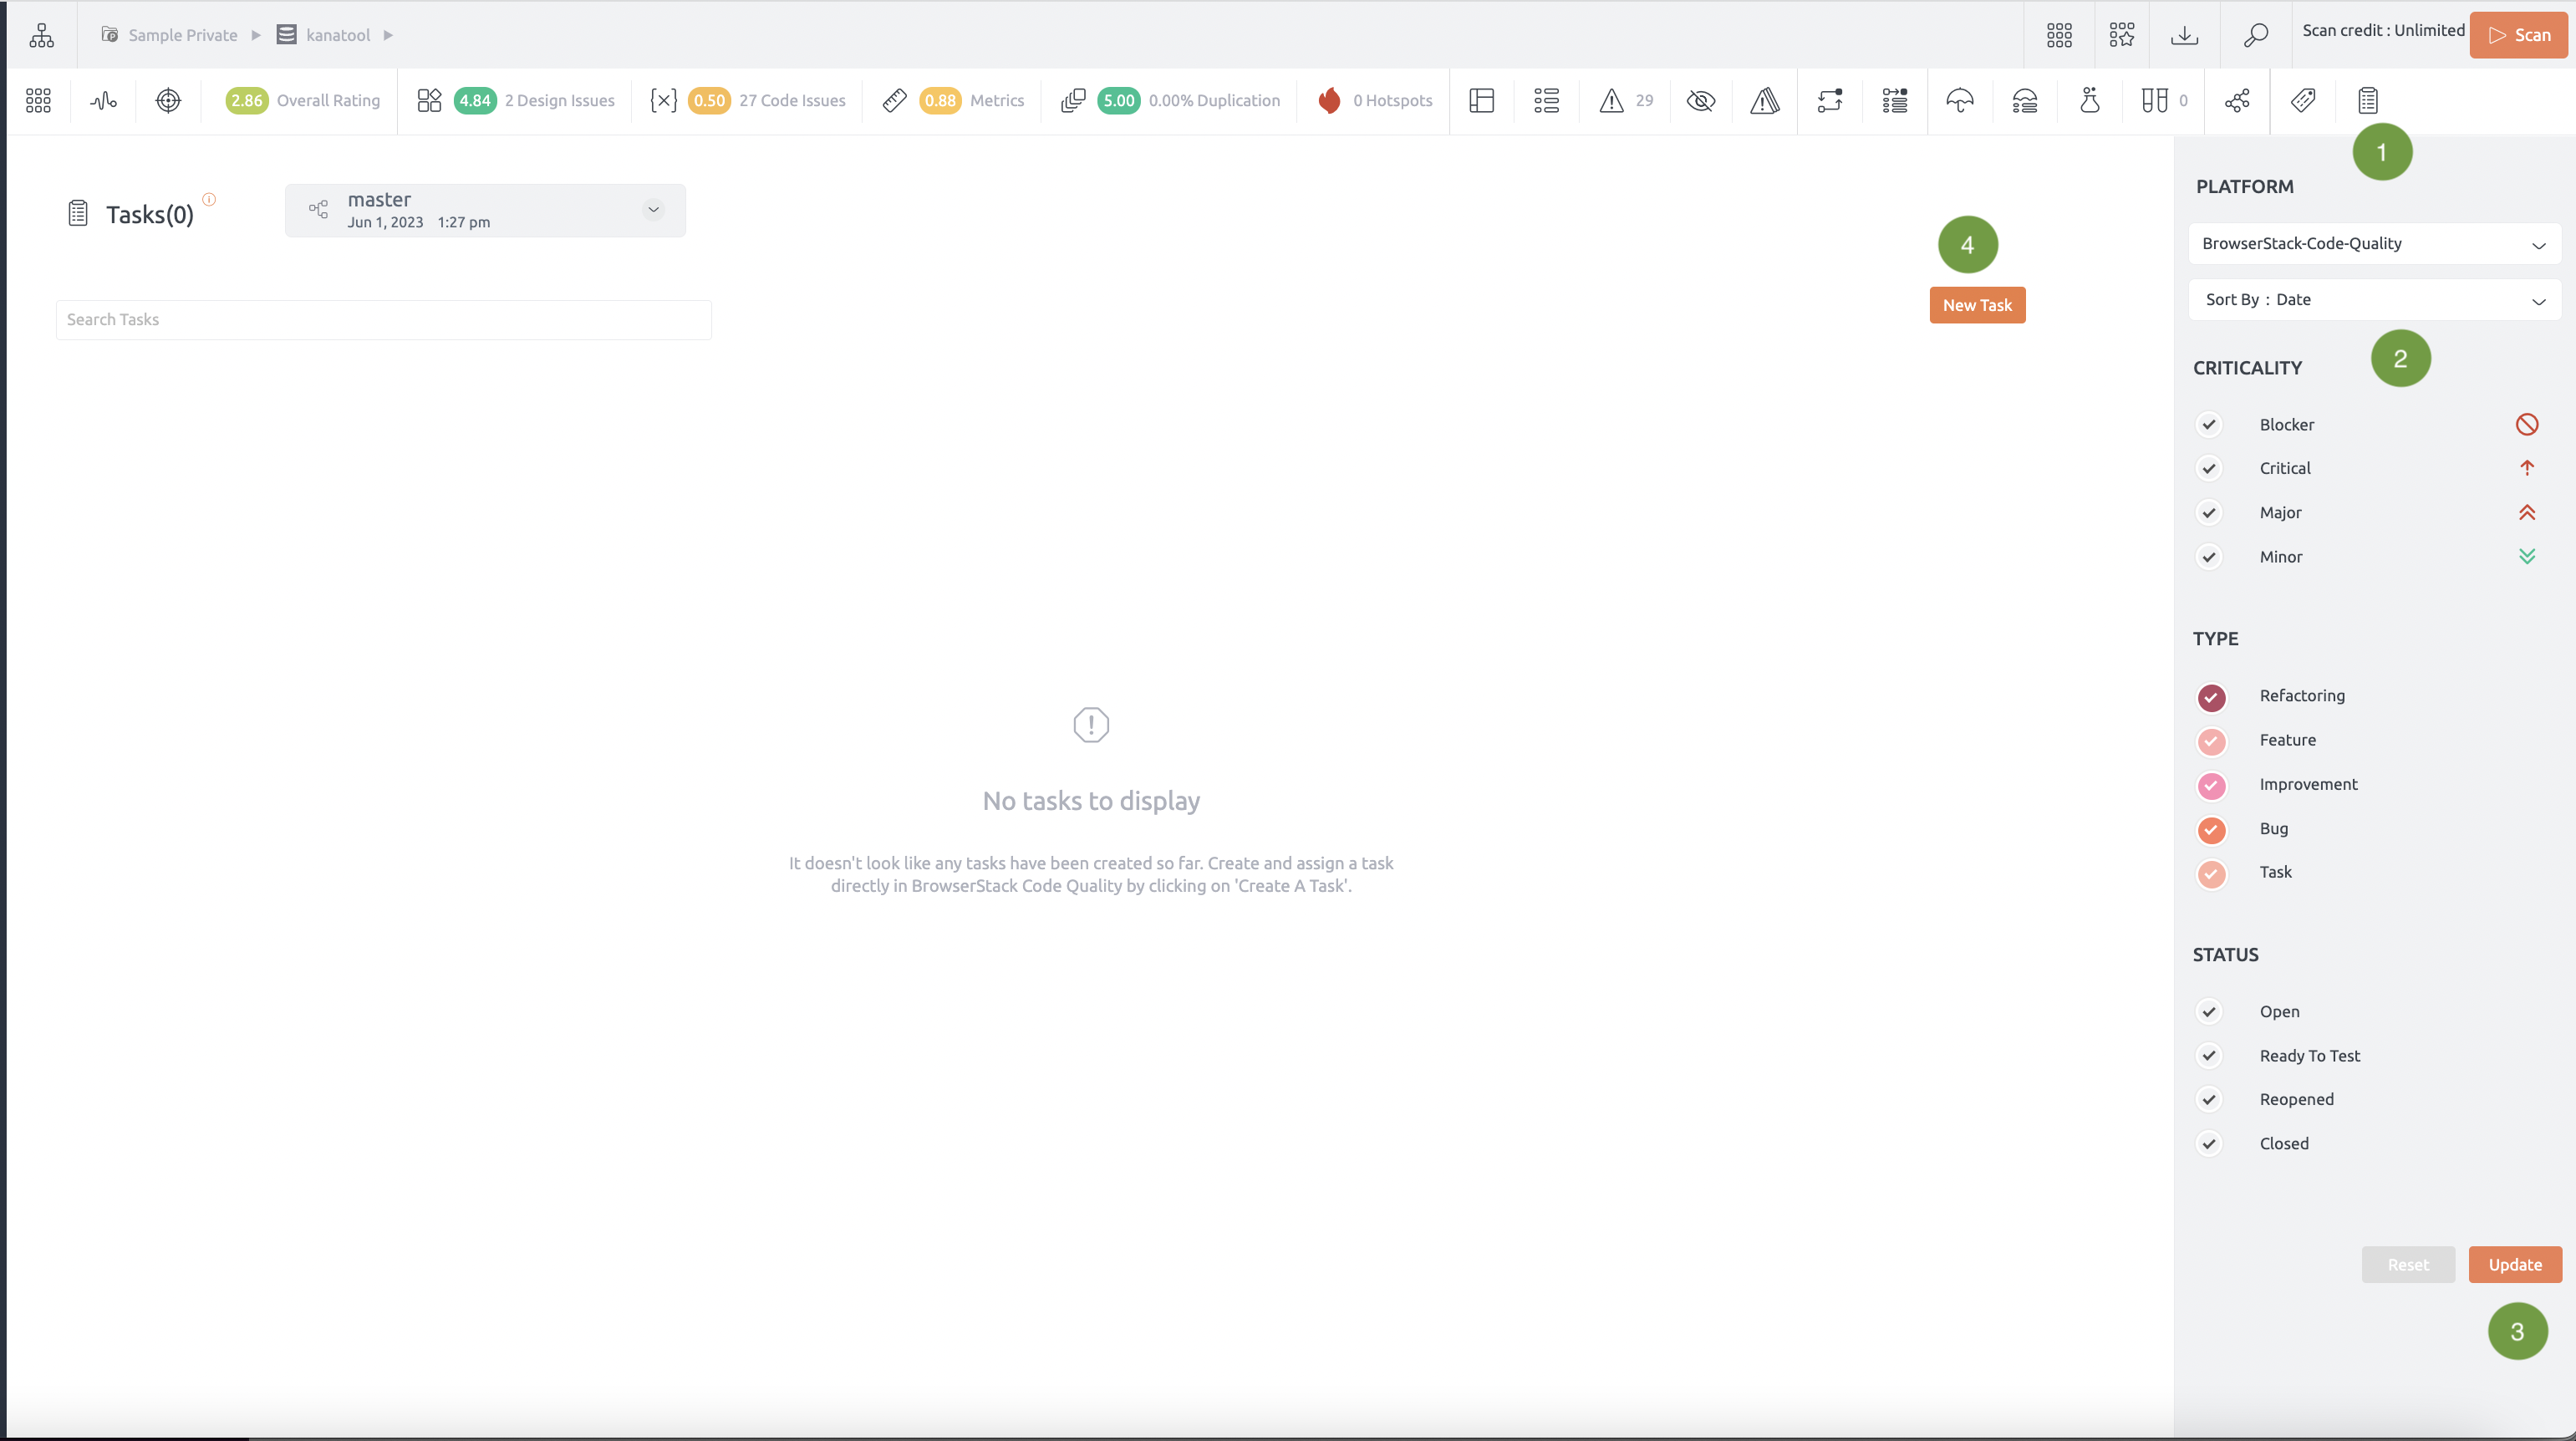
- Go to Project and open your desired repository. The Tasks can be accessed from the Component Explorer present at the top navigation bar next to the Issues tab.
- The right-side navigation pane has various filters such as : Platform, Sort By, Criticality, Type, Status.
- “Reset or Update” button is available to users for filtering the data.
- Tasks can be created from the Tasks page or Issues page. On the tasks page, click the New Task button. Or on the issues page, click +Task button on any of the issues.
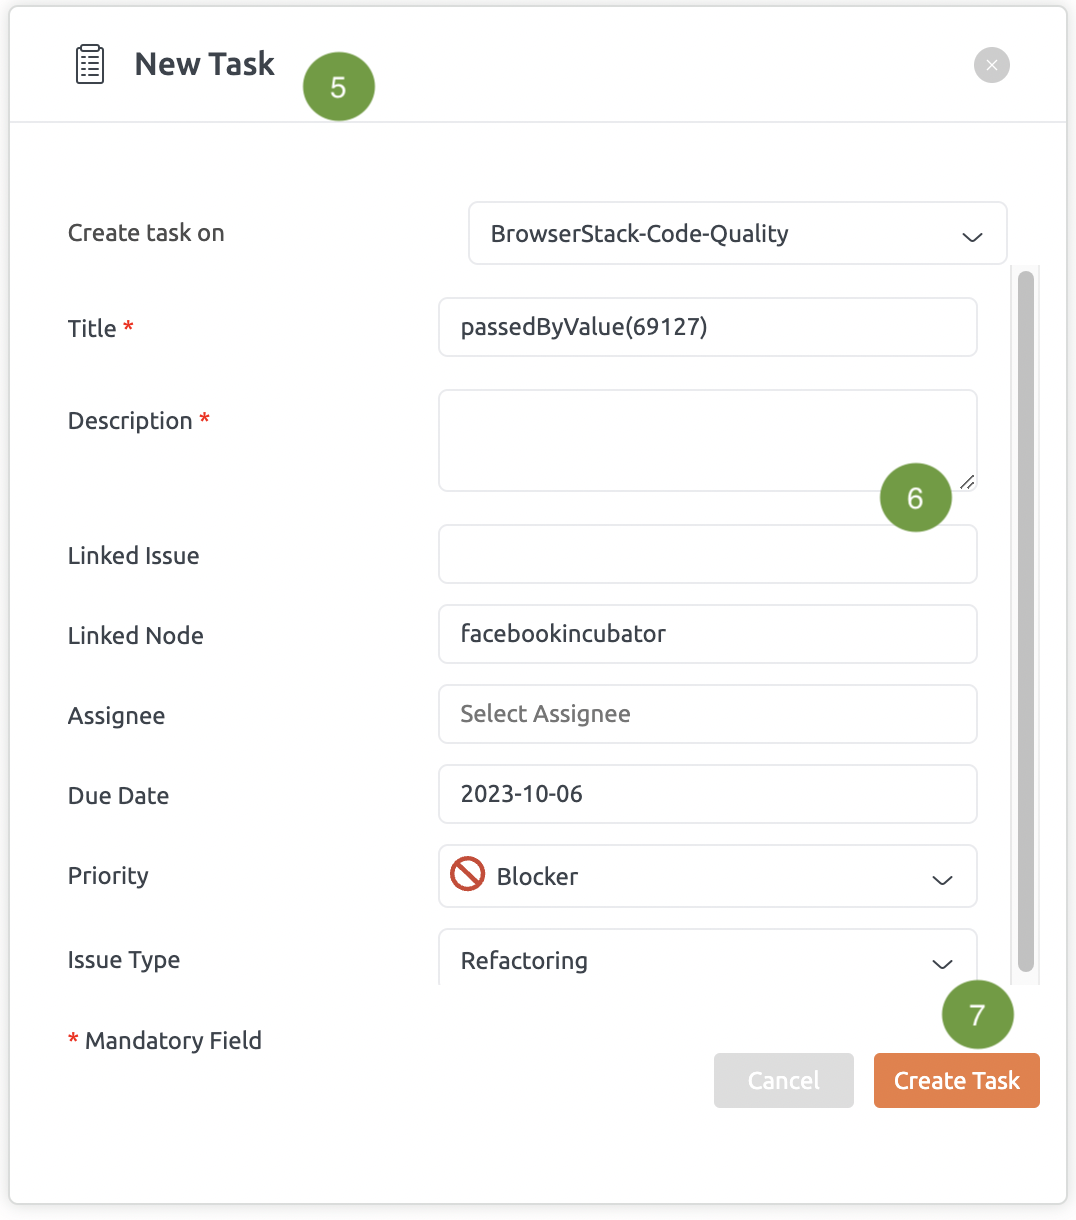
- A new task pop-up window is displayed. Tasks can be created for BrowserStack Code Quality, Jira or Azure DevOps.
- Fill in the form details.
- When the user clicks on the “Create Task” button, the newly created task will be listed on the Tasks page.