Email configuration
Email server configuration is used to configure your email server with BrowserStack Code Quality. On configuring your email server, the users will receive notifications from the configured email server.
Following are the steps to configure the email server:
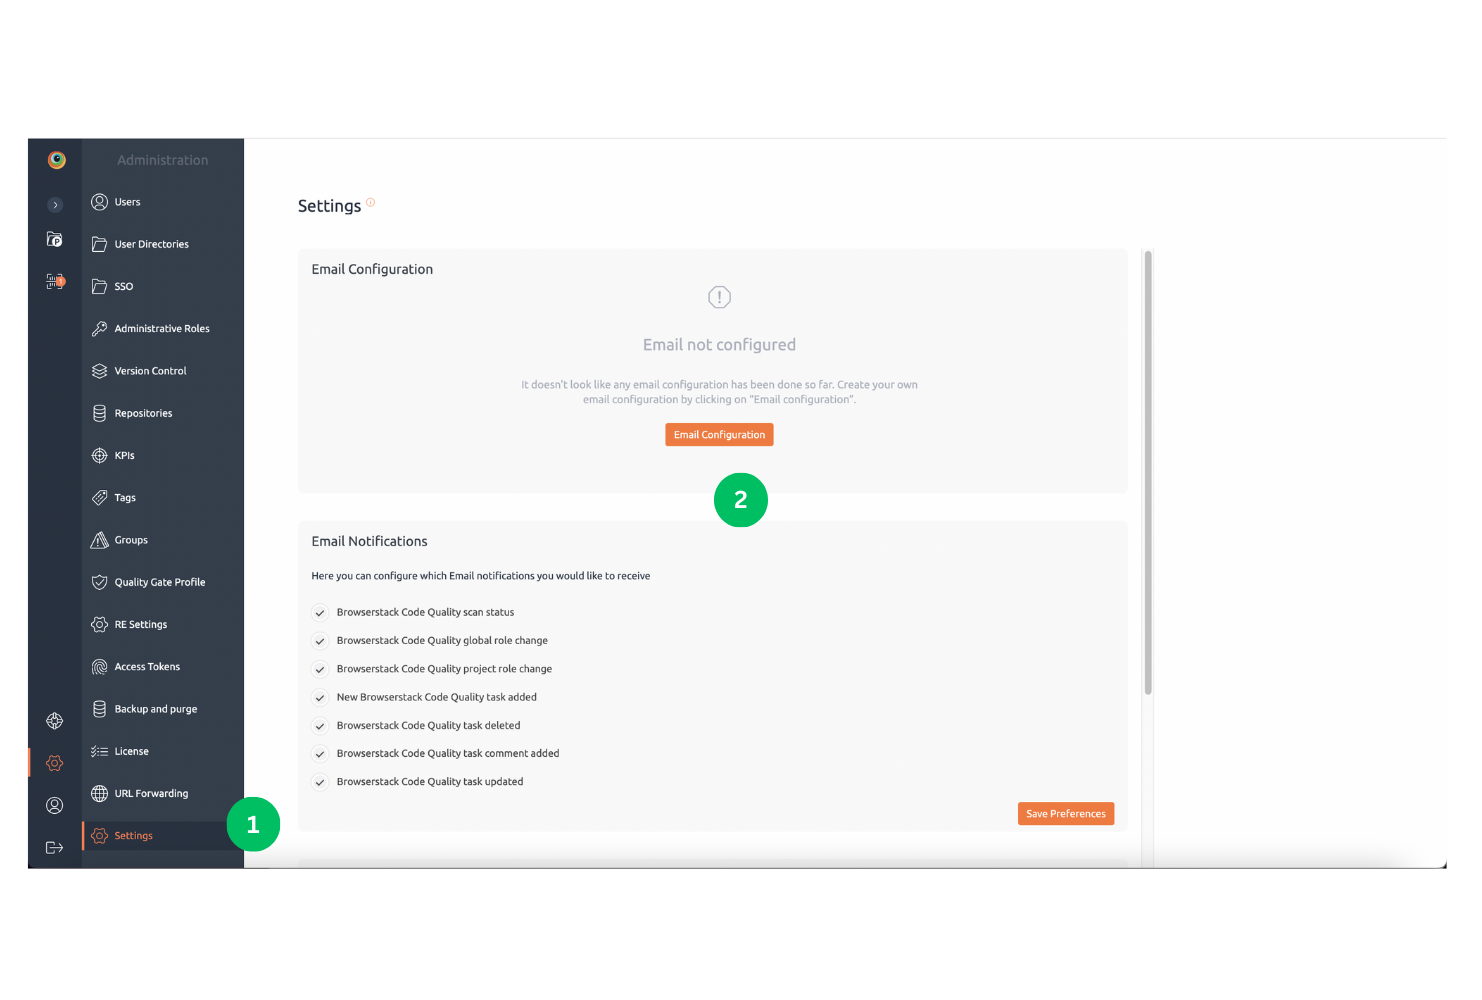
- Go to Admin > Notifications.
- Click Email Configuration.
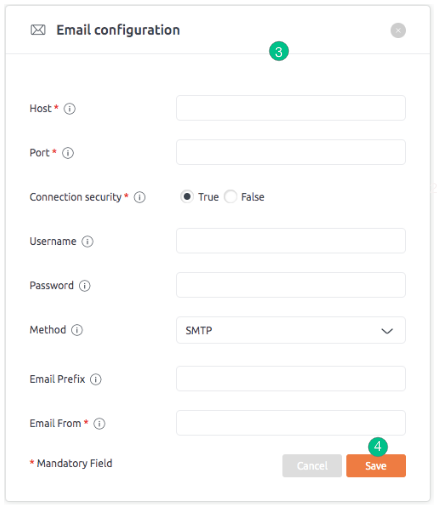
- Fill in the fields with your e-mail server configurations. The information/description regarding each field will be displayed on the information icon.
- Click the Save button.
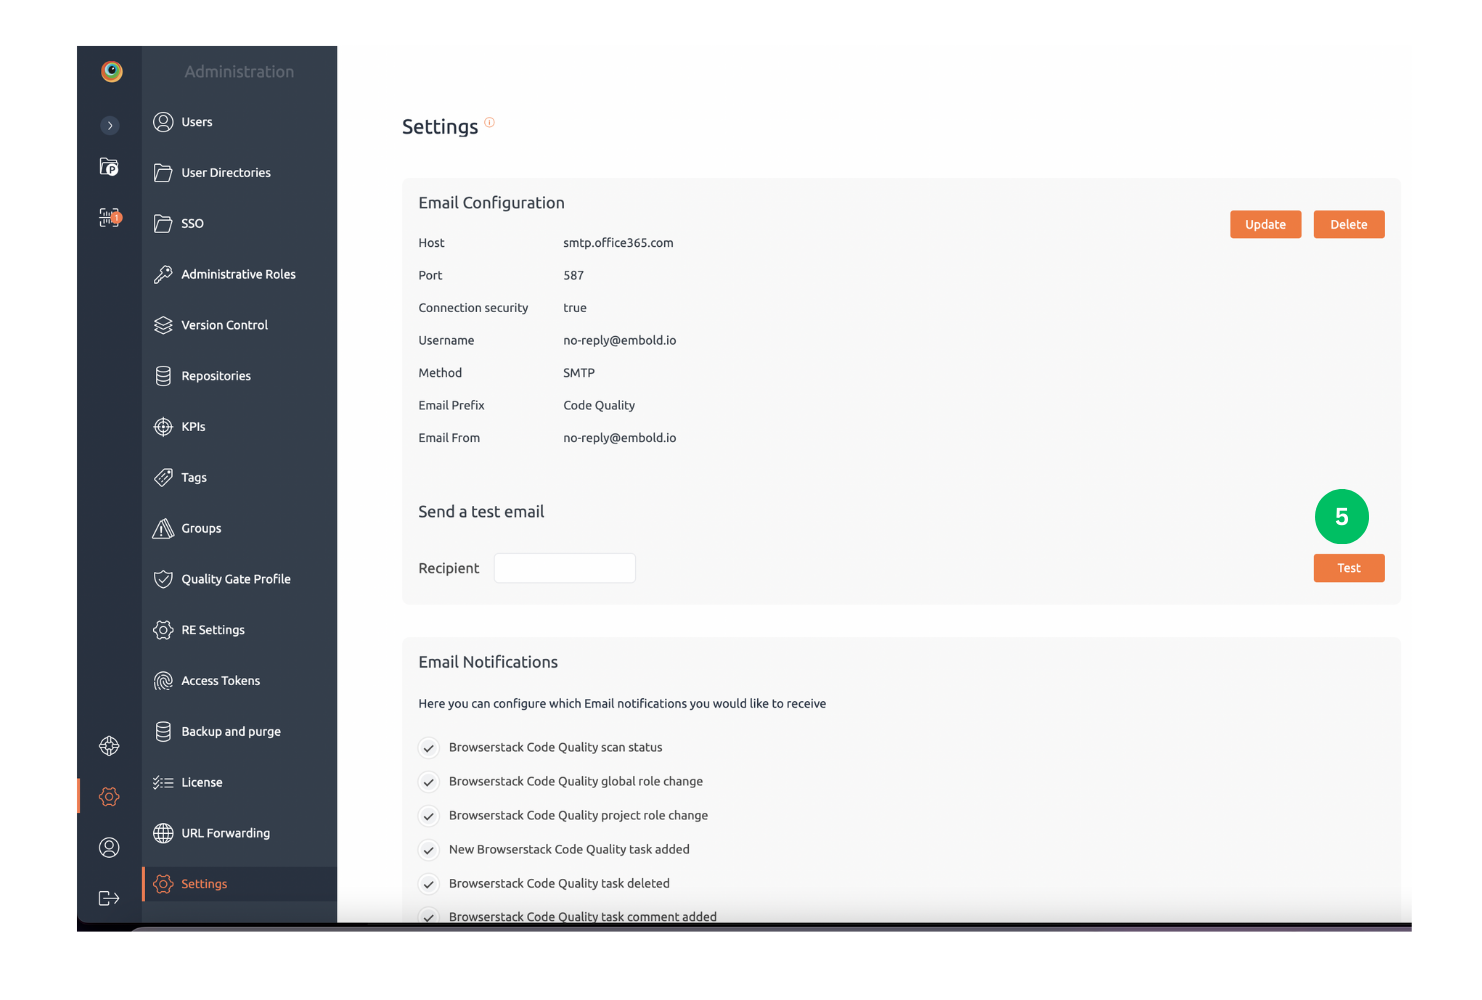
- Once an email server is configured with BrowserStack Code Quality, the user will be able to test the email server connection by clicking on the “Test” button.
When the “Test” button is clicked, an email will be sent to the provided email address.


Congratulations! You have configured your email server with BrowserStack Code Quality.
Email notifications
This selection allows users to edit/configure email preferences and receive notifications based on the occurrence of certain events.
Users can enable or disable the preferences according to his choice i.e. he can select customized email options.
Steps to configure email preferences:
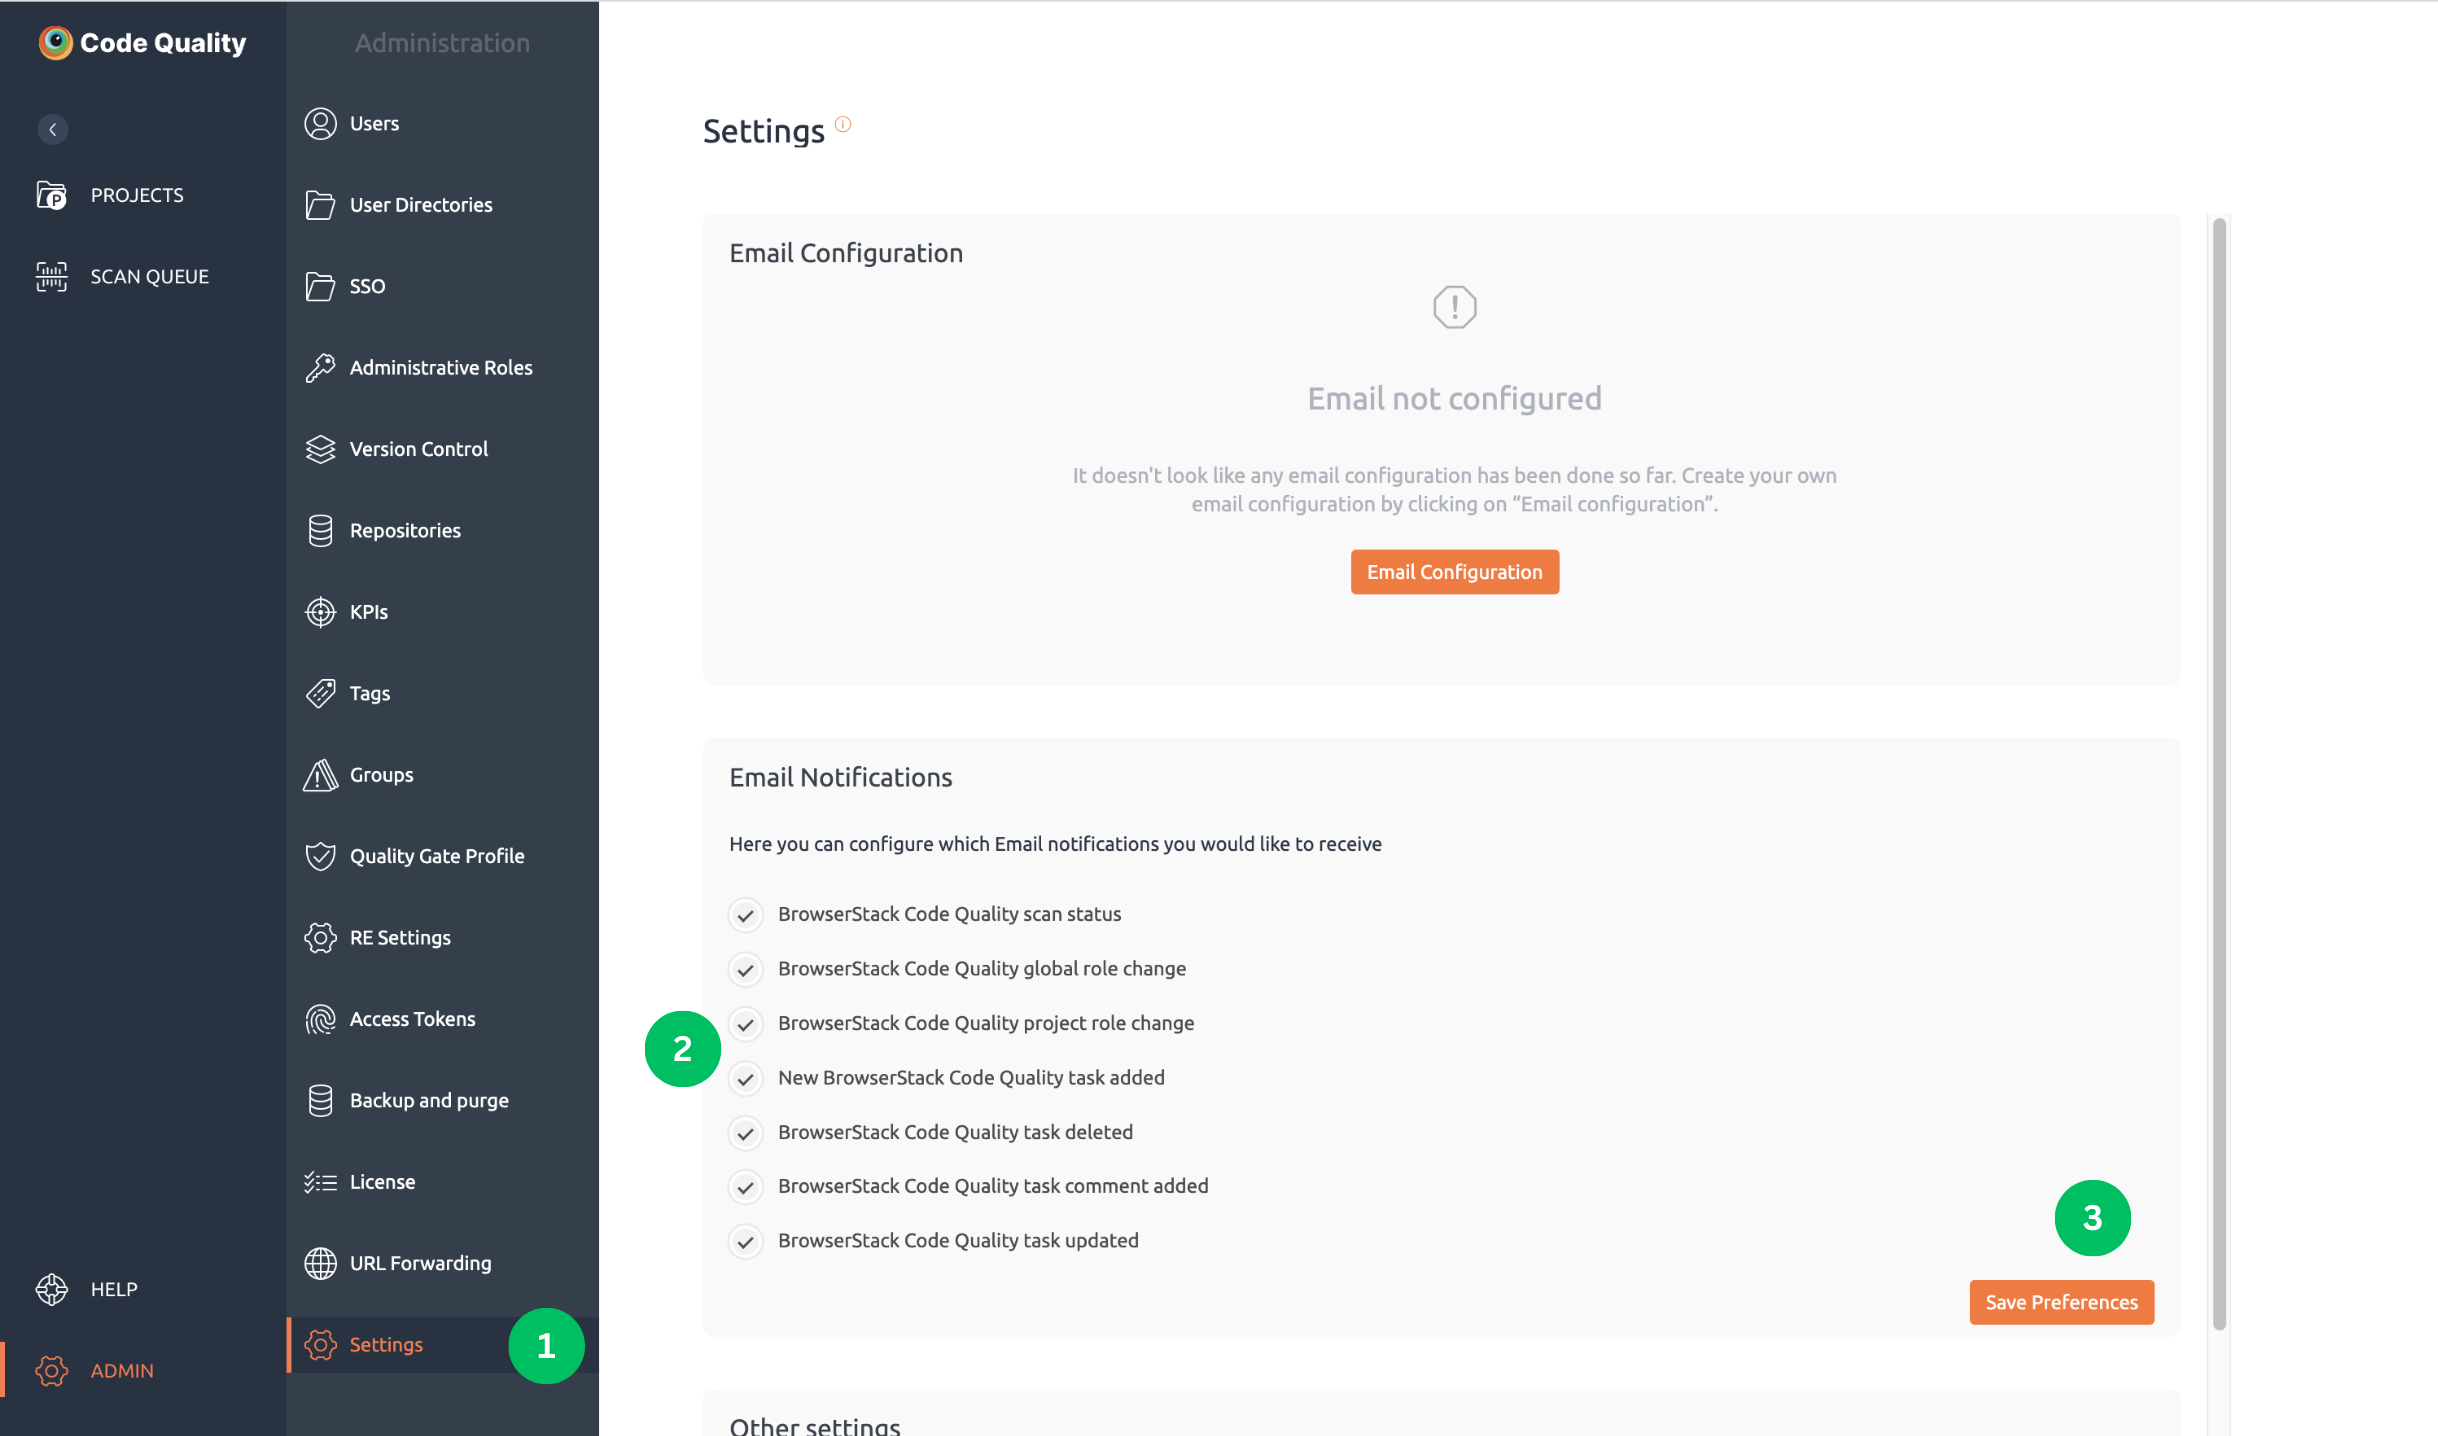
- Go to Admin > Notifications.
- There are various notification types displayed on the screen.
- By default, when the new user is created, all the checkboxes are ticked.
- Users can select or deselect the checkboxes according to the requirements.
- Click on the “Save Preferences” button. When the user clicks on this button, the newly selected preferences will be saved. Users will receive emails according to their selection.

Proxy Settings
Setup below env variables on system to use proxy :EMB_PROXY_HOSTEMB_PROXY_PORT EMB_PROXY_USERNAME EMB_PROXY_PASSWORD
Or
HTTP_PROXYHTTPS_PROXY
To exclude from proxy please set below environment variable:
no_proxy or NO_PROXY
To exclude multiple servers from proxy use ‘|’ or ‘,’ seperator in no proxy with double quote.
for e.g- no_proxy=“http://localhost:3000|http://3.72.41.7:3128” or no_proxy=“http://localhost:3000,http://3.72.41.7:3128”
Other Settings
Suppression and Group Placeholder Text
Purpose:
The placeholder text is designed to guide users in providing consistent and meaningful information when documenting suppressions. This ensures clarity and maintains high-quality documentation.
Placeholder Text for Suppression Descriptions
- Reason Placeholder:
Purpose: Encourages users to specify the reason for suppressing an issue.?
Example Placeholder Text:
Usage: Helps users justify their actions and maintain traceability.
Risk Placeholder:
Purpose: Prompts users to evaluate and describe the potential risk associated with suppression.
Example Placeholder Text:
Usage: Facilitates informed decision-making and risk assessment.
Enter a valid reason for suppressing this issue.
Describe the risks involved in suppressing this issue.
Suppression and Group Disallow Tags
Purpose:
Disallow tags help maintain organizational standards by restricting the usage of specific tags in suppressions and groups.
Suppression Disallow Tags
- Definition: Tags that are not permitted in suppression records.
- Functionality:
- Administrators define the restricted tags in the system configuration.
- Users attempting to use these tags receive an error message explaining the restriction.
- Benefits:
- Ensures compliance with organizational guidelines.
- Prevents misuse or irrelevant tagging.
Group Disallow Tags
- Definition: Tags that are not allowed in group configurations.
- Functionality:
- Similar to suppression disallow tags, these are set by administrators to restrict specific tags in group records.
- Benefits:
- Maintains consistency across group tagging.
- Enhances the accuracy and relevance of group categorizations.
