Embold integration in Jenkins can be done using 2 approaches:
- Using Embold plugin (Check limitations) or
- Using Embold CLI / Remote scan
Jenkins Plugin
Limitation in Jenkins Embold plugin:
- It is not supported in pipeline jobs.
- Embold scanner packages will not update automatically, you need to replace the new Embold scanner folder for every new release.
Installation steps
- Untar embold-scanner-1.9.7-archive.tar.gz to some location on Jenkins master/slave.
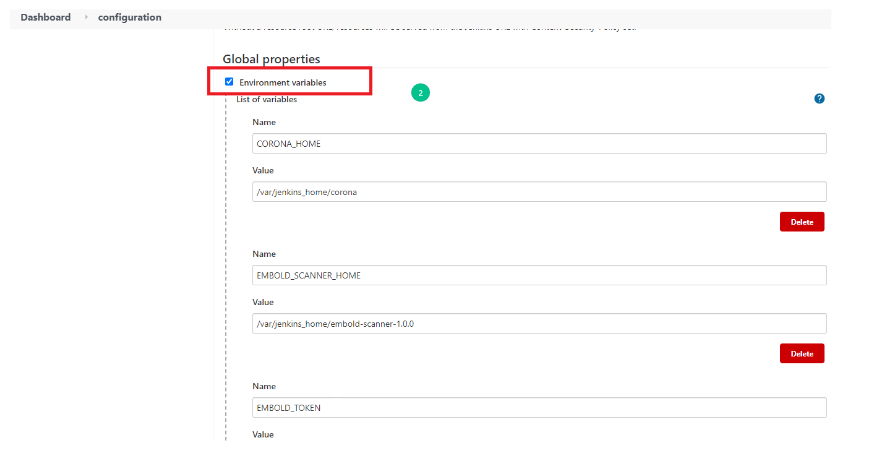
- Add the environment variables
CORONA_HOME
,CORONA_LOG
,EMBOLD_SCANNER_HOME
.CORONA_HOME
: Specify the location where Embold packages will be downloaded (e.g /opt/gamma/corona).CORONA_LOG
: Specify the location where logs for Embold Analysis will be generated.
Note: The directory should have write permissions.
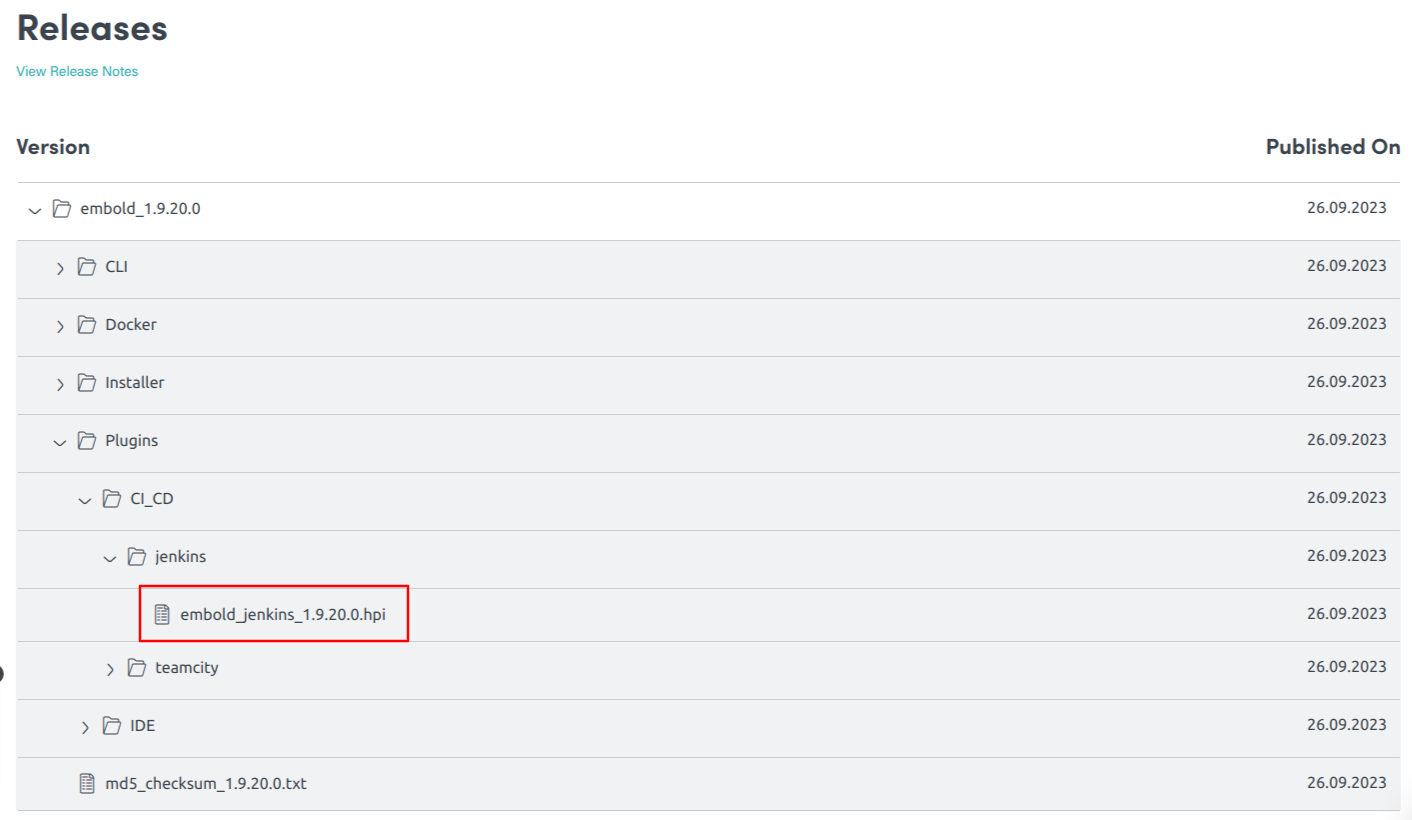
- Download Jenkins plugin from your Embold Account’s section > Releases tab > Plugins > CI_CD > jenkins. There will be file with a name similar to the following: Embold-Jenkins-Plugin-1.9.17.0.hpi.
- Click on “Manage Jenkins” on Jenkins’s home page.
- Jump to the Advanced tab.
- Go to the Upload Plugin section and upload “Embold-Jenkins-Plugin-1.9.17.0.hpi”.Click the “Upload” button.
- After Embold Jenkins Plugin is updated, Jenkins needs to be restarted.
Using CLI
Installation using Embold CLI / Remote scan
- Download the embold-scanner binaries from Embold control panel.
- Put the binaries in some directory where Jenkins user can access them (Make sure that the Jenkins user has
read-write-execute
permission). - Select Execute shell / Execute Windows batch command depending on OS where your job is running. (For pipeline jobs you can add following command in pipeline steps after build steps )
- Add a following command in ‘Command’ section
- For Windows, run the below command:
<Embold scanner path>/embold-scanner.bat -c <repository configuration path>/repository-configuration.json -u <Embold server URL> -t <Embold token> -sh <unique path where scanner packages will be downloaded> -r <Embold repository UID> -l <custom log directory>
- For Linux, run the below command:
<Embold scanner path>/embold-scanner -c <repository configuration path>/repository-configuration.json -u <Embold server URL> -t <Embold token> -sh <unique path where scanner packages will be downloaded> -r <Embold repository UID> -l <custom log directory>
For E.g./var/jenkins_home/embold-scanner-1.9.7/bin/embold-scanner -c ./repository-configuration.json -u http://192.168.2.38:3001/ -t eyJhbGciOiJFUzI1NiIsInR5cCI6IkpXVCJ9.eyJpZCI6MTYyODA2NTAxOTcyMSwiaWF0IjoxNjI4MDY1MDE5fQ.RehuKmSsWu7BaRvNgKGBMreOsy4d1GHXju53ujAr5QQLqqOOG48_sf7l4L_9aHcq40_hSWSiMR2coR4kXTJutPQ -sh ./embold -r 75b058cd126d1316af094632dfc47b01 -l ./logs
- For Windows, run the below command:
Note:
Make sure your Embold scanner package path (argument for -sh) is unique for each job