Embold integration in Jenkins can be done using 2 approaches:

  1. Using Embold plugin (Check limitations) or
  2. Using Embold CLI / Remote scan

Jenkins Plugin

Limitation in Jenkins Embold plugin:

  1. It is not supported in pipeline jobs.
  2. Embold scanner packages will not update automatically, you need to replace the new Embold scanner folder for every new release.

Installation steps

  1. Untar embold-scanner-1.0.0-archive.tar.gz to some location on Jenkins master/slave.
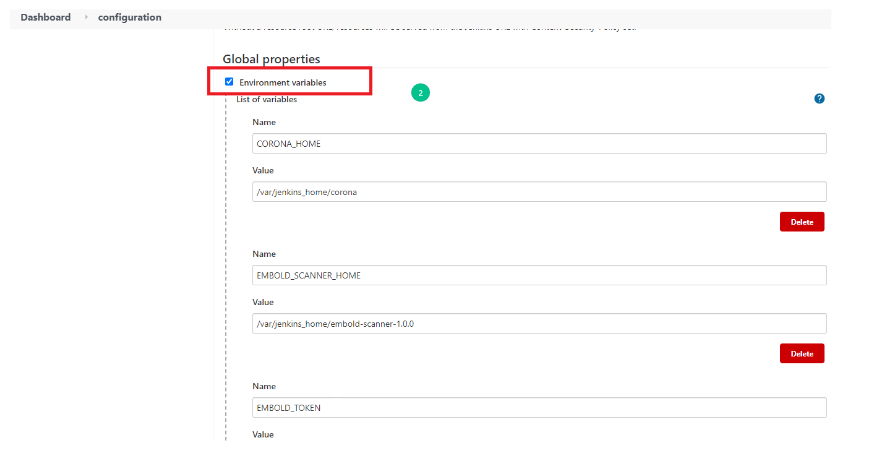
  2. Add the environment variables CORONA_HOME, CORONA_LOG,EMBOLD_SCANNER_HOME .
    1. CORONA_HOME: Specify the location where Embold packages will be downloaded (e.g /opt/gamma/corona).
    2. CORONA_LOG: Specify the location where logs for Embold Analysis will be generated.
      Note: The directory should have write permissions.
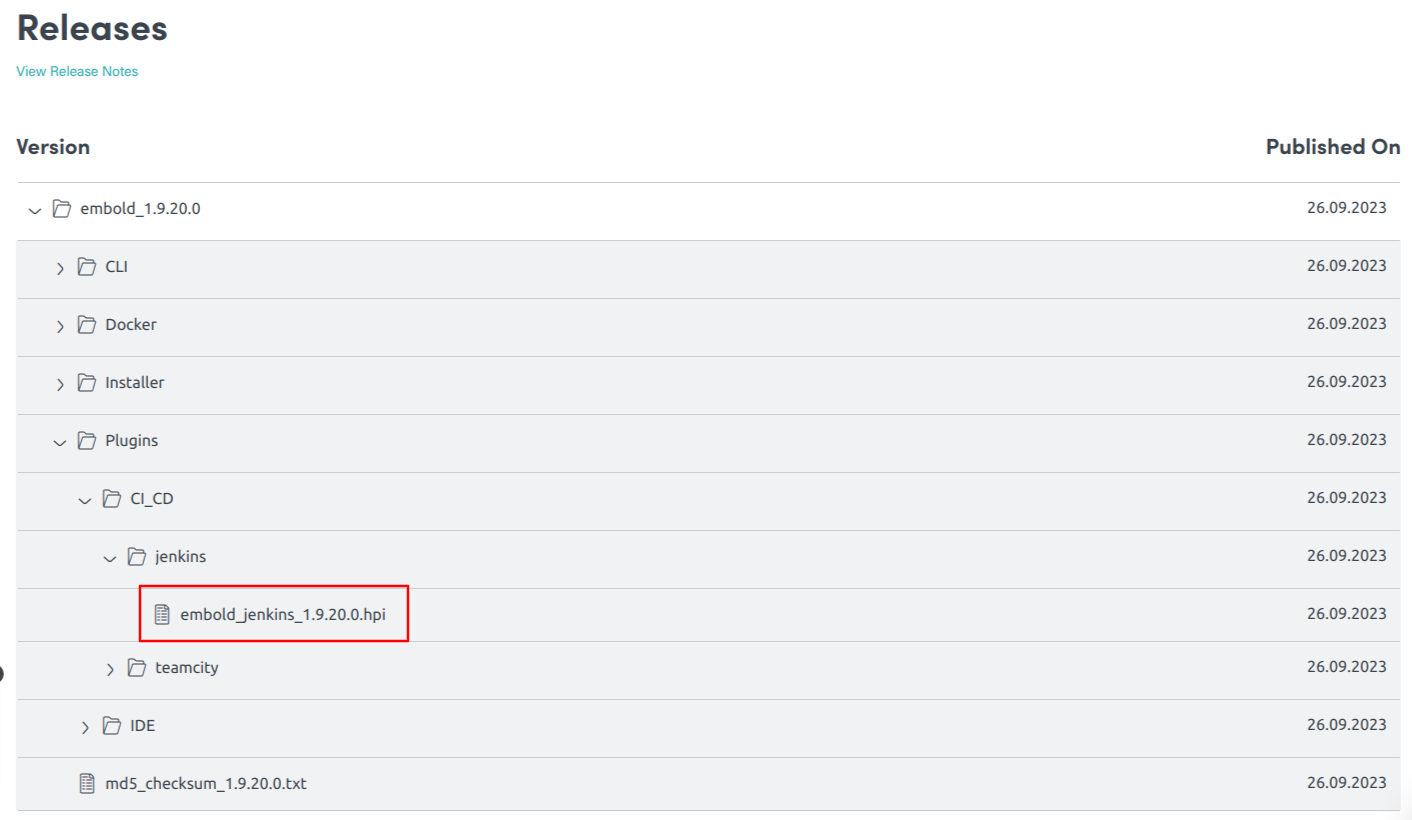
  3. Download Jenkins plugin from your Embold Account’s section > Releases tab > Plugins > CI_CD > jenkins. There will be file with a name similar to the following: Embold-Jenkins-Plugin-1.9.17.0.hpi.
  4. Click on “Manage Jenkins” on Jenkins’s home page.
  5. Jump to the Advanced tab.
  6. Go to the Upload Plugin section and upload “Embold-Jenkins-Plugin-1.9.17.0.hpi”.Click the “Upload” button.
  7. After Embold Jenkins Plugin is updated, Jenkins needs to be restarted.
Using CLI

Installation using Embold CLI / Remote scan

  1. Download the embold-scanner binaries from Embold control panel.
  2. Put the binaries in some directory where Jenkins user can access them (Make sure that the Jenkins user has read-write-execute permission).
  3. Select Execute shell / Execute Windows batch command depending on OS where your job is running. (For pipeline jobs you can add following command in pipeline steps after build steps )
  4. Add a following command in ‘Command’ section
    1. For Windows, run the below command:
      <Embold scanner path>/embold-scanner.bat -c <repository configuration path>/repository-configuration.json -u <Embold server URL> -t <Embold token> -sh <unique path where scanner packages will be downloaded> -r <Embold repository UID> -l <custom log directory>
    2. For Linux, run the below command:
      <Embold scanner path>/embold-scanner -c <repository configuration path>/repository-configuration.json -u <Embold server URL> -t <Embold token> -sh <unique path where scanner packages will be downloaded> -r <Embold repository UID> -l <custom log directory>

      For E.g.
      /var/jenkins_home/embold-scanner-1.0.0/bin/embold-scanner -c ./repository-configuration.json -u http://192.168.2.38:3001/ -t eyJhbGciOiJFUzI1NiIsInR5cCI6IkpXVCJ9.eyJpZCI6MTYyODA2NTAxOTcyMSwiaWF0IjoxNjI4MDY1MDE5fQ.RehuKmSsWu7BaRvNgKGBMreOsy4d1GHXju53ujAr5QQLqqOOG48_sf7l4L_9aHcq40_hSWSiMR2coR4kXTJutPQ -sh ./embold -r 75b058cd126d1316af094632dfc47b01 -l ./logs
Note:
Make sure your Embold scanner package path (argument for -sh) is unique for each job