Below are the steps to integrate Jira with basic authentication and OAuth authentication:
A. Steps to integrate Jira with Basic authentication
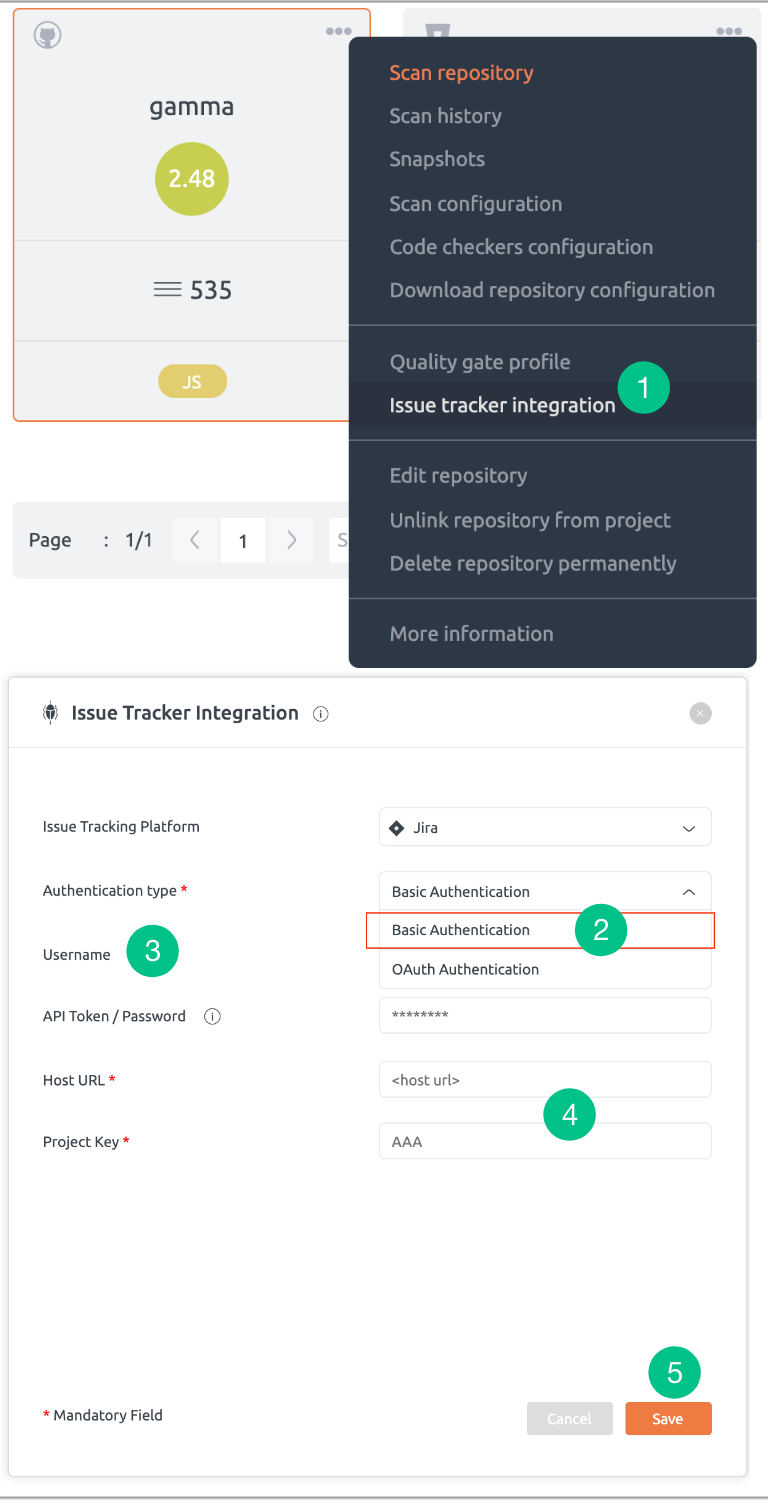
- Select the Issue tracker Integration option from the repository context menu of the desired repository.
- In Issue Tracker Integration pop-up, by default Basic Authentication is displayed from the Authentication type dropdown list.
- Enter your username and generate the Atlassian API token. For more information, refer to this article.
- Mention your Host URL and Project Key.
- Click the Save button to add the JIRA account successfully.
Note:
API tokens are used for basic authentication as Jira has deprecated the use of passwords. Password-based authentication will work for older versions of Jira only.
API tokens are used for basic authentication as Jira has deprecated the use of passwords. Password-based authentication will work for older versions of Jira only.
Jira has introduced PAT for Jira on-premise version 8.14 and later. BrowserStack Code Quality is in process of adding support for login using PAT.
BrowserStack Code Quality works with Jira cloud (all versions) and Jira on-premise version 8.13 and below.

B. Steps to integrate Jira with OAuth
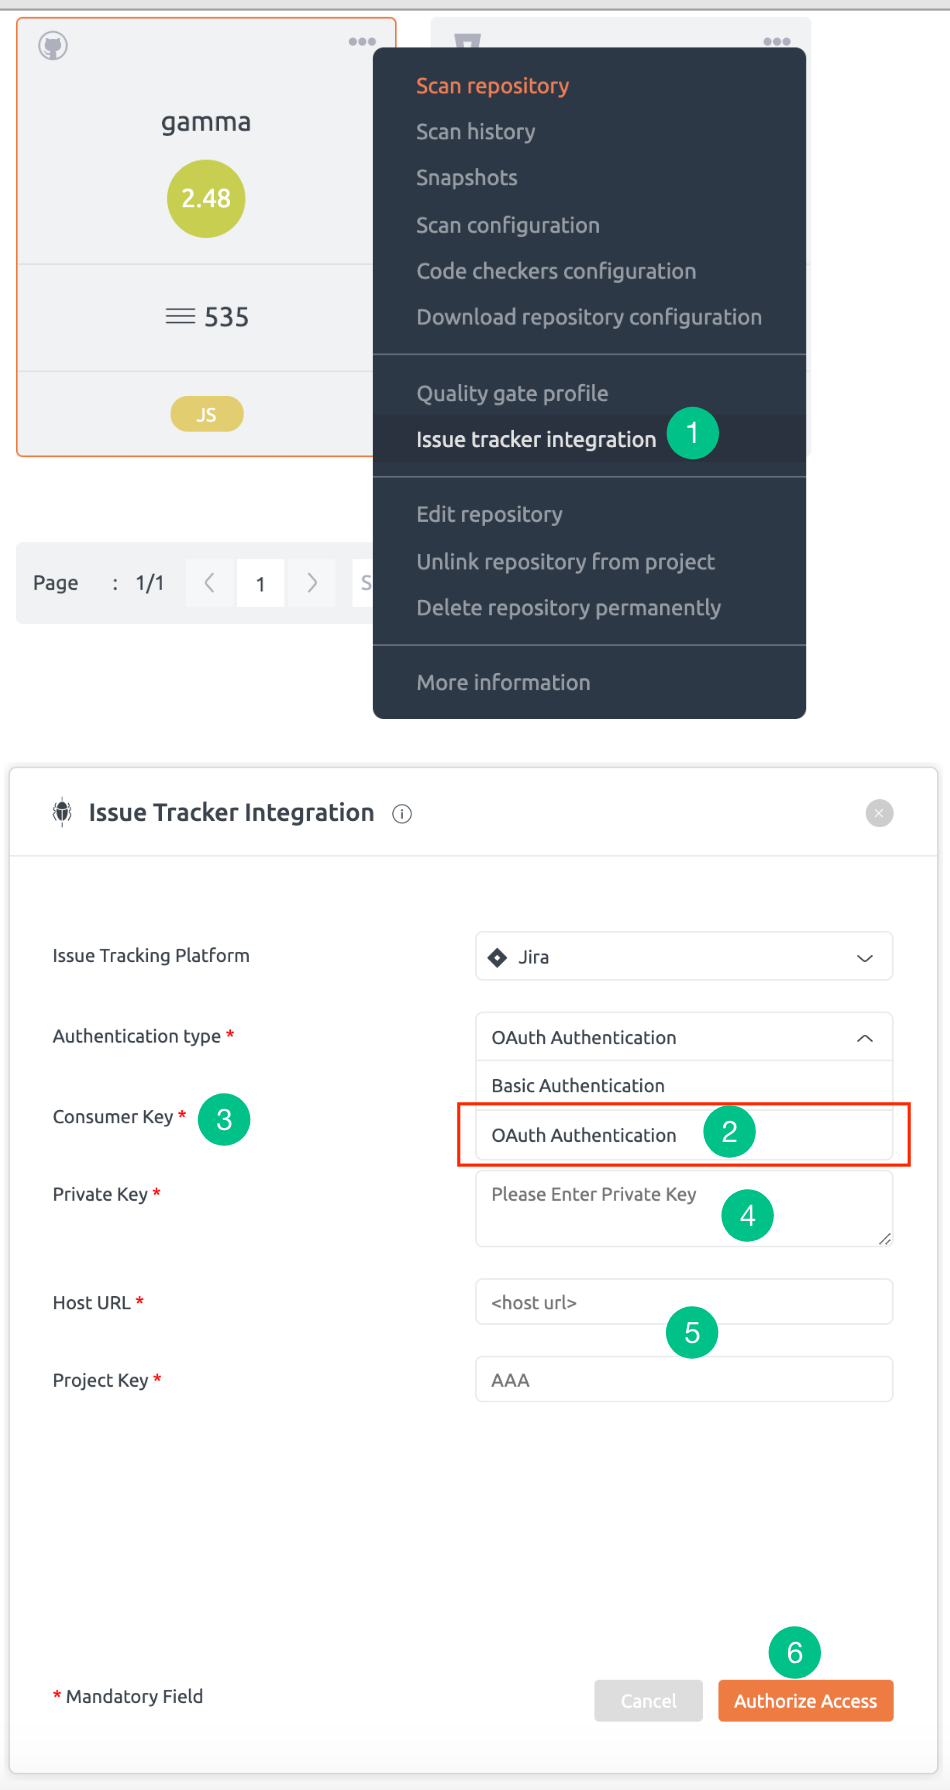
- Select the Issue tracking Integration option from the repository context menu of the desired repository.
- In Issue Tracking Integration pop-up, select OAuth Authentication from the Authentication type dropdown list.
- Generate Atlassian Consumer Key. For more information, refer to this article.
- Generate Atlassian Private Key. For more information, refer to this article.
- Mention your Host URL and Project Key.
- Click the Verify button.
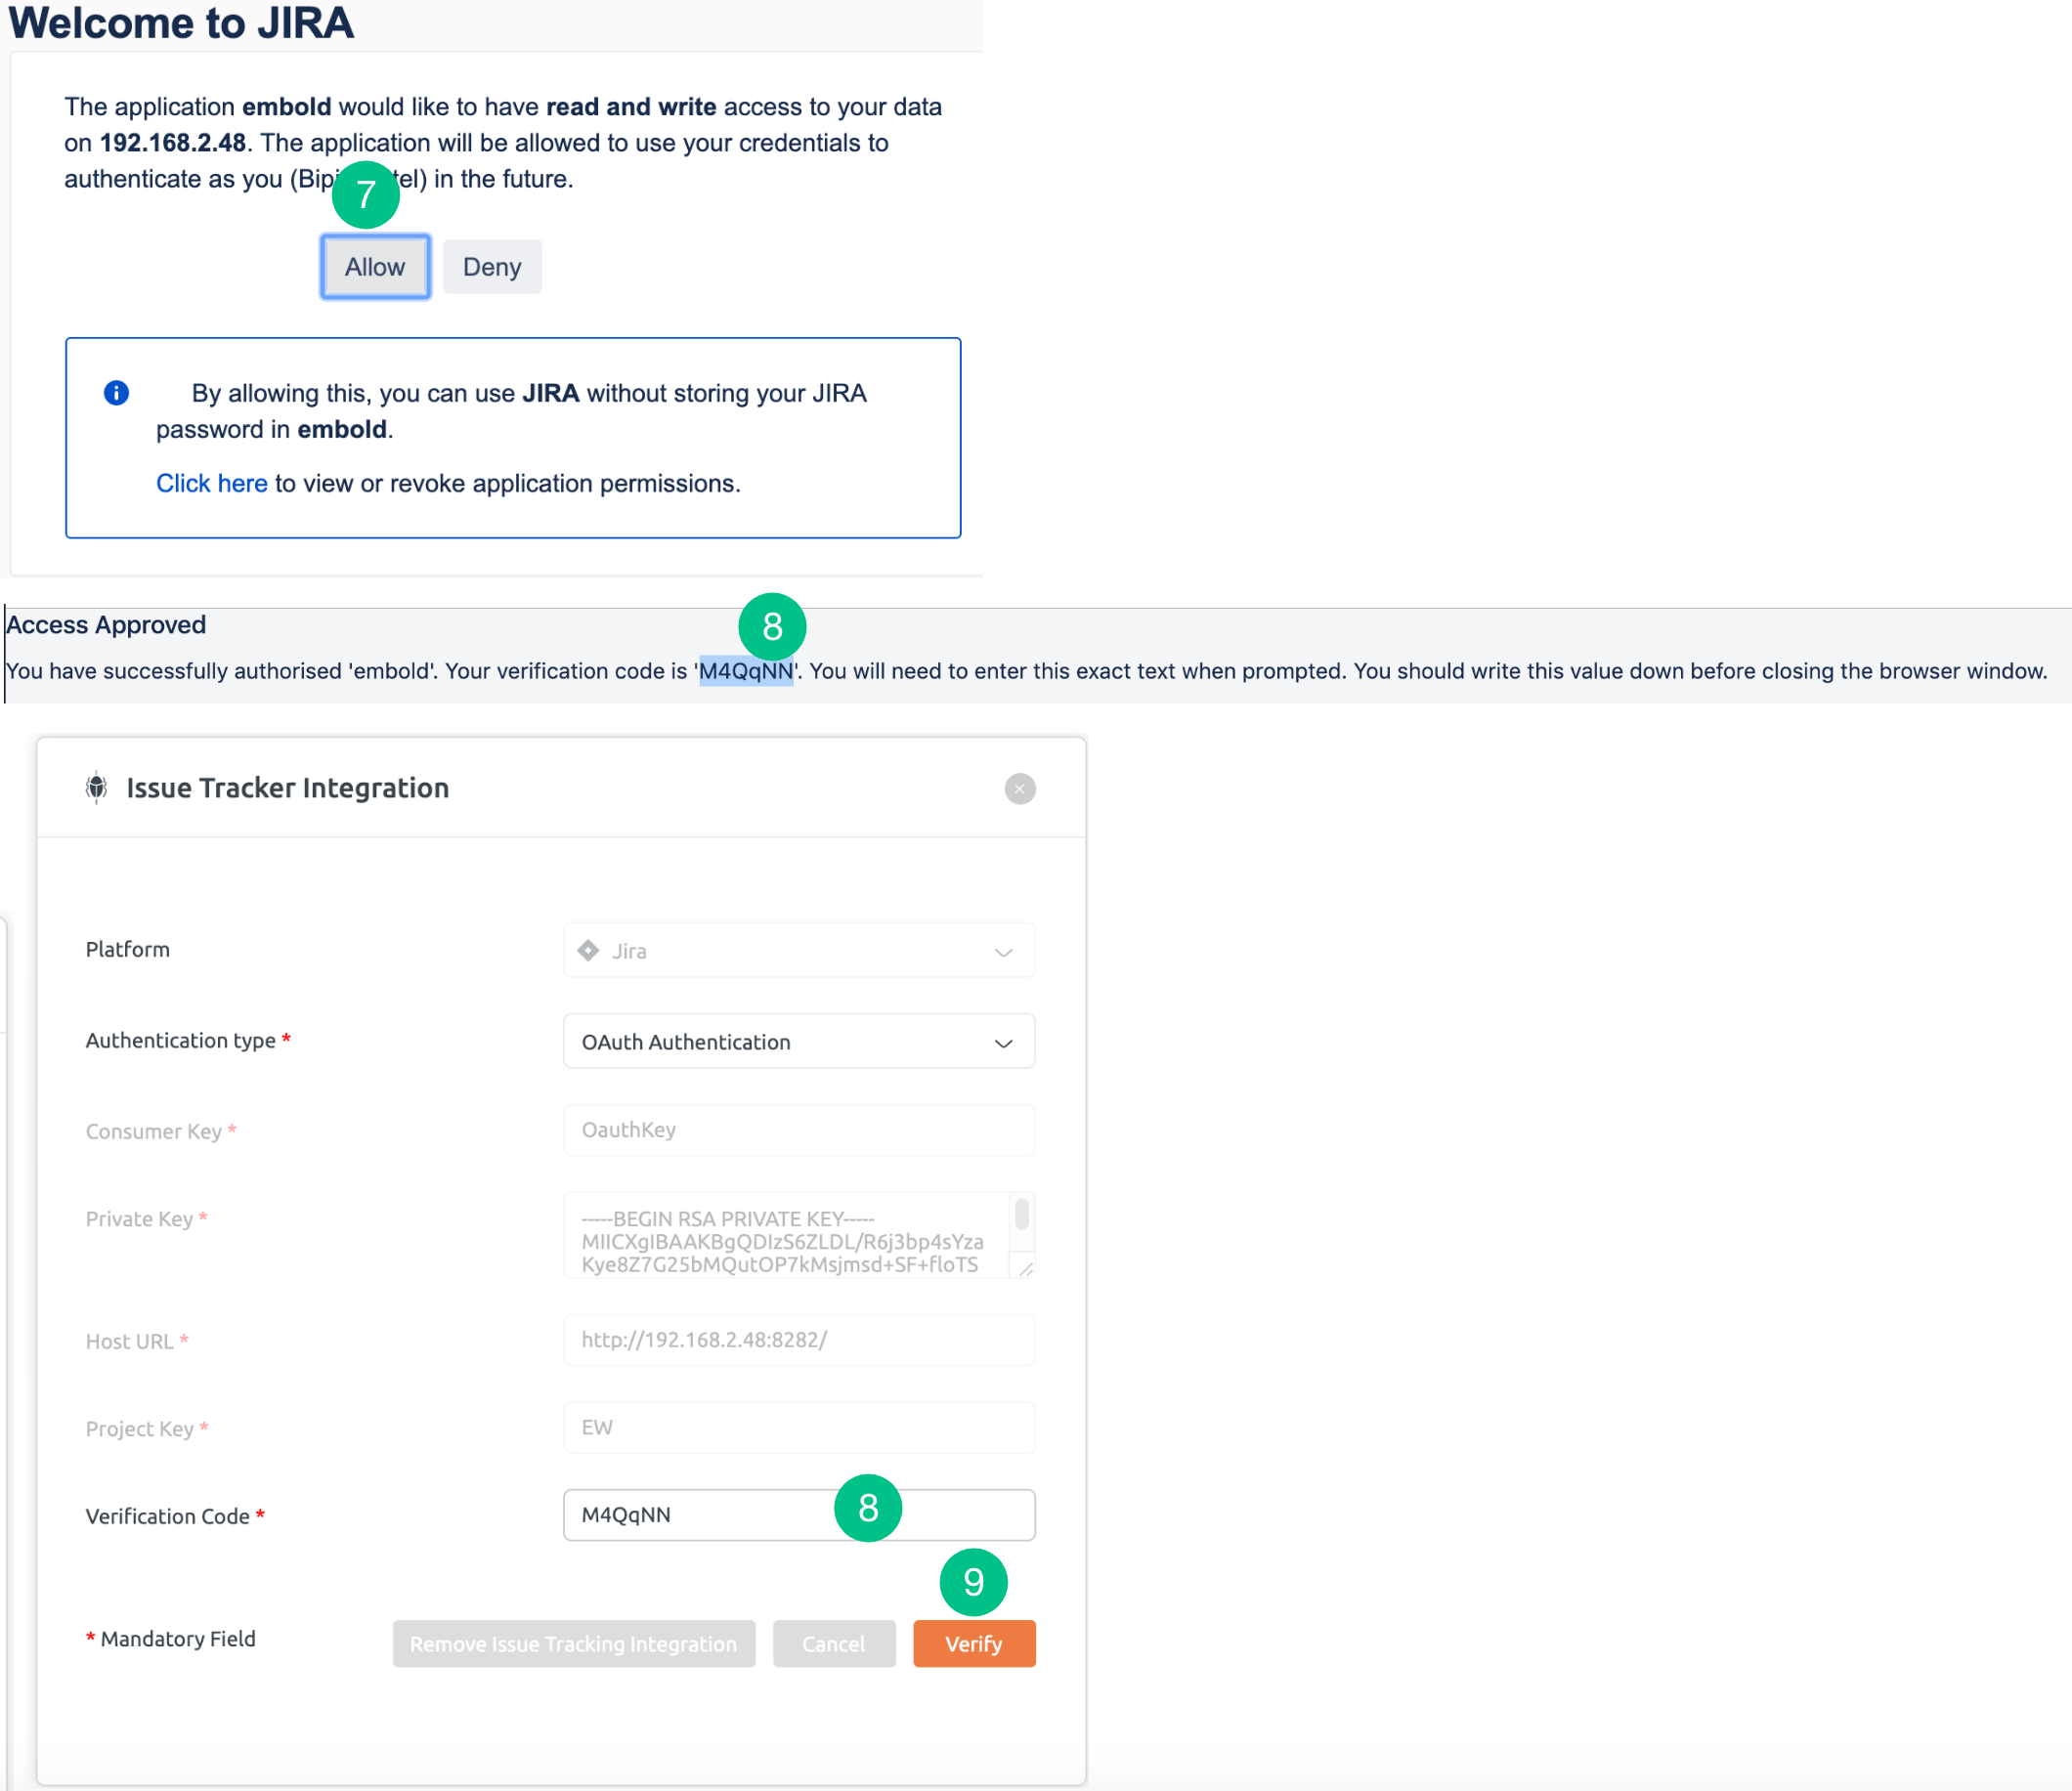
- A new tab will be opened. Click on the Allow button to get access to the verification code.
- Copy the verification code and paste in the “Verification Code” text box manually.
Note: If the user stays idle for sometime, token gets expired.


