SAML (Security Assertion Markup Language) is mainly used for authentication purposes.
Tested on : Okta , Auth0 , Azure SAML and OneLogin
How to go to SSO Settings?
Navigate to the SSO tab in the administration section. SSO Settings page will be displayed that contains a list of providers.
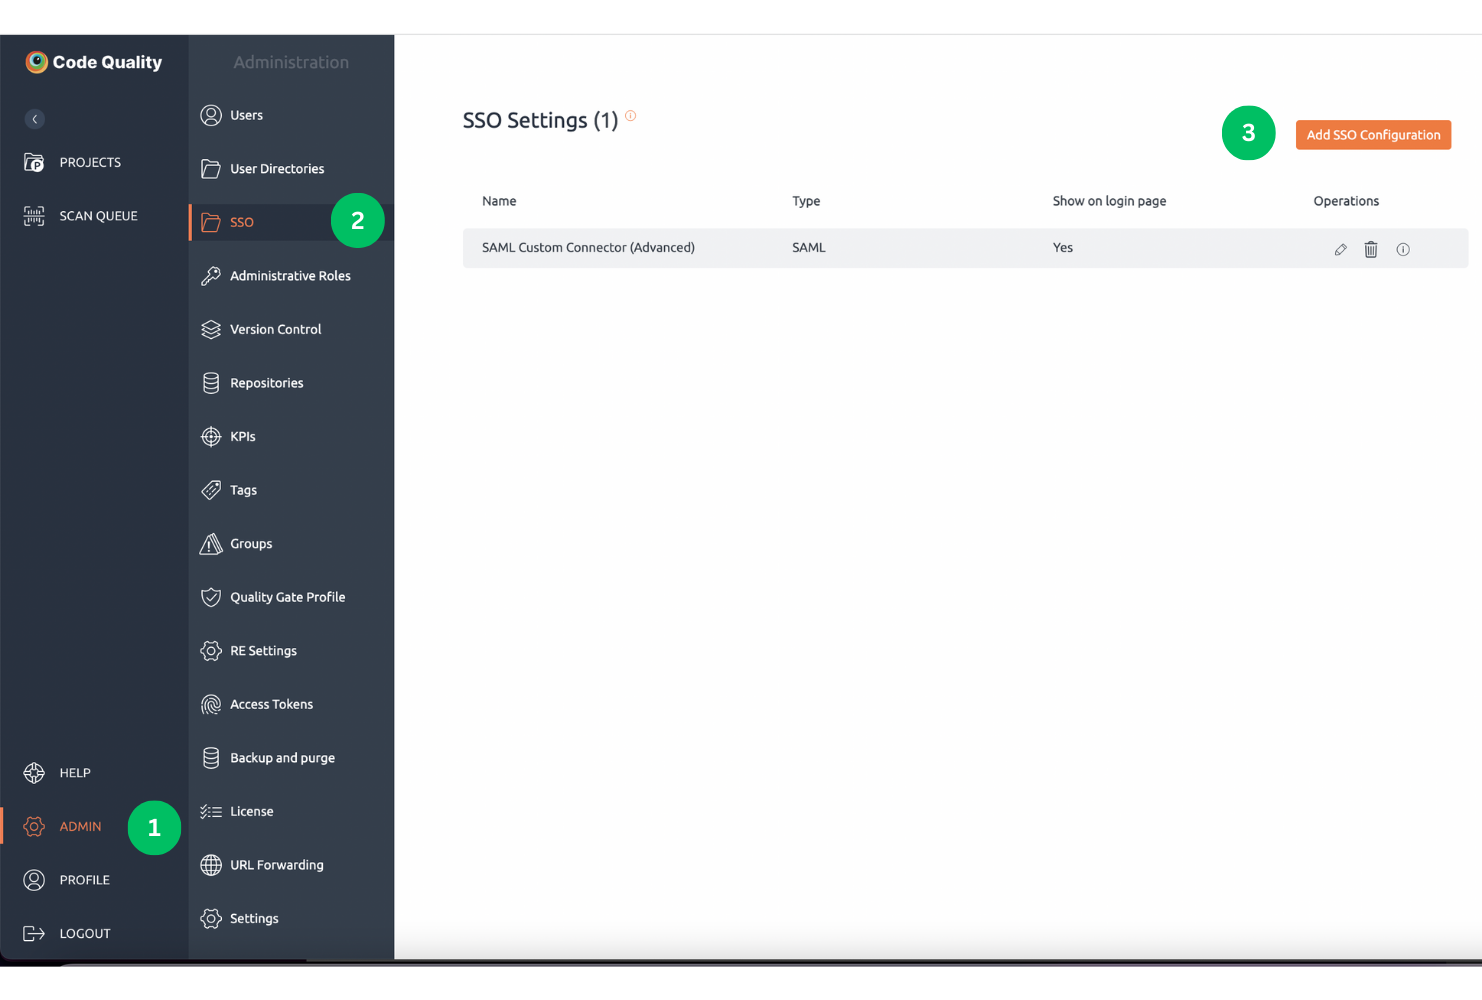
Currently, this SSO is only available for on-premise customers and not on the cloud.
Configuration Settings
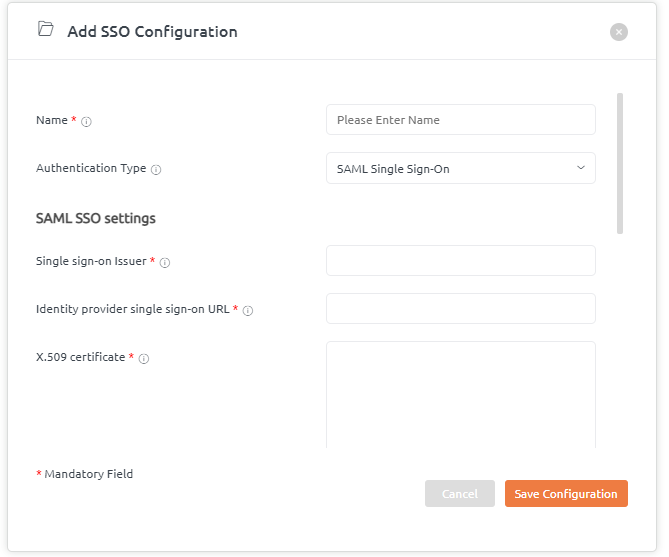
Click on Add SSO Configuration button. A below pop-up window will be displayed. It has the following fields:
- Enter the name for SSO configuration.
- By default SAML Single Sign-on Authentication type is displayed.
- Add details about SAML SSO settings like entity ID, SAML SSO 2.0 URL, X.509 certificate from your provider.
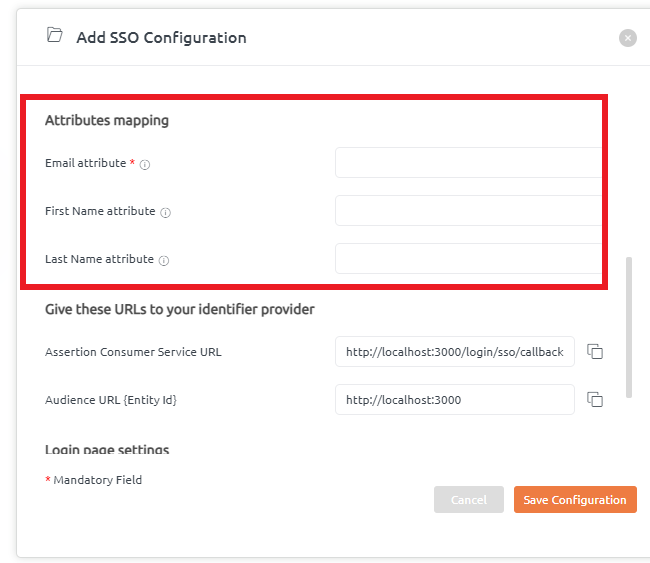
Attribute mapping here states that IDP attributes are mapped with the BrowserStack Code Quality user’s data according to SAML’s response.
Add details for the Attributes mapping like email id, first name, and last name.
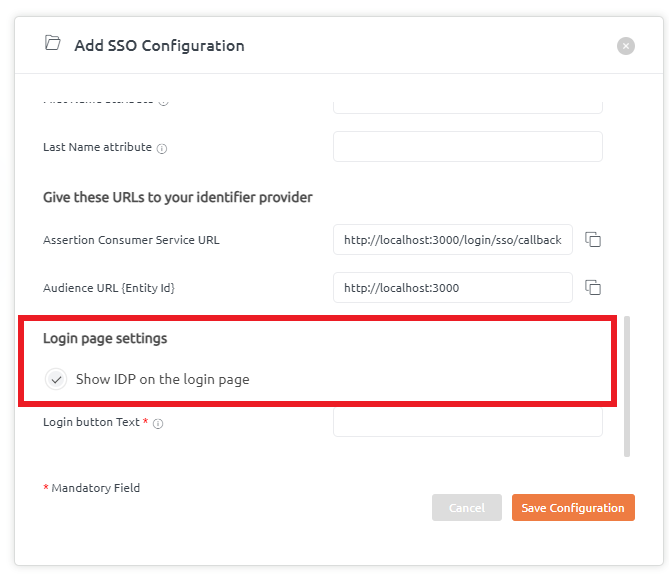
BrowserStack Code Quality provides Assertion Customer Service URL and Audience URL that needs to be given to the identifier provider. So, these URLs will be configured at the provider’s side.
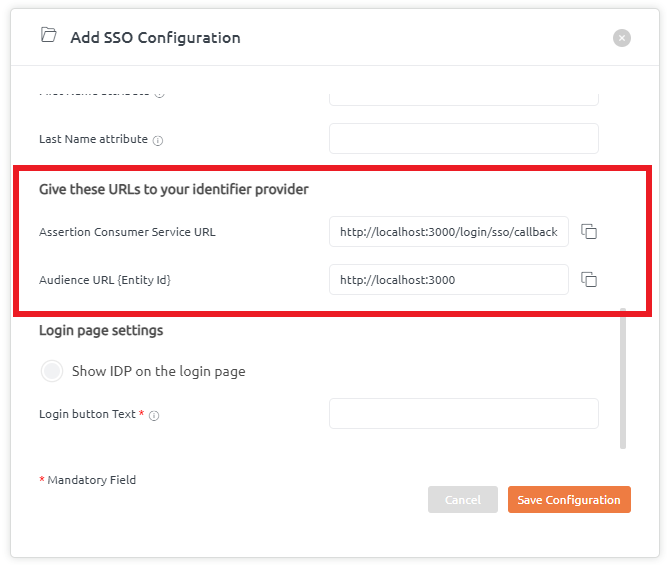
Login Page settings help to showcase the IDP name on the login page.
Users can tick this checkbox to enable the IDP name to be displayed on the login page. By default, this is enabled.
If the tickbox is unchecked, this feature will be disabled.
Moreover, there is a provision to add Login text button details as per your choice.
Once, when all the above details are filled in, click on the “Save Configuration” button.
SSO Configuration details added successfully.
